Subscriber Exclusive
Alpaca Pleated Scarf
Harness the energy in high-twist yarns to create a collapse-fabric scarf.
Harness the energy in high-twist yarns to create a collapse-fabric scarf. <a href="https://spinoffmagazine.com/alpaca-pleated-scarf/">Continue reading.</a>
https://spinoffmagazine.com/cdn-cgi/image/format=auto/https://www.datocms-assets.com/75073/1656679240-energized-singles.jpg?auto=format&w=900
I’ve been spinning for about 20 years, but I still think of myself as a beginner. I like to spin fine high-twist singles, and I love the character they add to my handwoven fabrics, including pleats, bumps, and even tracking. Collapse fabric can be created in a number of ways, but simply adjusting the direction and amount of twist in warp, weft, or both warp and weft can yield an amazing variety of collapse effects. (See Denise’s article, "Twist & Pleat: High-Twist Singles for Easy Woven Texture," in Spin Off Summer 2021 for more about collapse fabrics.)

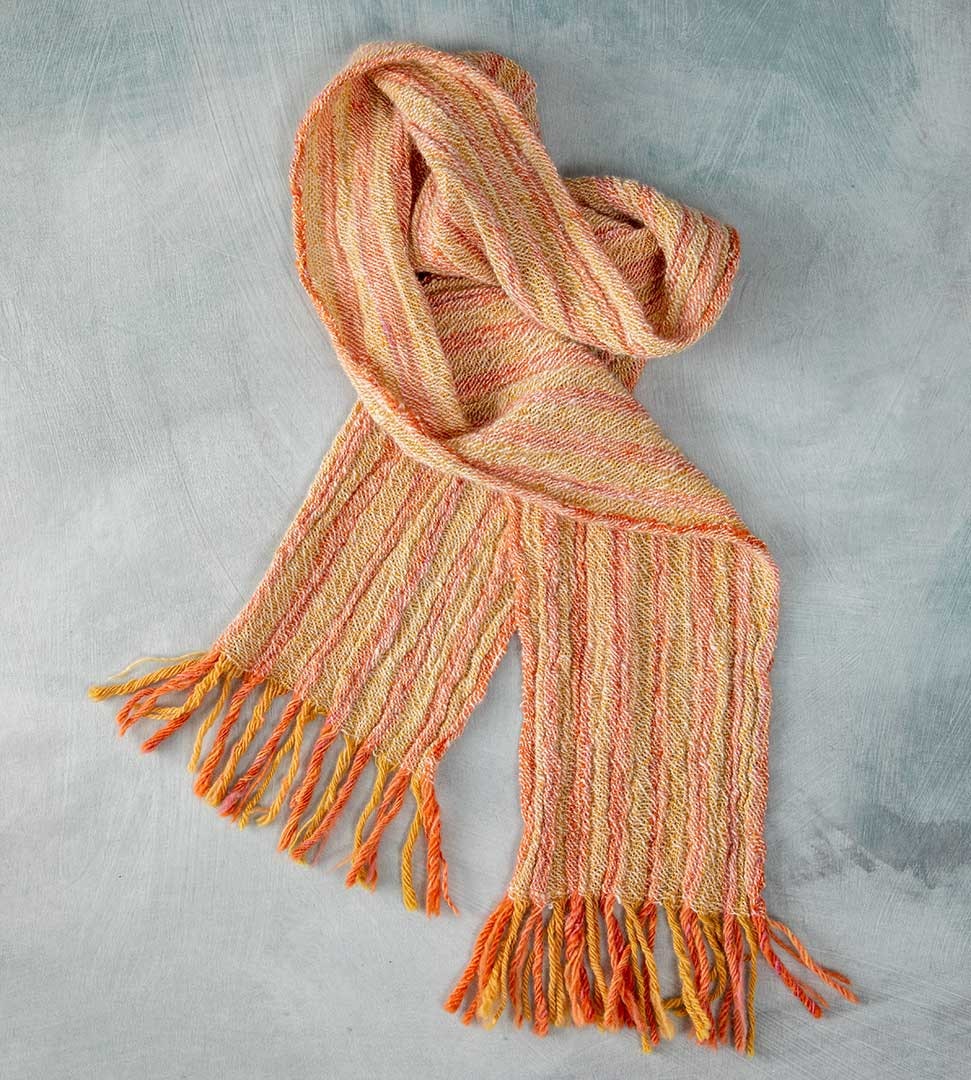
Experiment with weaving energized singles to create a striking textured scarf with plain weave. Photo by Matt Graves
SUBSCRIBER EXCLUSIVE
I’ve been spinning for about 20 years, but I still think of myself as a beginner. I like to spin fine high-twist singles, and I love the character they add to my handwoven fabrics, including pleats, bumps, and even tracking. Collapse fabric can be created in a number of ways, but simply adjusting the direction and amount of twist in warp, weft, or both warp and weft can yield an amazing variety of collapse effects. (See Denise’s article, "Twist & Pleat: High-Twist Singles for Easy Woven Texture," in Spin Off Summer 2021 for more about collapse fabrics.)

Experiment with weaving energized singles to create a striking textured scarf with plain weave. Photo by Matt Graves
[PAYWALL]
Spinning Notes
I used my Lendrum double-treadle wheel and a short-forward draft to create an S-twist singles. How much twist to add? My approach is simple: add
enough twist to the single as it is spun that it self-plies when tension is relaxed (twists back on itself). This is more of a guesstimate approach, and it works well for me. However, you could use a twists-per-inch measurement if you prefer. These fingering-weight yarns were wound straight from the bobbin to the warping mill, with no washing or steaming beforehand. The reason: I wanted to maximize the energized, high-twist effects.
I hand-dyed the roving with madder for the coral color and onion skins for the golden color. I spun laceweight singles, spinning S-twist with the coral fiber and Z-twist with the gold and white fibers.
Project Notes
STRUCTURE
Plain weave.
EQUIPMENT
2-shaft loom, minimum 13" weaving width; 12-dent reed; 1 shuttle.
FIBER
Alpaca roving, 2 oz dyed with madder (coral), 2 oz dyed with onion skins (gold). 2.2 oz Merino/Angora blend roving, white.
YARNS
Singles, 20 wpi, 2,500 ypp, 6–8 tpi, ~30° twist angle.
WARP: S-twist coral, 240 yd; Z-twist gold, 210 yd.
WEFT: Z-twist white, 330 yd.
OTHER SUPPLIES
Optional: Madder and onion skins for dyeing.
WARP LENGTH
150 ends 3 yd long (allows 8" for take-up, 28" for loom waste; loom waste includes fringe).
SETTS
Warp: 12 epi (1/dent in a 12-dent reed).
Weft: 12 ppi.
DIMENSIONS
Width in the reed: 12-6/12".
Woven length: (measured under tension) 72".
Finished size: 6-1/2" x 54" plus 3" fringe.
Figure 1. Warp Color Order

Figure 2. Draft
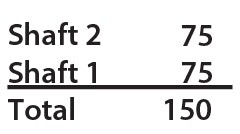
 Heddle Count

1. Wind a warp of 150 ends, 3 yards long, following the warp color order, Figure 1.
2. Beam the warp using your preferred method, maintaining a taut, even tension as you wind on. If the yarns begin to curl up on themselves, gently but firmly draw them out to full tension. Thread the loom for plain weave, Figure 2. Centering for a weaving width of 12-6/12", sley 1 end per dent in a 12-dent reed.
3. Weave a header using waste yarn, then leave 4" unwoven for fringe. Wind a bobbin with white Merino/Angora Z-twist singles. Weave 2 yards in plain weave at 12 picks per inch. Leave 4" unwoven at end of scarf. Weave 1" in waste yarn. Remove the scarf from the loom.
Finishing
Fill a bin or sink with hot tap water. Add half a teaspoon of mild soap. Immerse the scarf and agitate gently for 1 to 2 minutes. Rinse out the soap with water of the same temperature. Remove the scarf from the water and press out the excess water using a towel. Lay flat to dry without disturbing the texture.
When the scarf is completely dry, place a ruler horizontally across the fringe about 3" from the beginning of the weaving and hold it in place. With a rotary cutter, cut across the fringe, using the ruler as a guide.
Denise Bolger Kovnat weaves and teaches from her home in Rochester, New York, focusing on collapse techniques, echo, jin, extended parallel threadings, warp painting, and deflected doubleweave. She blogs about her work at denisekovnat.com.


 Heddle Count
