
In the Winter 2024 issue of Spin Off, Jacqueline Harp draws from her training as a master wool sorter and shares advice for selecting an excellent suri alpaca fleece and preparing it with minicombs . . . or just your bare hands! She also has great tips for blending suri with wool to add a bit of bounce. We hope this inspires your future fiber adventures. —Editors
Suri alpaca fibers are extremely silky and luxurious, and have exquisite drape. Without careful planning, however, yarns and fabrics made from pure suri are at risk of over-draping and losing shape because suri lacks strong memory. If I’m planning to make something that needs a bit of bounce to balance suri’s drape, I might blend suri with wool using minicombs. Wool from sheep breeds such as Merino and Rambouillet have excellent memory and can help bring out the best in suri fibers with just a few flicks of the comb.
My Blend
I chose a hand-dyed, 24-micron Merino top from my spinning stash and fawn suri locks sourced from Jean Van Effen, owner of La Vida Alpaca and Tahoma Vista Fiber Mill, located in Yelm, Washington. This fiber was featured in my Winter 2024 Spin Off article, “Suri Alpaca: Select, Prep, and Spin a Silken Fleece,” which discusses the mysteries of spinning a raw suri alpaca fleece from animal to final fabric. In the article, I show two ways to prepare suri for spinning: using just my hands and using Louët two-pitch minicombs. Now, I’ll blend Merino with the suri top I created using minicombs to make a hand-pulled top.
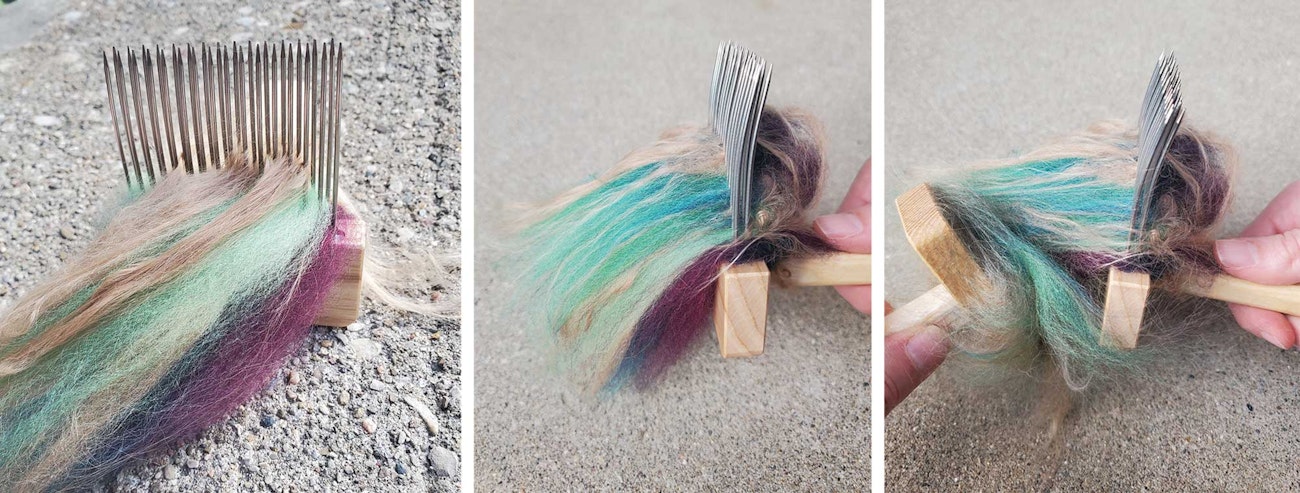 Begin by loading the suri and Merino onto one comb, alternating layers until the comb is half full. Start blending by holding your filled comb tightly with the tines facing up, then begin to pull using the second comb.
Combing Instructions
- Start by loading layers of suri and Merino onto the tines of your comb.
- Continue to fill your comb with fibers, one layer at a time, until about halfway up the tines. The order of how you layer your fibers is not important, but taking the time to layer your fibers (suri, Merino, suri, Merino, etc.) on top of one another makes the blending process faster and reduces the risk of overprocessing your top. Now you are ready to blend!
- To begin blending, hold your filled comb tightly with the tines facing up.
- Take your empty comb, place it in the fibers, and pull through, pulling your comb through the fibers and away from you.
- As you comb, the fibers on the stationary comb will transfer onto the moving comb and will start to combine. If there are any leftover fibers on the stationary comb, remove those, and repeat steps 3 and 4, passing the fibers between the combs until you have reached the desired amount of cohesion.
After about four passes, I am ready to remove my newly blended fibers. I gently pull the fibers off to make top and spin them directly onto my treasured Allen Berry top-whorl spindle. Sometimes suri can be a bit slippery when spun on its own, but this was not a problem for this blend. The Merino helped make the suri more spinnable by lending it a bit of grip!
 Use the empty comb to pull the fibers away from you. Continue combing the fibers from one comb to the other until you reach the desired amount of cohesion. Gently remove the fibers from the comb.
How Does It Spin?
I find hand-pulled top to be one of the easiest fibers to spin on a spindle. I decided to spin a singles yarn to show off the beautiful color combination created by the blend of hand-dyed fibers and fawn suri. I finished my singles in a warm, soapy bath and rinsed in water of the same temperature to avoid felting the yarn. I gave the singles the “whack” treatment against my sink to encourage some blooming and to set the twist. I hung the skein unweighted in a sunny windowsill and waited for it to dry.
I then knitted a small swatch to get a true feel of the blend as a fabric and I was not disappointed. The next-to-skin softness and drape were simply perfect. The stitch definition was good and the swatch itself was very elastic, springing back into shape with ease after being stretched. It is important to note that the Merino top and the suri alpaca had similar softness levels, luster, color theme, and staple lengths—the final swatch was a testament to how nicely these fibers blended together!
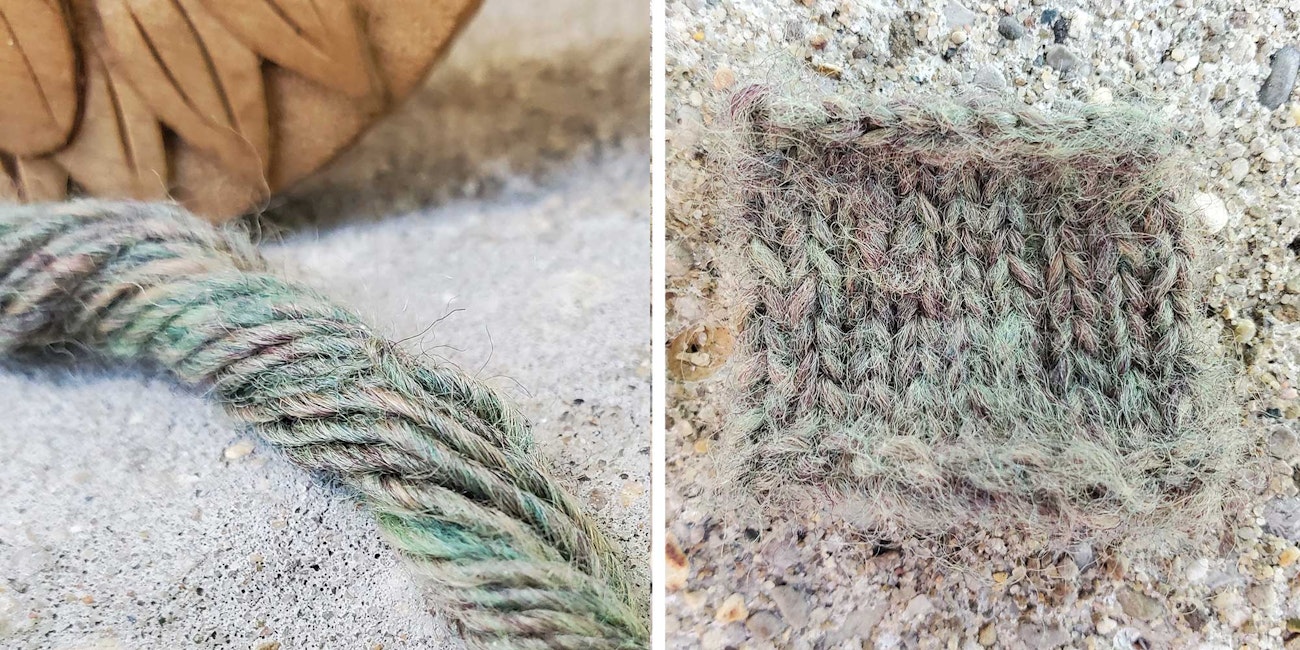 Jacqueline’s yarn and knitted swatch show off the blended colors beautifully.
5 Suri/Wool Blending Tips
Here are some important preparation tips to make sure your suri/wool blend spins beautifully and stays stable in a final fabric.
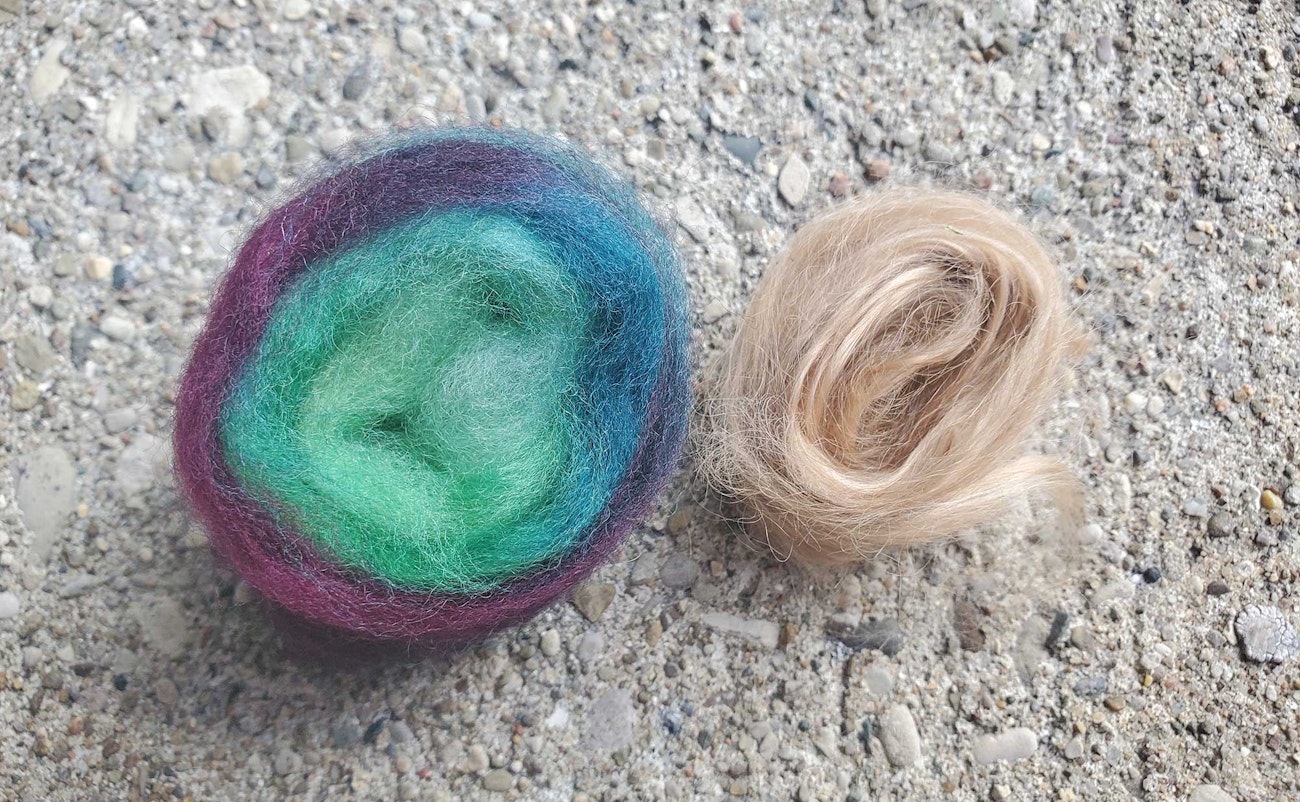 Jacqueline chose to blend a colorful Merino combed top with her fawn-colored suri.
1. Softness
Suri is delightfully soft to the touch. Take advantage of that softness by blending a wool that can complement this characteristic.
Sheep breeds such as Merino, Rambouillet, and Cormo are all lovely candidates due to their very low micron counts.
2. Luster
High-quality suri fibers have a noticeable luster that is similar to silk, so it can add a bit of shine when blended with wools that can be more matte such as Romeldale/CVM or Targhee.
But, if wools with gloss and glamour strike your fancy, Bluefaced Leicester or Teeswater are both excellent choices to maximize luster.
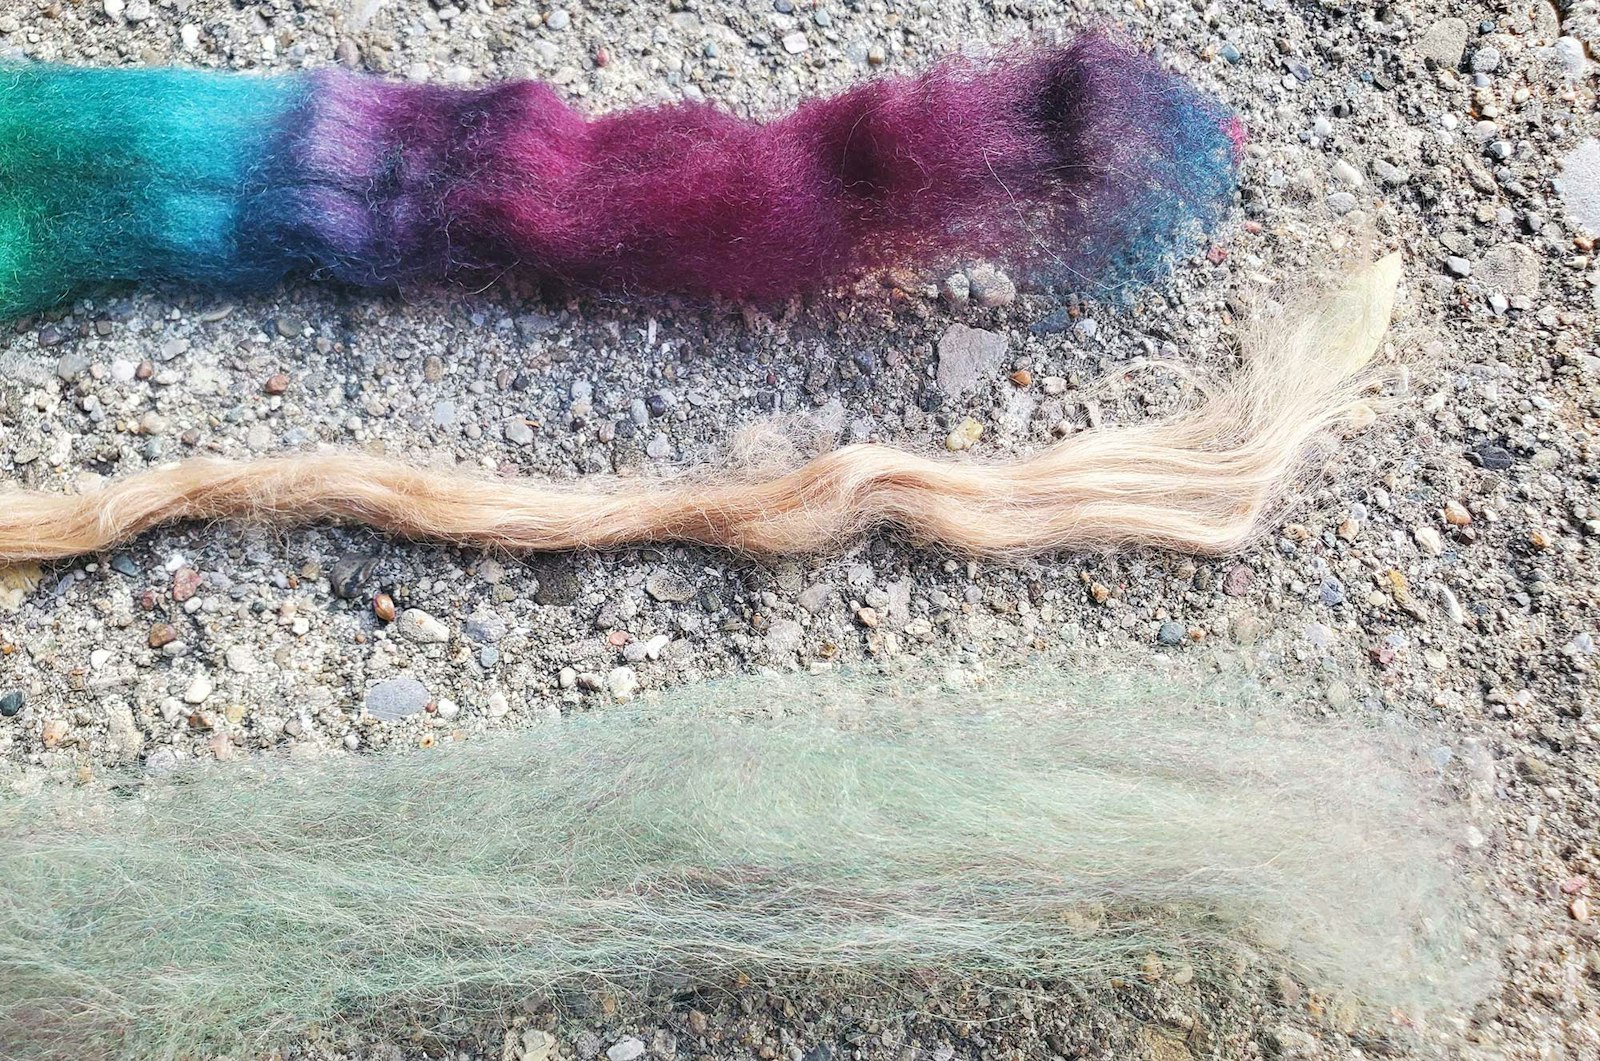
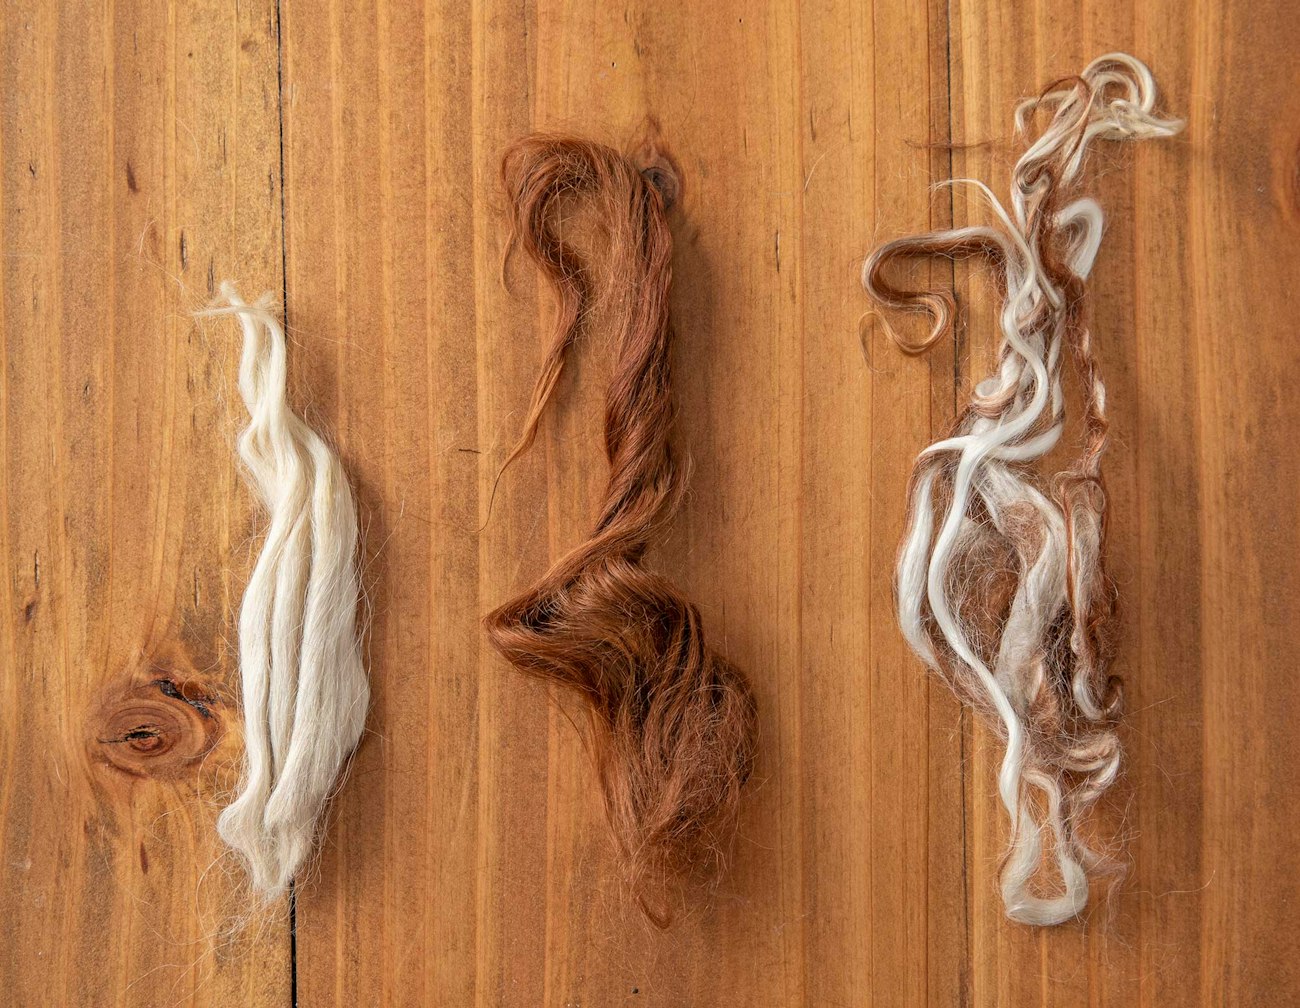 Suri comes in several natural colors, from light to dark, and have a beautiful luster that’s similar to silk. Locks range in staple length and character. Photo by Matt graves
3. Color
Commercial suri is usually bright white, and it can be dyed with natural and non-natural dyes. While suri fleeces come in over 15 natural colors—from light fawn to midnight black—some colors are harder to find. Dyed wool is available to most of us in a wide variety of colors, so it can be an easy way to add color to suri blends.
4. Staple Length
It is much easier to blend fibers of similar staple lengths. It is good to research the fiber staple lengths in advance before acquiring your fibers for blending. Once you have your fibers in hand, it never hurts to double check the staple length. One of the easiest, ruler-free methods for determining the staple length is to take a small sample of each, lay them side-by-side, and simply compare the lengths.
5. Ratio of Suri to Wool?
There is an unwritten rule about using wool to blend with suri, and it goes something like this: You can always add more wool, but you can’t subtract it. If you have a limited amount of suri, sample first and add a small amount of wool at a time. After much experimentation, I find that I prefer 80/20 suri/wool blends for most of my spinning projects. I find that this amount uses just enough wool to provide memory without overwhelming the suri in the final project.
Get Blending!
Suri and wool make for a great fiber blend and this blending project is meant to inspire you to experiment with your own fiber combinations. When in doubt, blend a small sample and spin it to get a feel for it. The wool complements and enhances what is already an extravagant fiber, so you can’t go wrong following your creative intuition now that you have some pro tips for blending suri with wool.
Jacqueline Harp is a freelance writer and multimedia fiber artist who spins, felts, weaves, crochets, and knits in every spare moment possible. She is also a former certified Master Sorter of Wool Fibers through the State University of New York (Cobleskill) Sorter-Grader-Classer (SGC) Program. Her Instagram handle is @foreverfiberarts.