
You know you have a fiber stash—the roving, batts, or the washed fleece you have not started spinning. Well it's time to build some colorful yarn with it. A lot of carded multi-colored batts end up looking mud-colored. This sandwich method retains the original colors of the fiber.
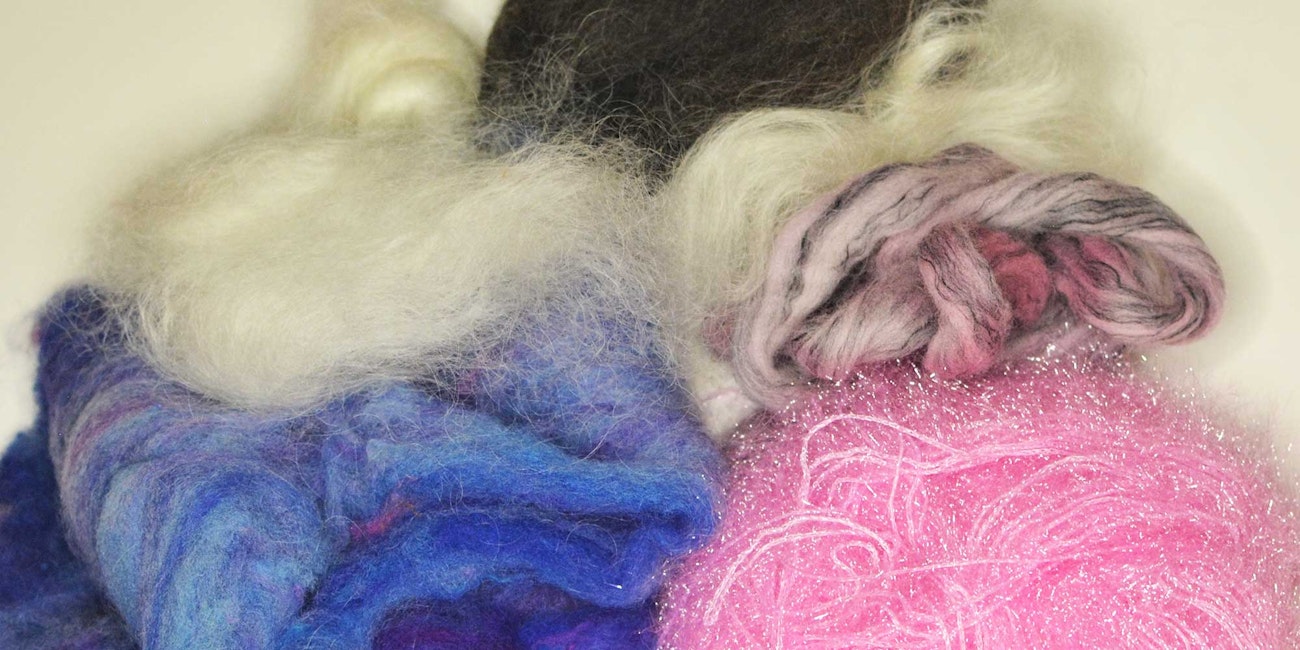
Start by picking two overall compatible colors of fiber and a neutral-colored roving/fiber, be it black, white, gray, or navy. From your stash, pick some random elements for added pizzazz.
Look at your chosen fibers and decide what you would like to use this yarn for. Is it going to be yarn for socks, for a blanket, or for placing in a bowl as a decoration? Do you want art yarn? Your intended use will determine how it will be built and spun. Will you spin it long draw, thick and thin, singles, or plied? If you have a lot of very short and very long fibers together, it will be more difficult to spin.
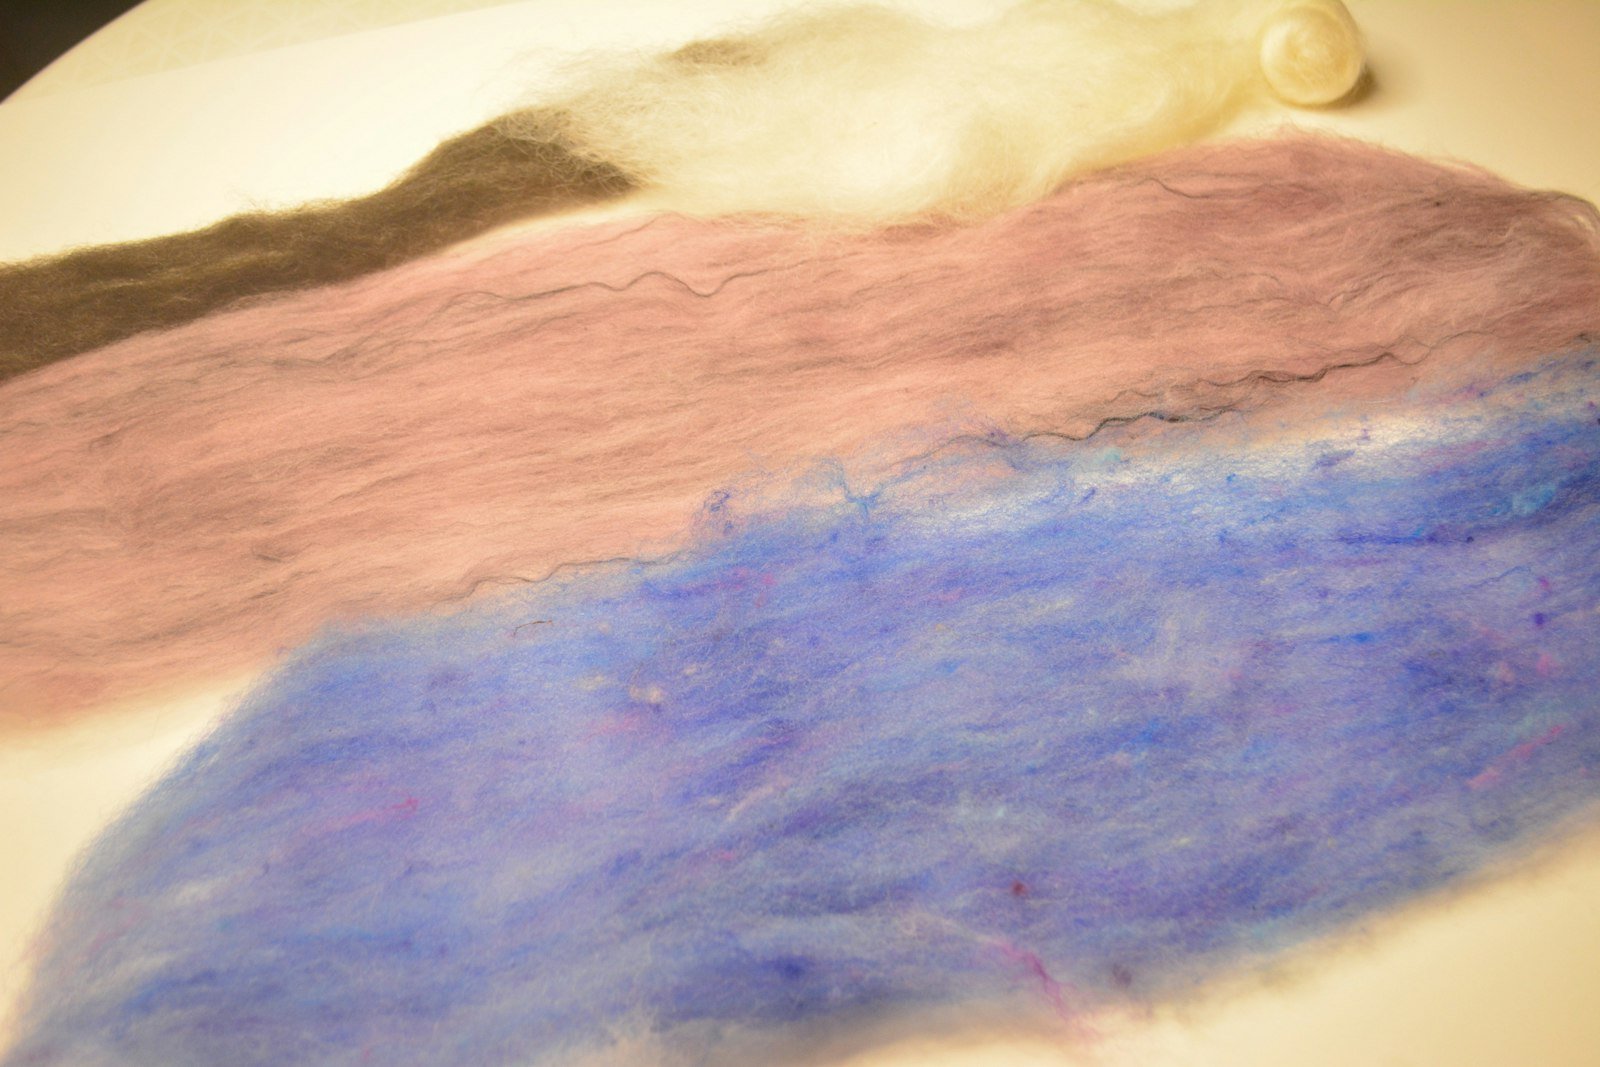
The author's stash of fibers she's ready to start with.
The Process
Card all your fibers, individually, so they are spin ready, but do not card them together. Do not use more than half an ounce of fiber for each of your layers because they will get too thick and be more difficult to handle.
Determine which two batts/layers will be your upper and lower sandwich pieces. Take each one and, gently, on a slippery surface, push the layer out sideways, thinning it, so each has a width of about 12 inches or more.
Take what is your lower sandwich layer and add your “spice” filling on top of it. These can be odds and ends of various colors, fluffy stuff, glitz—anything you want to incorporate into your creation. Add about a half-inch layer or more. Gently press it down.
Place your upper sandwich layer on top of the filling and gently press down on it. You should be able to see distinct upper and lower layers with various materials in the middle.
Starting on the long edge, roll the bundle jelly-roll style, not too tight, but tight enough so it holds together.
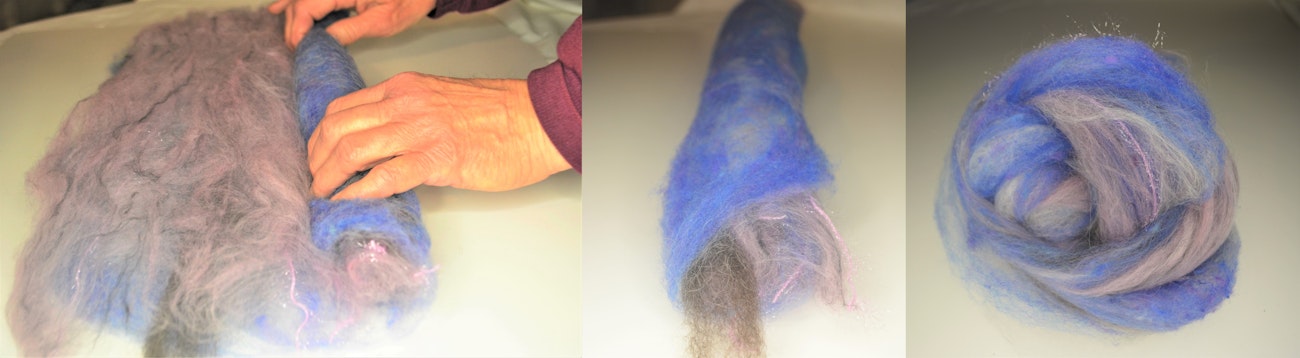
Rolling sandwich jelly-roll style (left), rolled sandwich before thinning roll (center), and ball of thinned roll ready for spinning (right).
Now for the hard part. Using both hands, gently push and pull sections of the roll to make it longer and thinner. Do this on a slippery surface like a bare table. When the roll is first made, it is too wide to spin. This process also makes your various elements blend together. It is easier to thin one half before starting to thin the second half of the roll.
As you narrow the roll, it gets longer and will need to be coiled to keep it on your table/surface. The jelly-roll that started out being 18 inches long will now be about nine feet long. Once it is narrow enough for you to spin, wind a loose ball of it and place it in a bowl for support while you are spinning it.
SPIN. Have fun. You have now made a dent in your fiber stash. However, you have now added to your yarn stash!
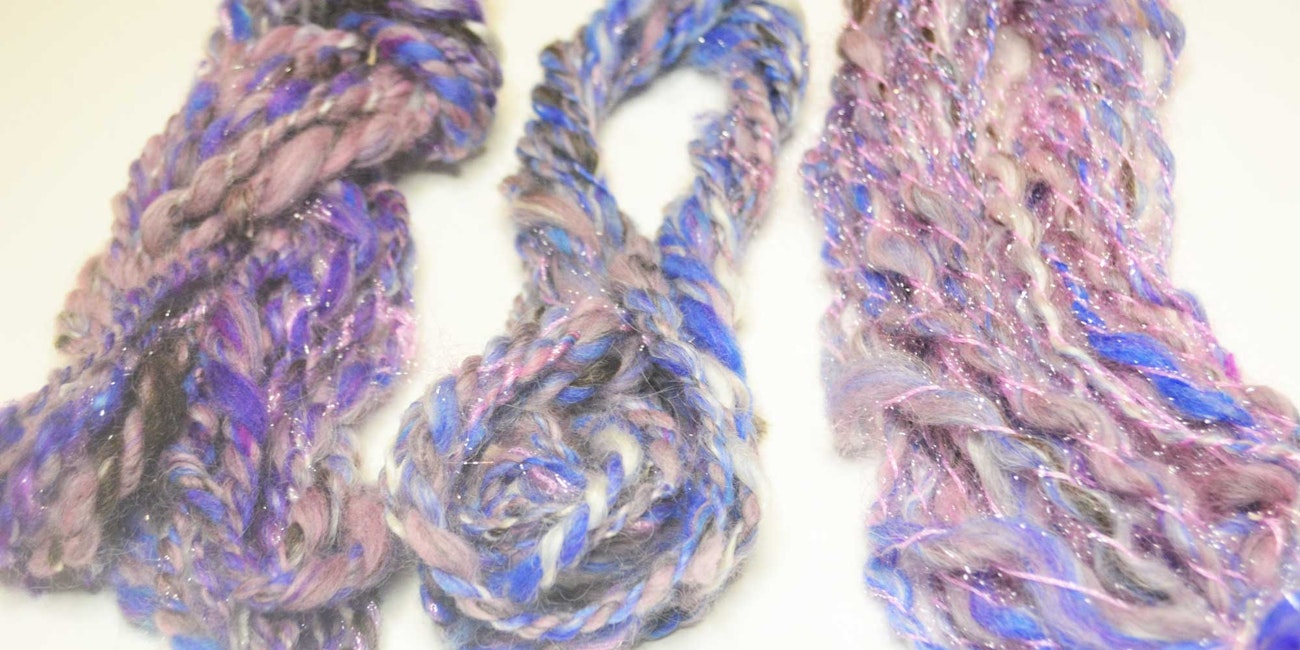
Plied yarn with more purple in the first layer (left), yarn plied with itself (center), singles spiral plied with glizzy nylon commercial yarn (right).


Ilze Tomsevics is a Pacific Northwest fiber artist. She is determined to learn to spin each of the 80-plus yarn designs in Sarah Anderson’s Spinner’s Book of Yarn Designs. She can be found covered in color, dyeing yarn on her back deck during the summer.