Subscriber Exclusive
Can I Spin an 8-Ply Yarn Without Cabling?
Seven or even eight plies creates magical depth in handspun, with help from the "laziest kate."
Seven or even eight plies creates magical depth in handspun, with help from the "laziest kate." <a href="https://spinoffmagazine.com/color-family-study-7-and-8-ply-yarn/">Continue reading.</a>
https://spinoffmagazine.com/cdn-cgi/image/format=auto/https://www.datocms-assets.com/75073/1738604924-pong-8-ply-yarn-header.jpg?auto=format&w=900
One of the things I love about handspun yarn is when it’s obvious that it was not made by a machine. This doesn’t always mean thick-and-thin or art yarn though. There are just some color combinations you can’t get in a store. After creating a six-ply rainbow yarn where each strand was a different color, I jumped into a whole world of color combinations.
I came up with the idea to create yarn with seven to eight plies, where each ply is a different shade of the same color. Paradise Fibers was my inspiration—they have 100 colors of solid-dyed Merino combed top, 23 microns, and a staple length of about 3½". I made a spreadsheet of all of their colors and split them into groups of different color families, with seven to eight shades per group.
 Kat weighs out each bundle of combed top before spinning the singles.
I measured out 15 grams of each color and spun each single Z-twist on the fastest ratio on my SpinOlution Worker Bee, and later on a SpinOlution Monarch. I mostly spun long draw when I could use a faster ratio, and when using a slower ratio, I stuck with a short forward draw. I spun a couple of my singles on drop spindles while traveling using a short forward draft.
I aimed for 30 wpi and about 30 degrees of twist. Especially when working with so many plies, under-twisted singles is problematic; having a single fall apart is very hard to deal with when plying. Over-twisted yarn is even worse. Pigtails need to be easy to pull out, because with so many singles, tensioning while plying is a challenge.
Plying with "The Laziest" Kate
Before I built my laziest kate, I used to wind my singles into a plying ball, smoothing out any pigtails as I went. This was a fine method, but much slower. You also need to figure out a way to keep tension on each of the singles as you’re winding onto the plying ball. If you go this route, be sure to keep tension on all of the strands as you release them from the ball when plying.
Inertia and momentum are important to consider when getting ready to ply. If your bobbin is heavy, it will take more force to pull the singles off, and it will rotate longer before stopping due to the greater momentum. If the bobbin spins much after you’ve pulled off what you’re ready to ply, you get instant pigtails everywhere.
I found I had the most control when plying from singles wound onto cardboard tubes or lightweight, 3D-printed 4-oz bobbins. Toilet-paper rolls work great for this because you can cut a slit three-quarters of the way along one side if needed to fit it onto a ball winder (and trim any excess so it doesn’t stick up). This makes a very lightweight bobbin with almost no inertia to overcome. And who has nine bobbins anyway?
Get a closer look! Click on any image below to view it in full-screen mode.
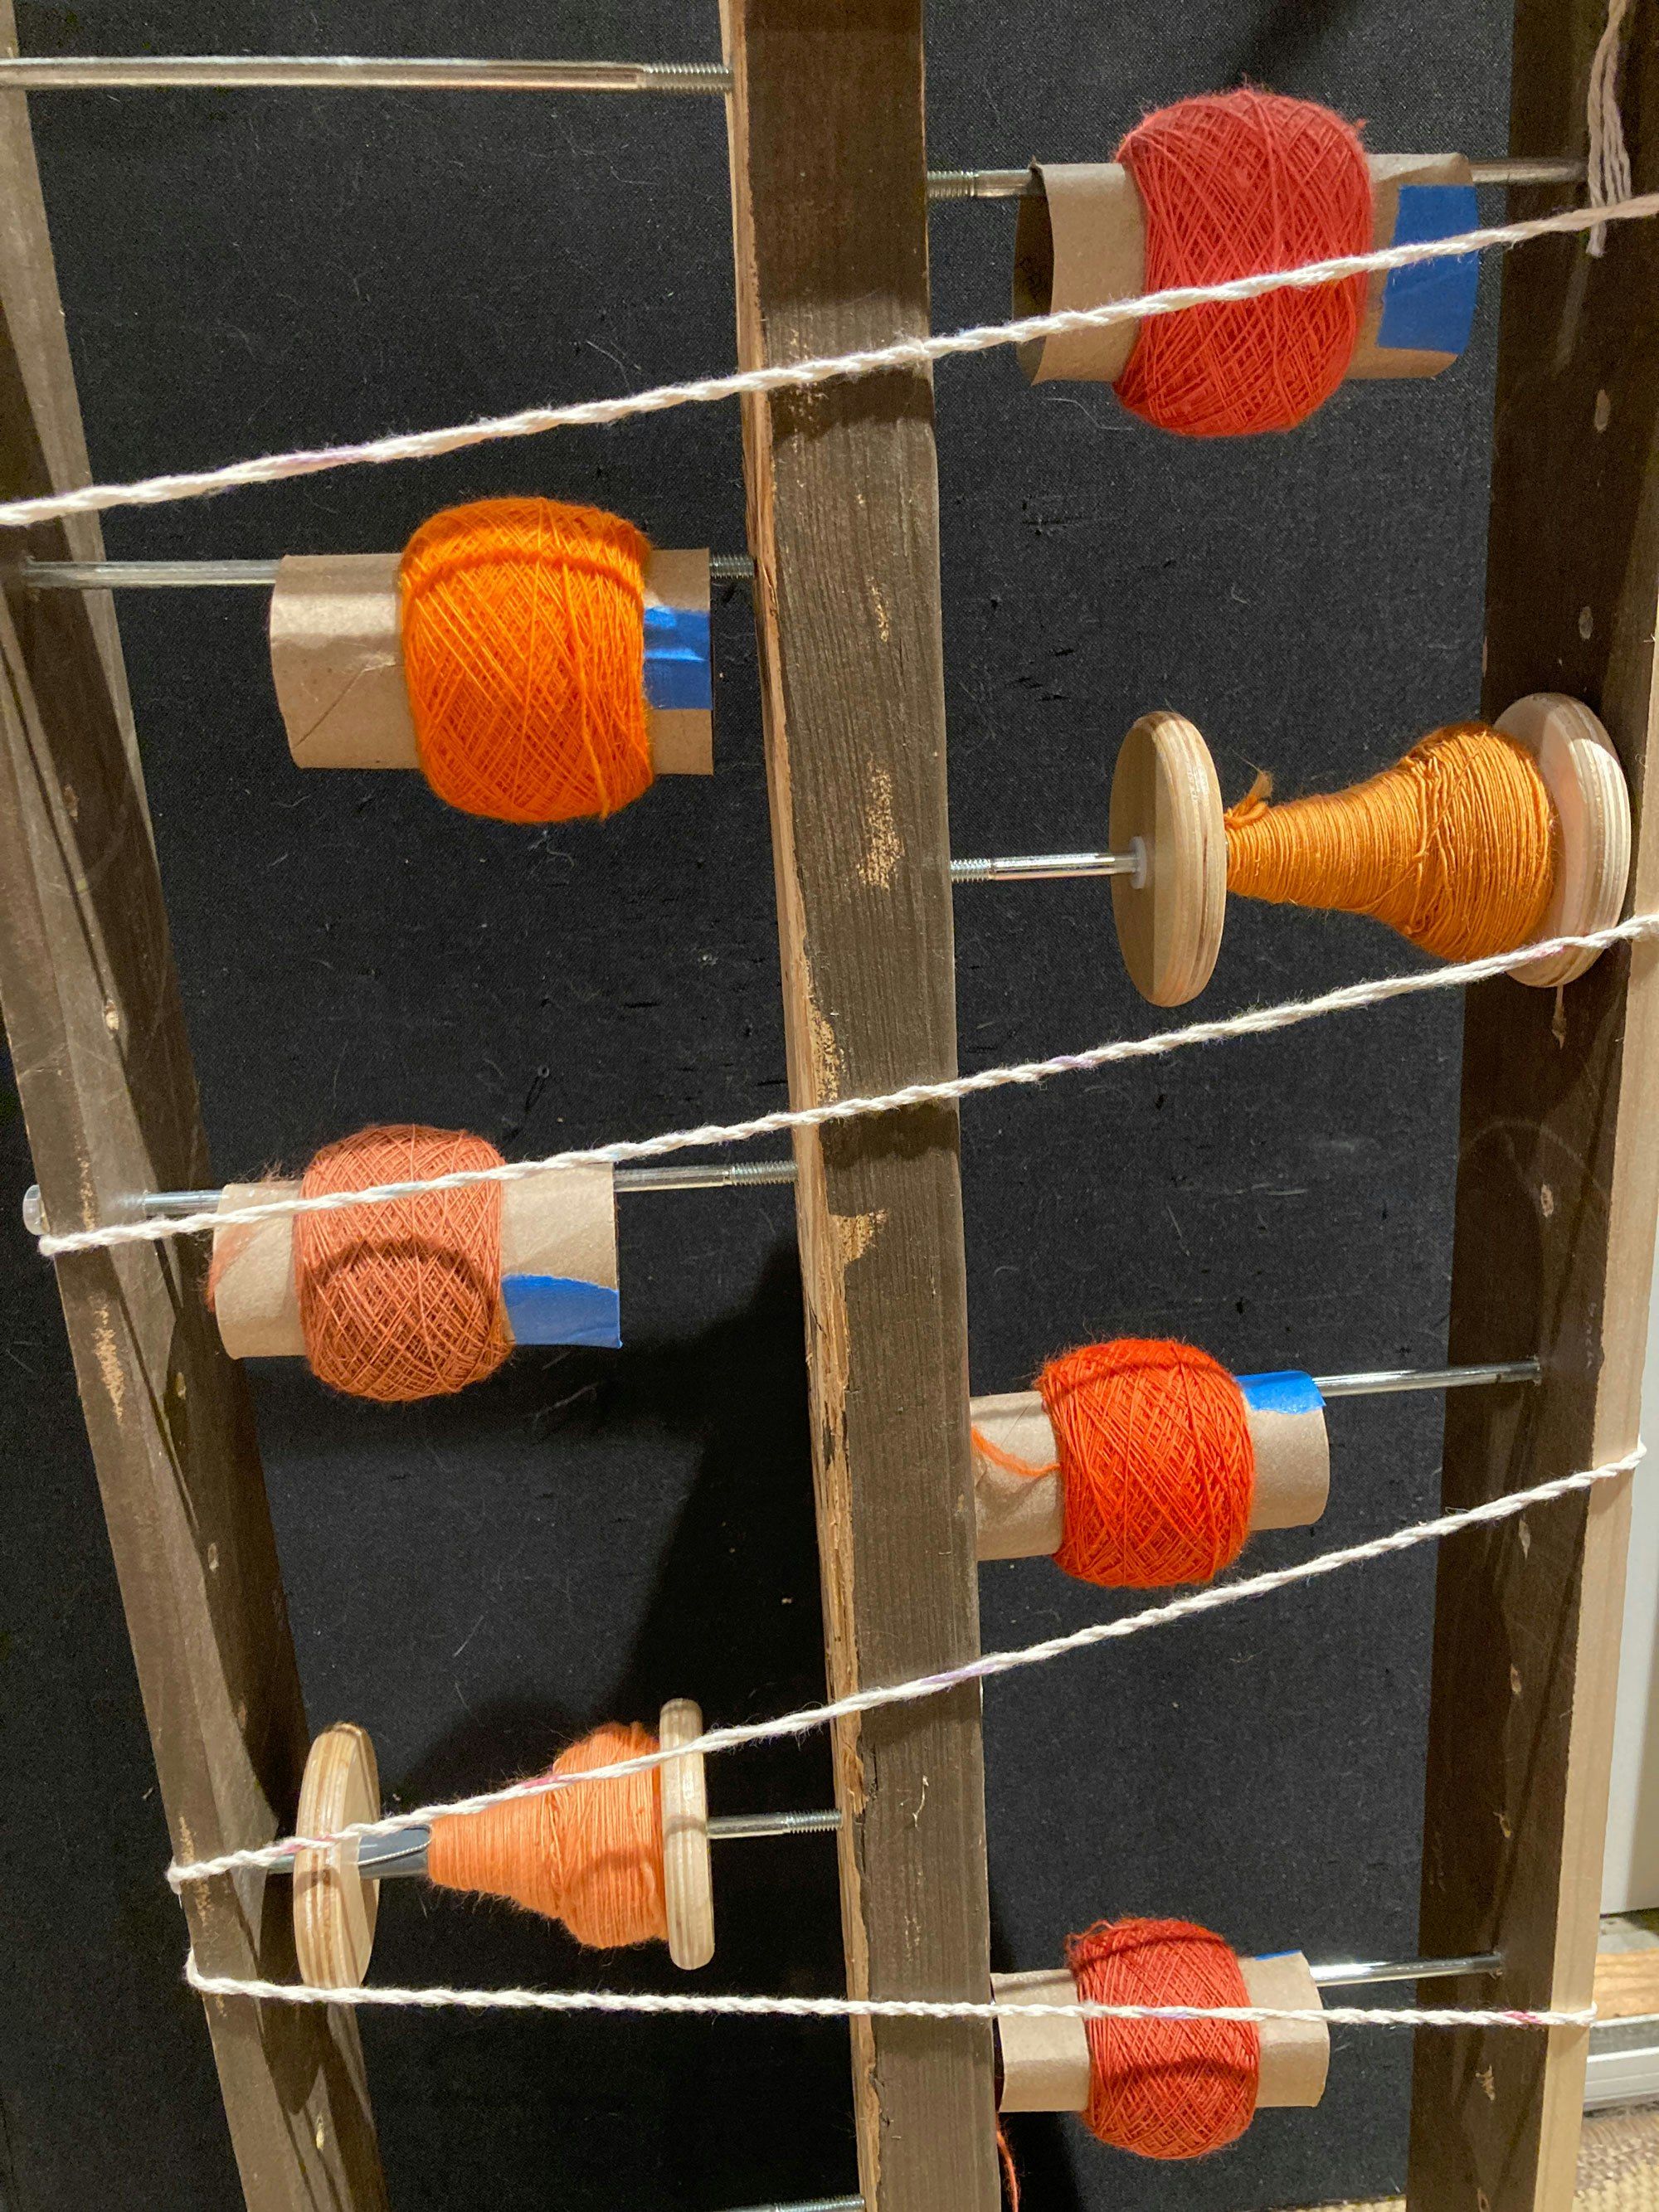
To ply the yarn, I made a lazy kate, with two columns and plenty of room to space out my tubes and bobbins. To make it even lazier and help manage all those plies, I overspun a cotton yarn (Sugar ’n Cream worsted) and cable plied it back on itself. I strung this cabled yarn in front of each bobbin. I threaded each singles through the plies of the cotton yarn, which allowed the cotton yarn to act as an extra set of fingers, keeping tension on the singles until plied.
SUBSCRIBER EXCLUSIVE
One of the things I love about handspun yarn is when it’s obvious that it was not made by a machine. This doesn’t always mean thick-and-thin or art yarn though. There are just some color combinations you can’t get in a store. After creating a six-ply rainbow yarn where each strand was a different color, I jumped into a whole world of color combinations.
I came up with the idea to create yarn with seven to eight plies, where each ply is a different shade of the same color. Paradise Fibers was my inspiration—they have 100 colors of solid-dyed Merino combed top, 23 microns, and a staple length of about 3½". I made a spreadsheet of all of their colors and split them into groups of different color families, with seven to eight shades per group.
Kat weighs out each bundle of combed top before spinning the singles.
I measured out 15 grams of each color and spun each single Z-twist on the fastest ratio on my SpinOlution Worker Bee, and later on a SpinOlution Monarch. I mostly spun long draw when I could use a faster ratio, and when using a slower ratio, I stuck with a short forward draw. I spun a couple of my singles on drop spindles while traveling using a short forward draft.
I aimed for 30 wpi and about 30 degrees of twist. Especially when working with so many plies, under-twisted singles is problematic; having a single fall apart is very hard to deal with when plying. Over-twisted yarn is even worse. Pigtails need to be easy to pull out, because with so many singles, tensioning while plying is a challenge.
Plying with "The Laziest" Kate
Before I built my laziest kate, I used to wind my singles into a plying ball, smoothing out any pigtails as I went. This was a fine method, but much slower. You also need to figure out a way to keep tension on each of the singles as you’re winding onto the plying ball. If you go this route, be sure to keep tension on all of the strands as you release them from the ball when plying.
Inertia and momentum are important to consider when getting ready to ply. If your bobbin is heavy, it will take more force to pull the singles off, and it will rotate longer before stopping due to the greater momentum. If the bobbin spins much after you’ve pulled off what you’re ready to ply, you get instant pigtails everywhere.
I found I had the most control when plying from singles wound onto cardboard tubes or lightweight, 3D-printed 4-oz bobbins. Toilet-paper rolls work great for this because you can cut a slit three-quarters of the way along one side if needed to fit it onto a ball winder (and trim any excess so it doesn’t stick up). This makes a very lightweight bobbin with almost no inertia to overcome. And who has nine bobbins anyway?
Get a closer look! Click on any image below to view it in full-screen mode.
To ply the yarn, I made a lazy kate, with two columns and plenty of room to space out my tubes and bobbins. To make it even lazier and help manage all those plies, I overspun a cotton yarn (Sugar ’n Cream worsted) and cable plied it back on itself. I strung this cabled yarn in front of each bobbin. I threaded each singles through the plies of the cotton yarn, which allowed the cotton yarn to act as an extra set of fingers, keeping tension on the singles until plied.[PAYWALL]
The only potential problem here is that if you’ve rewound your singles to a new tube or bobbin, rough joins can catch on the cotton. Smooth down your joins well as you create them in the singles or check the directions of the joins on your singles bobbins.
If you have a tensioned lazy kate, that can be used instead of this cotton set-up, but be sure to adjust the tension before starting to ply. In addition, you do not want the singles to touch and start plying before they reach your hands.
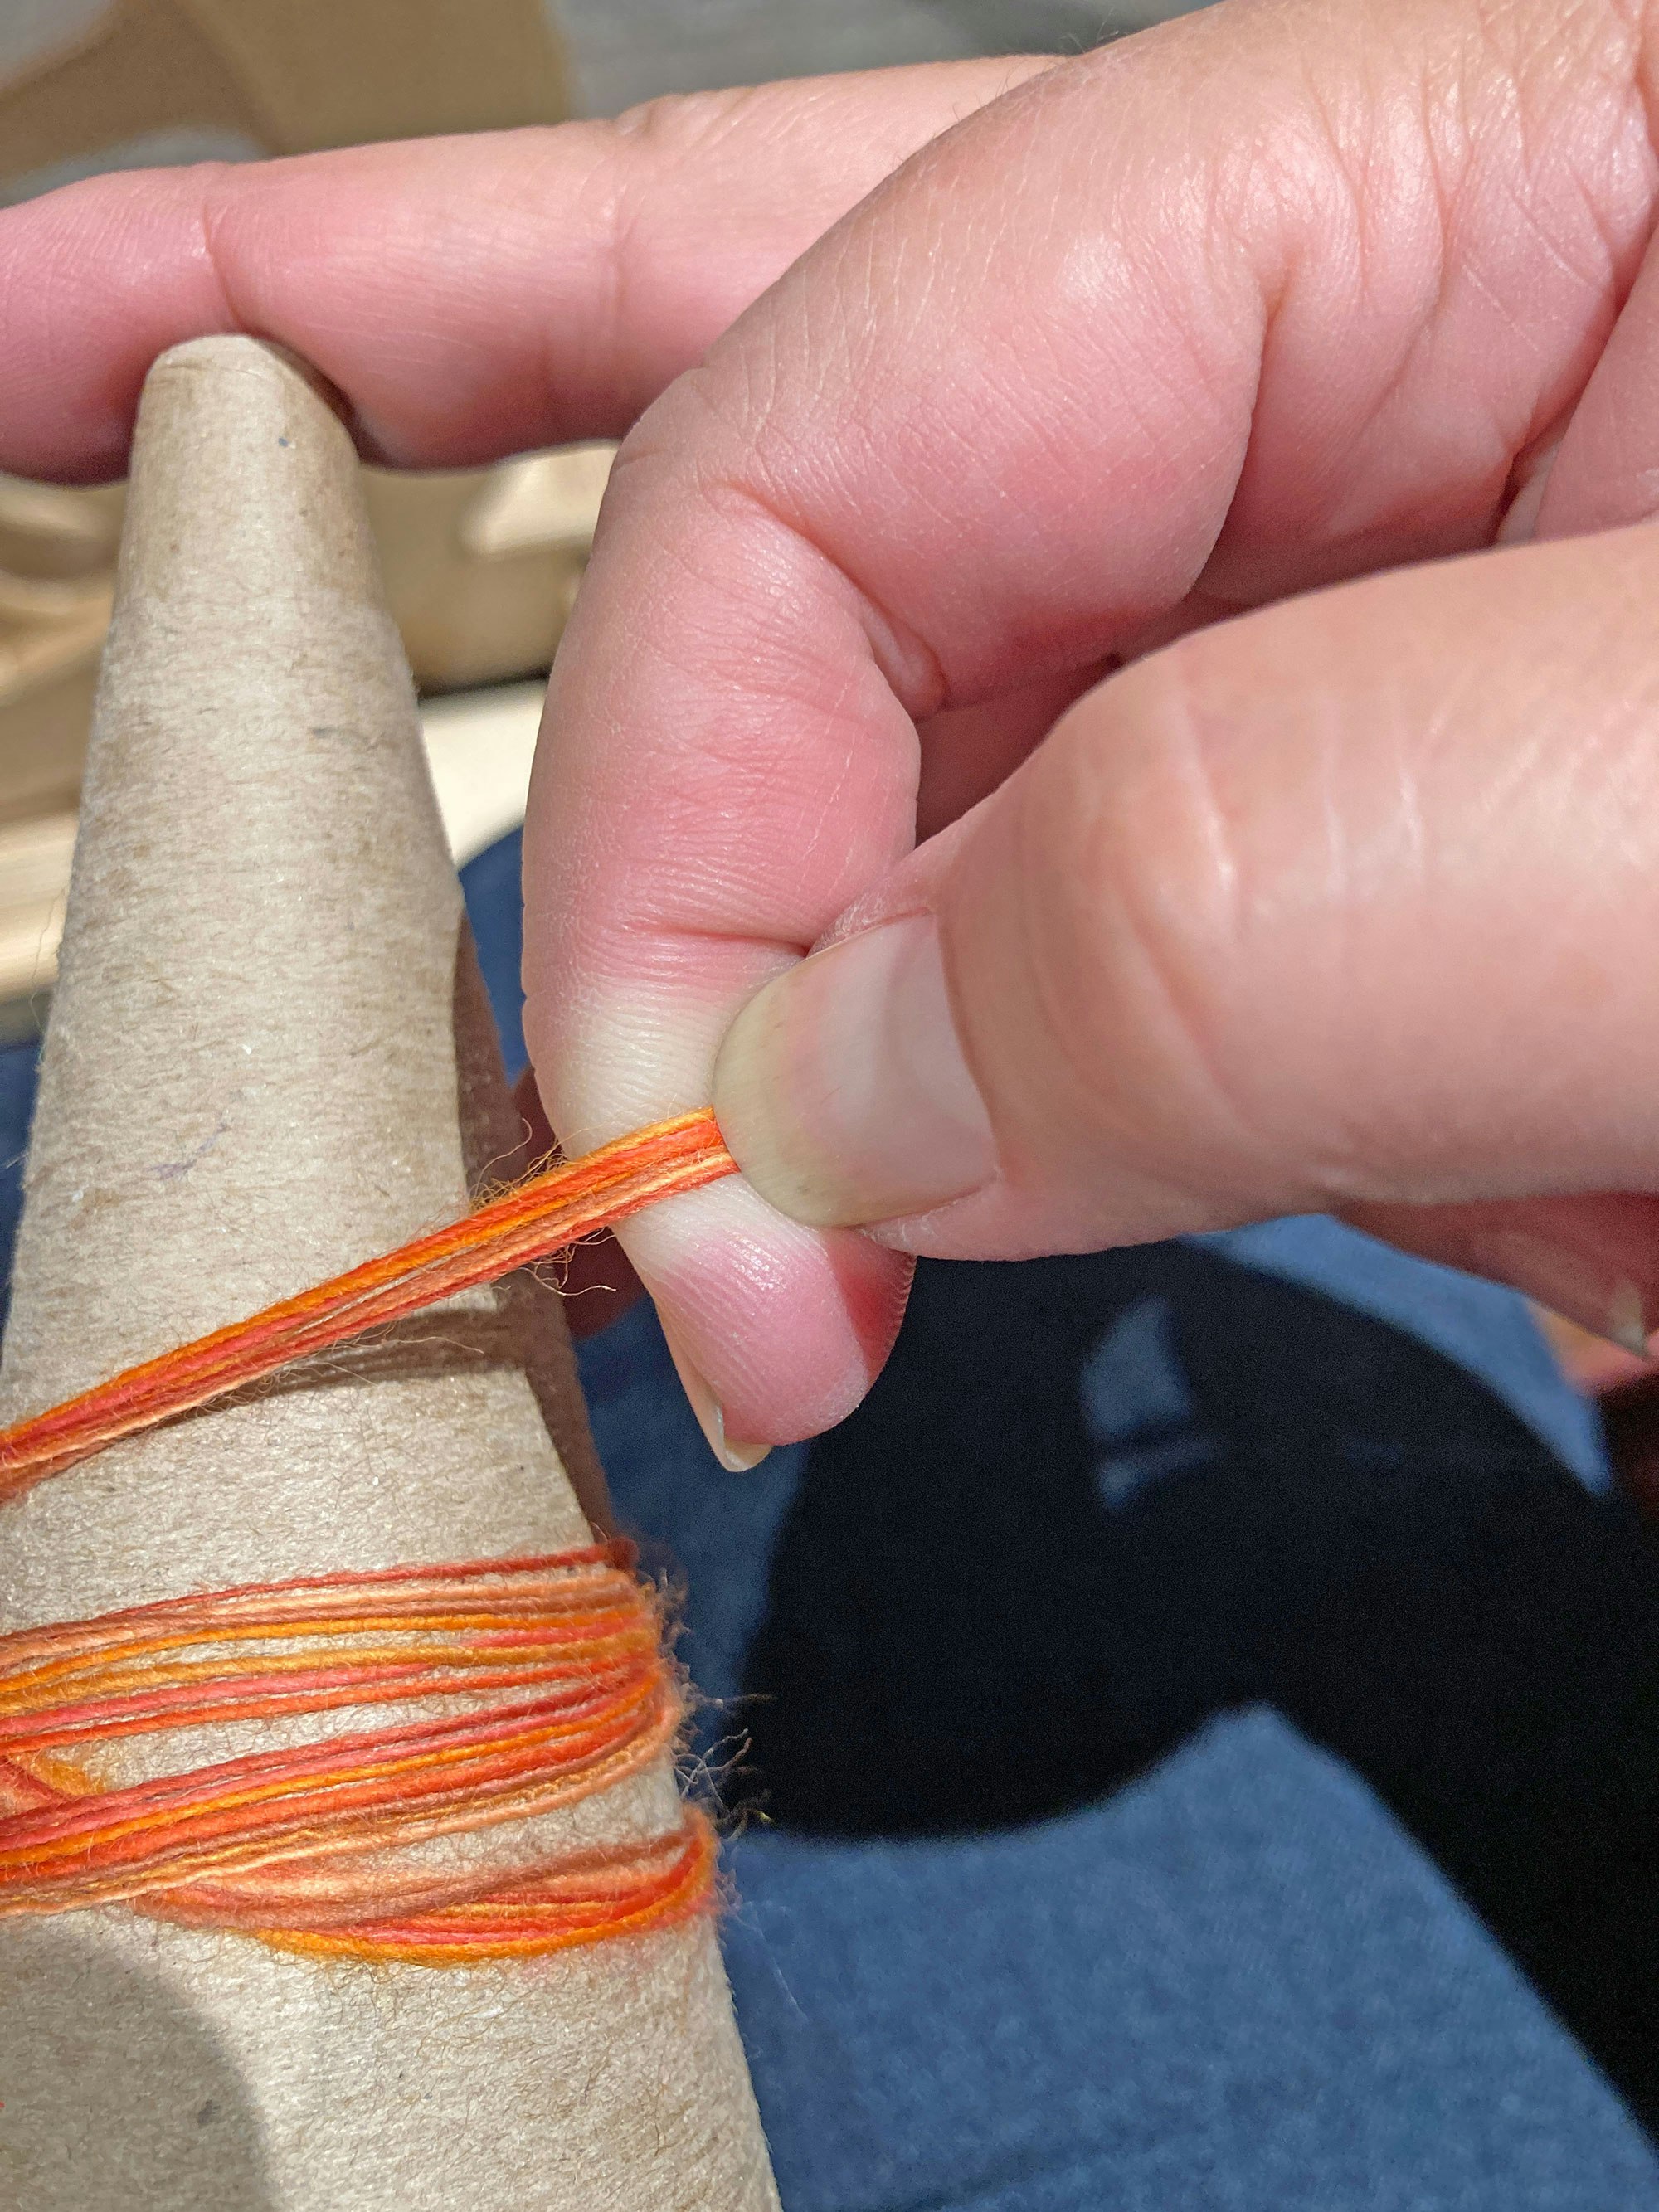
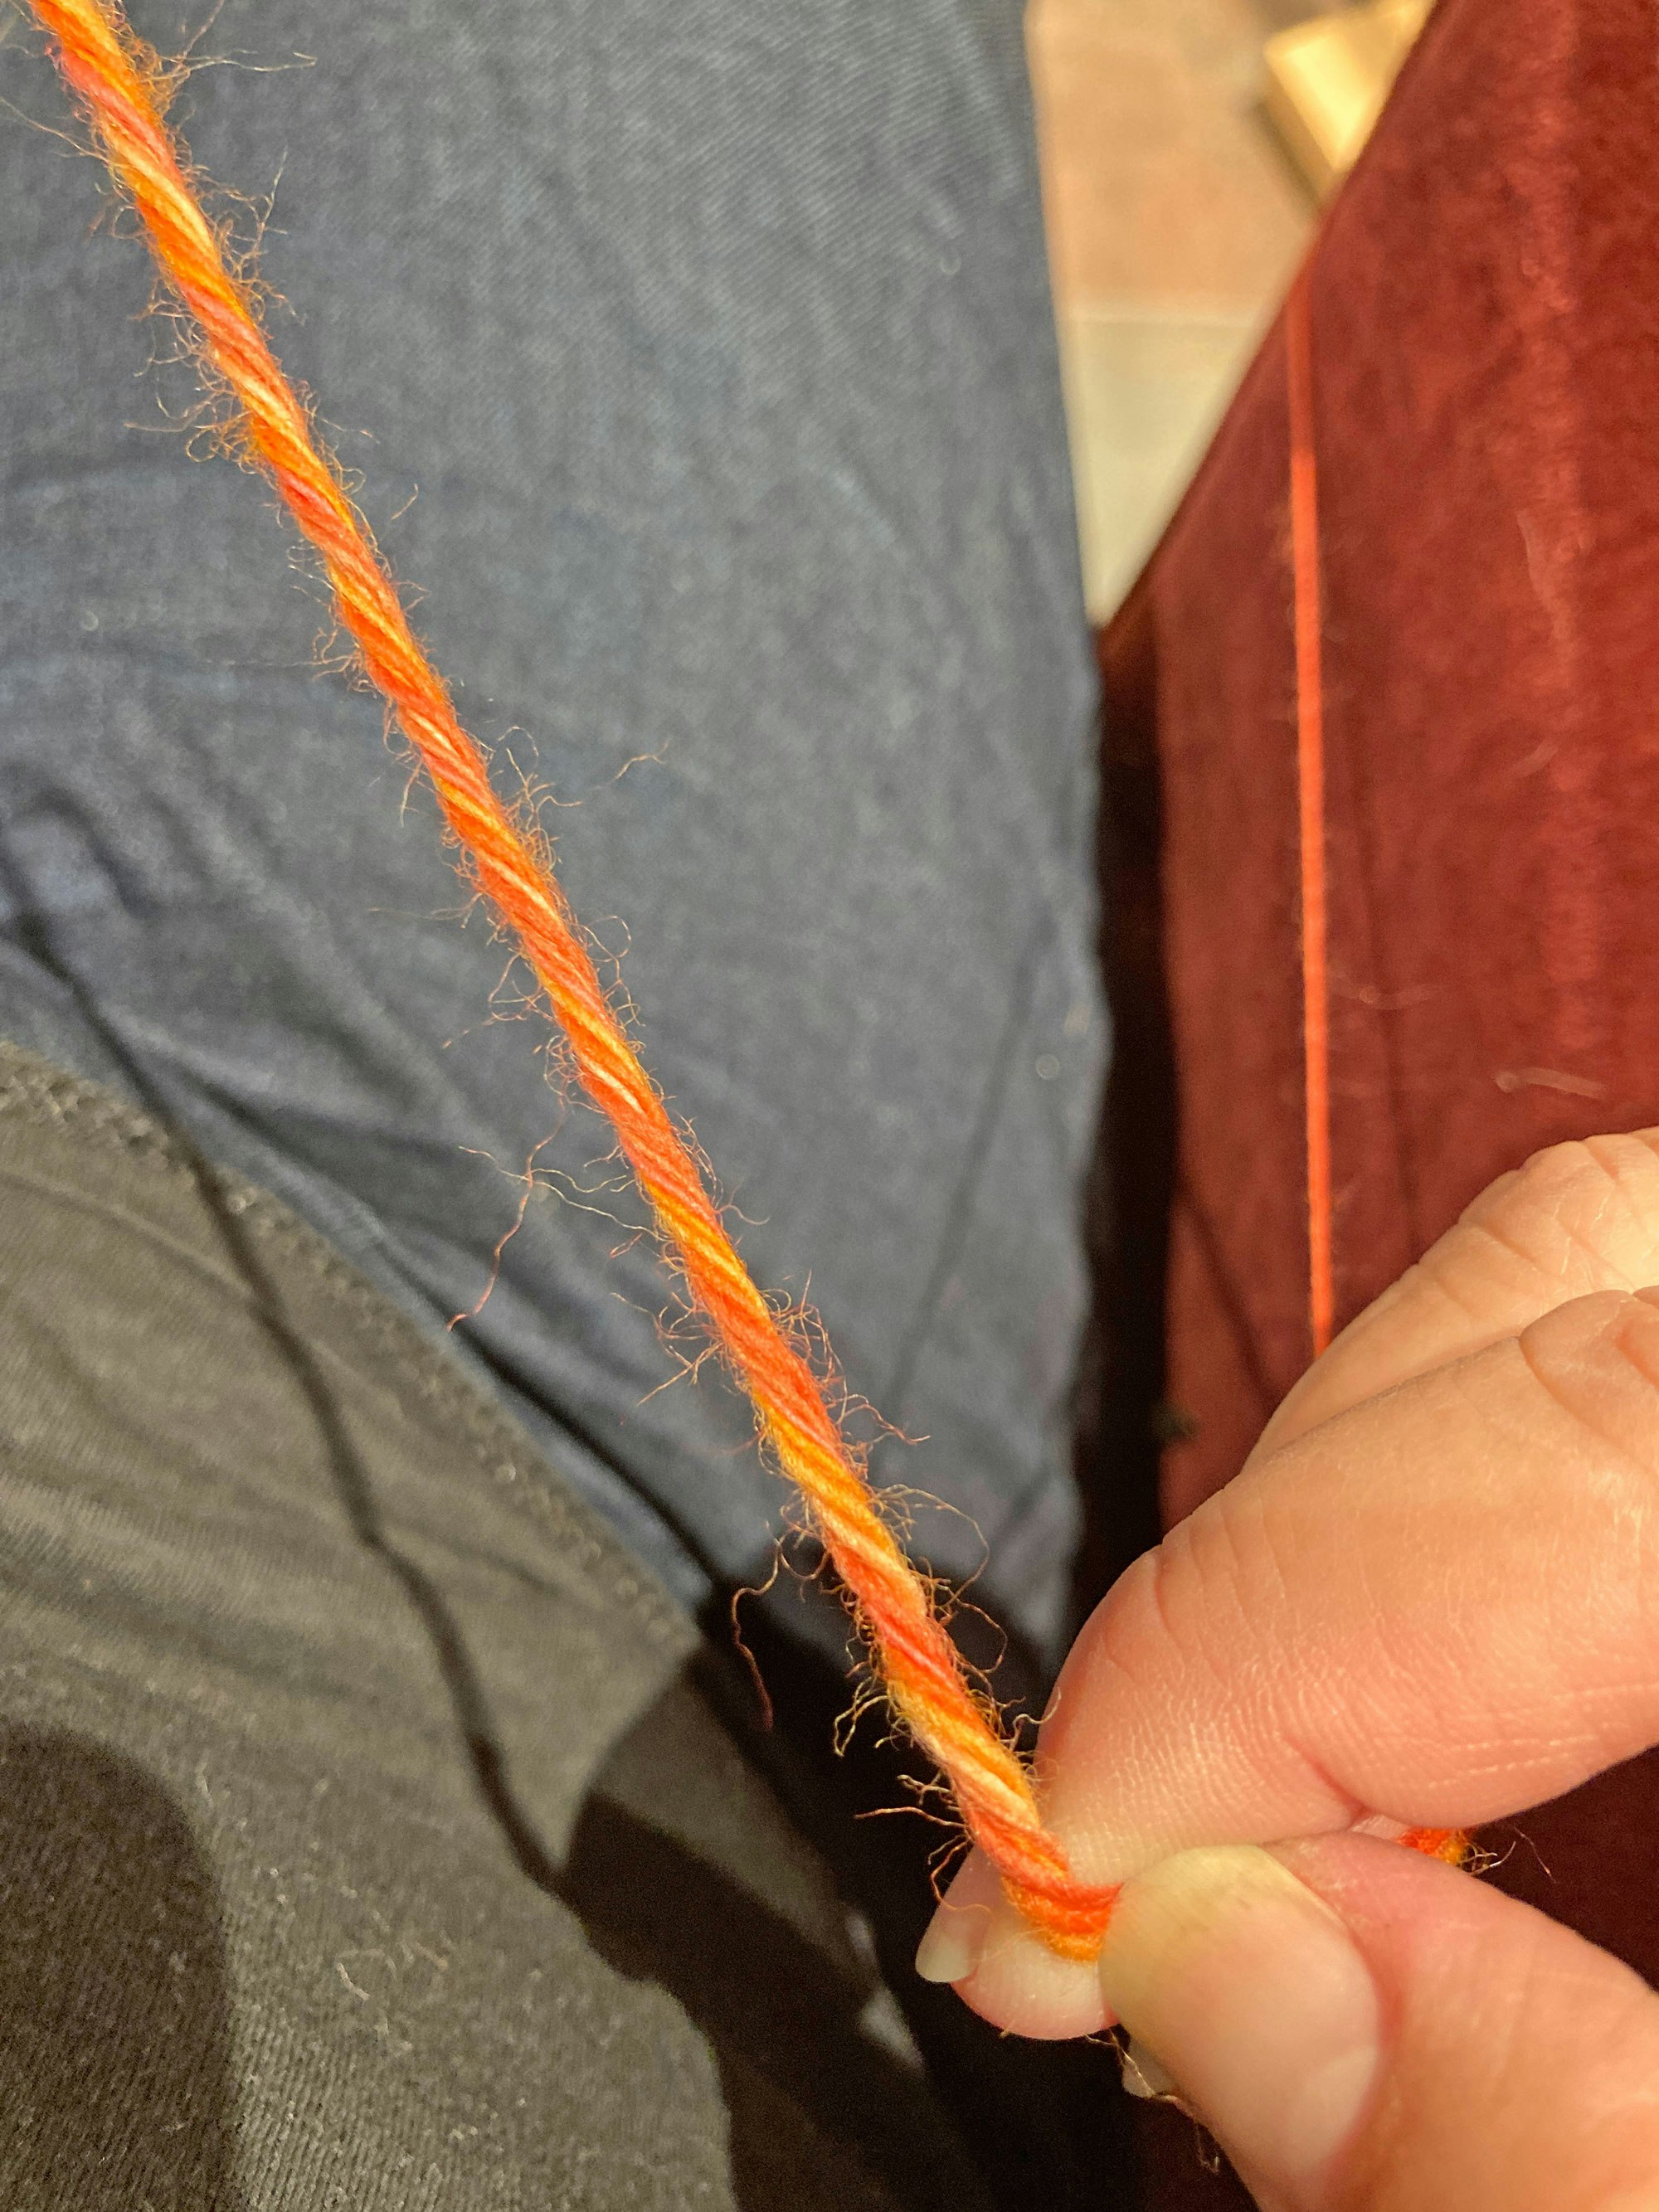
 Threading each singles through the plies of the cotton yarn allows the cotton yarn to act as an extra set of fingers and prevent pigtails.
Tips for juggling all those singles . . .
Get a closer look! Click on any image below to view it in full-screen mode.
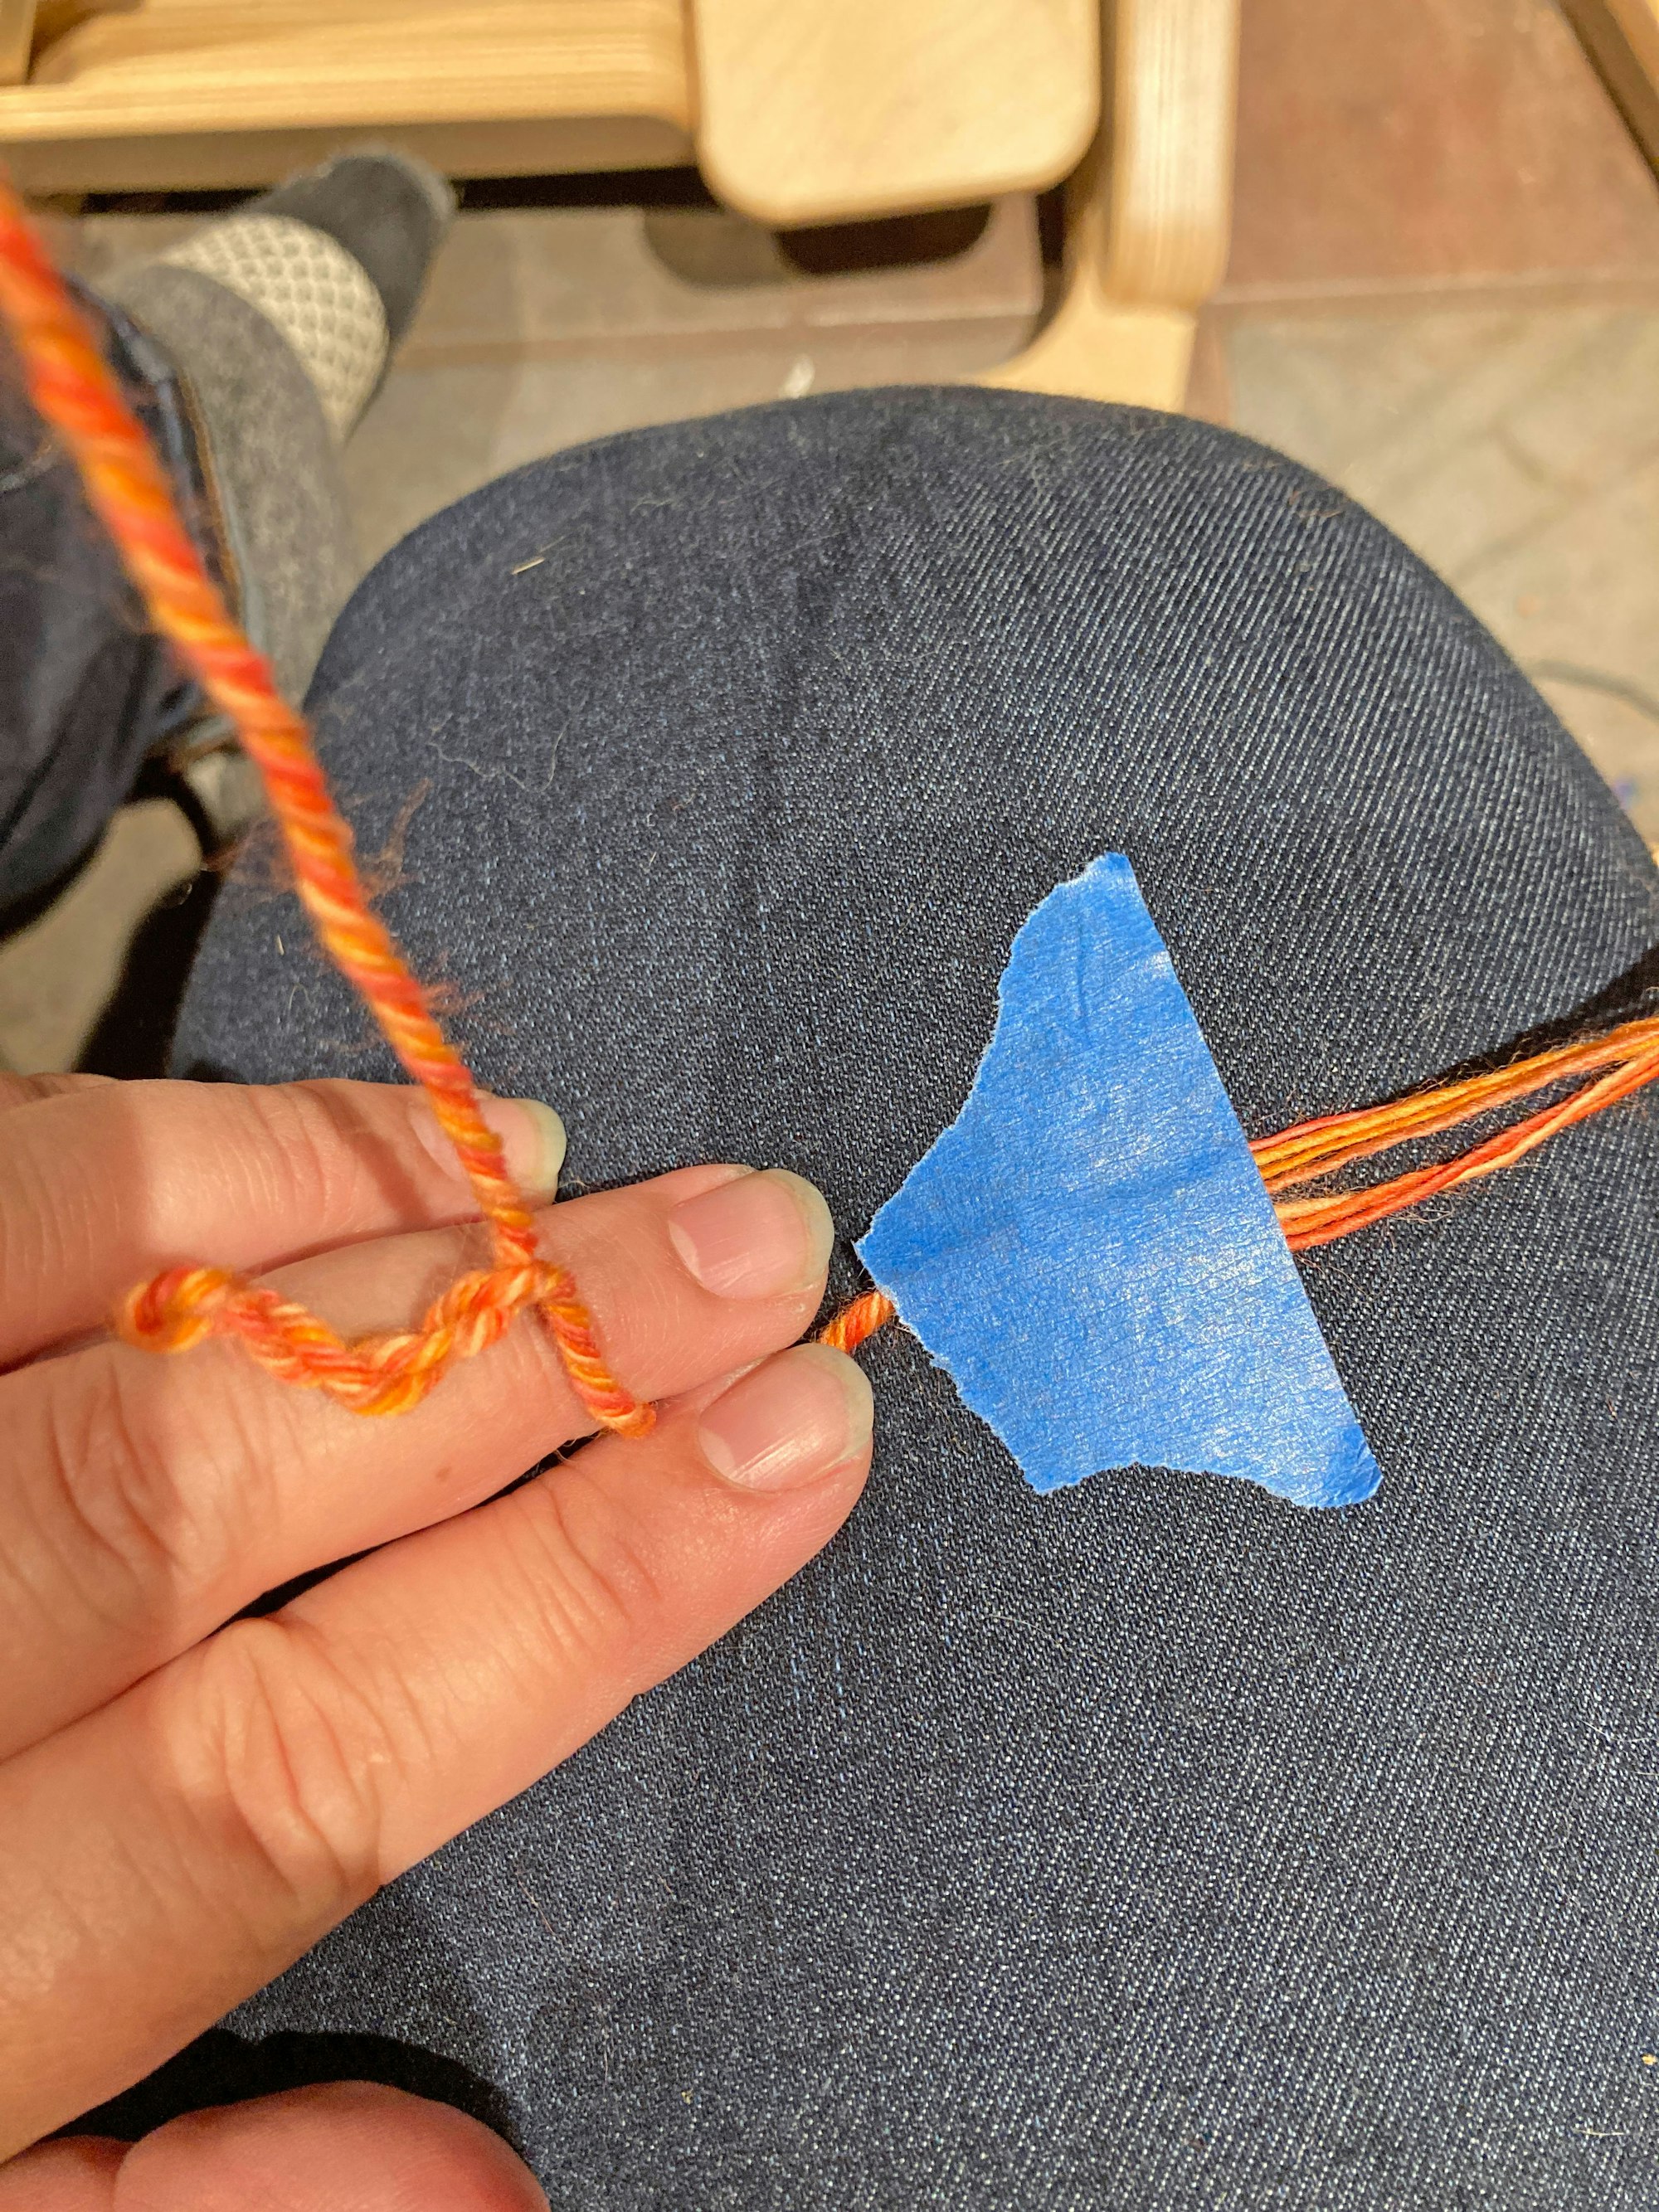
A piece of painter’s tape helps to start the plying step; run each singles to your leg or something else you can stick the tape to. Stick each singles to the tape one at a time. Don’t let slack build up in the singles, and you should prevent them from tangling or twining with each other as you do this.
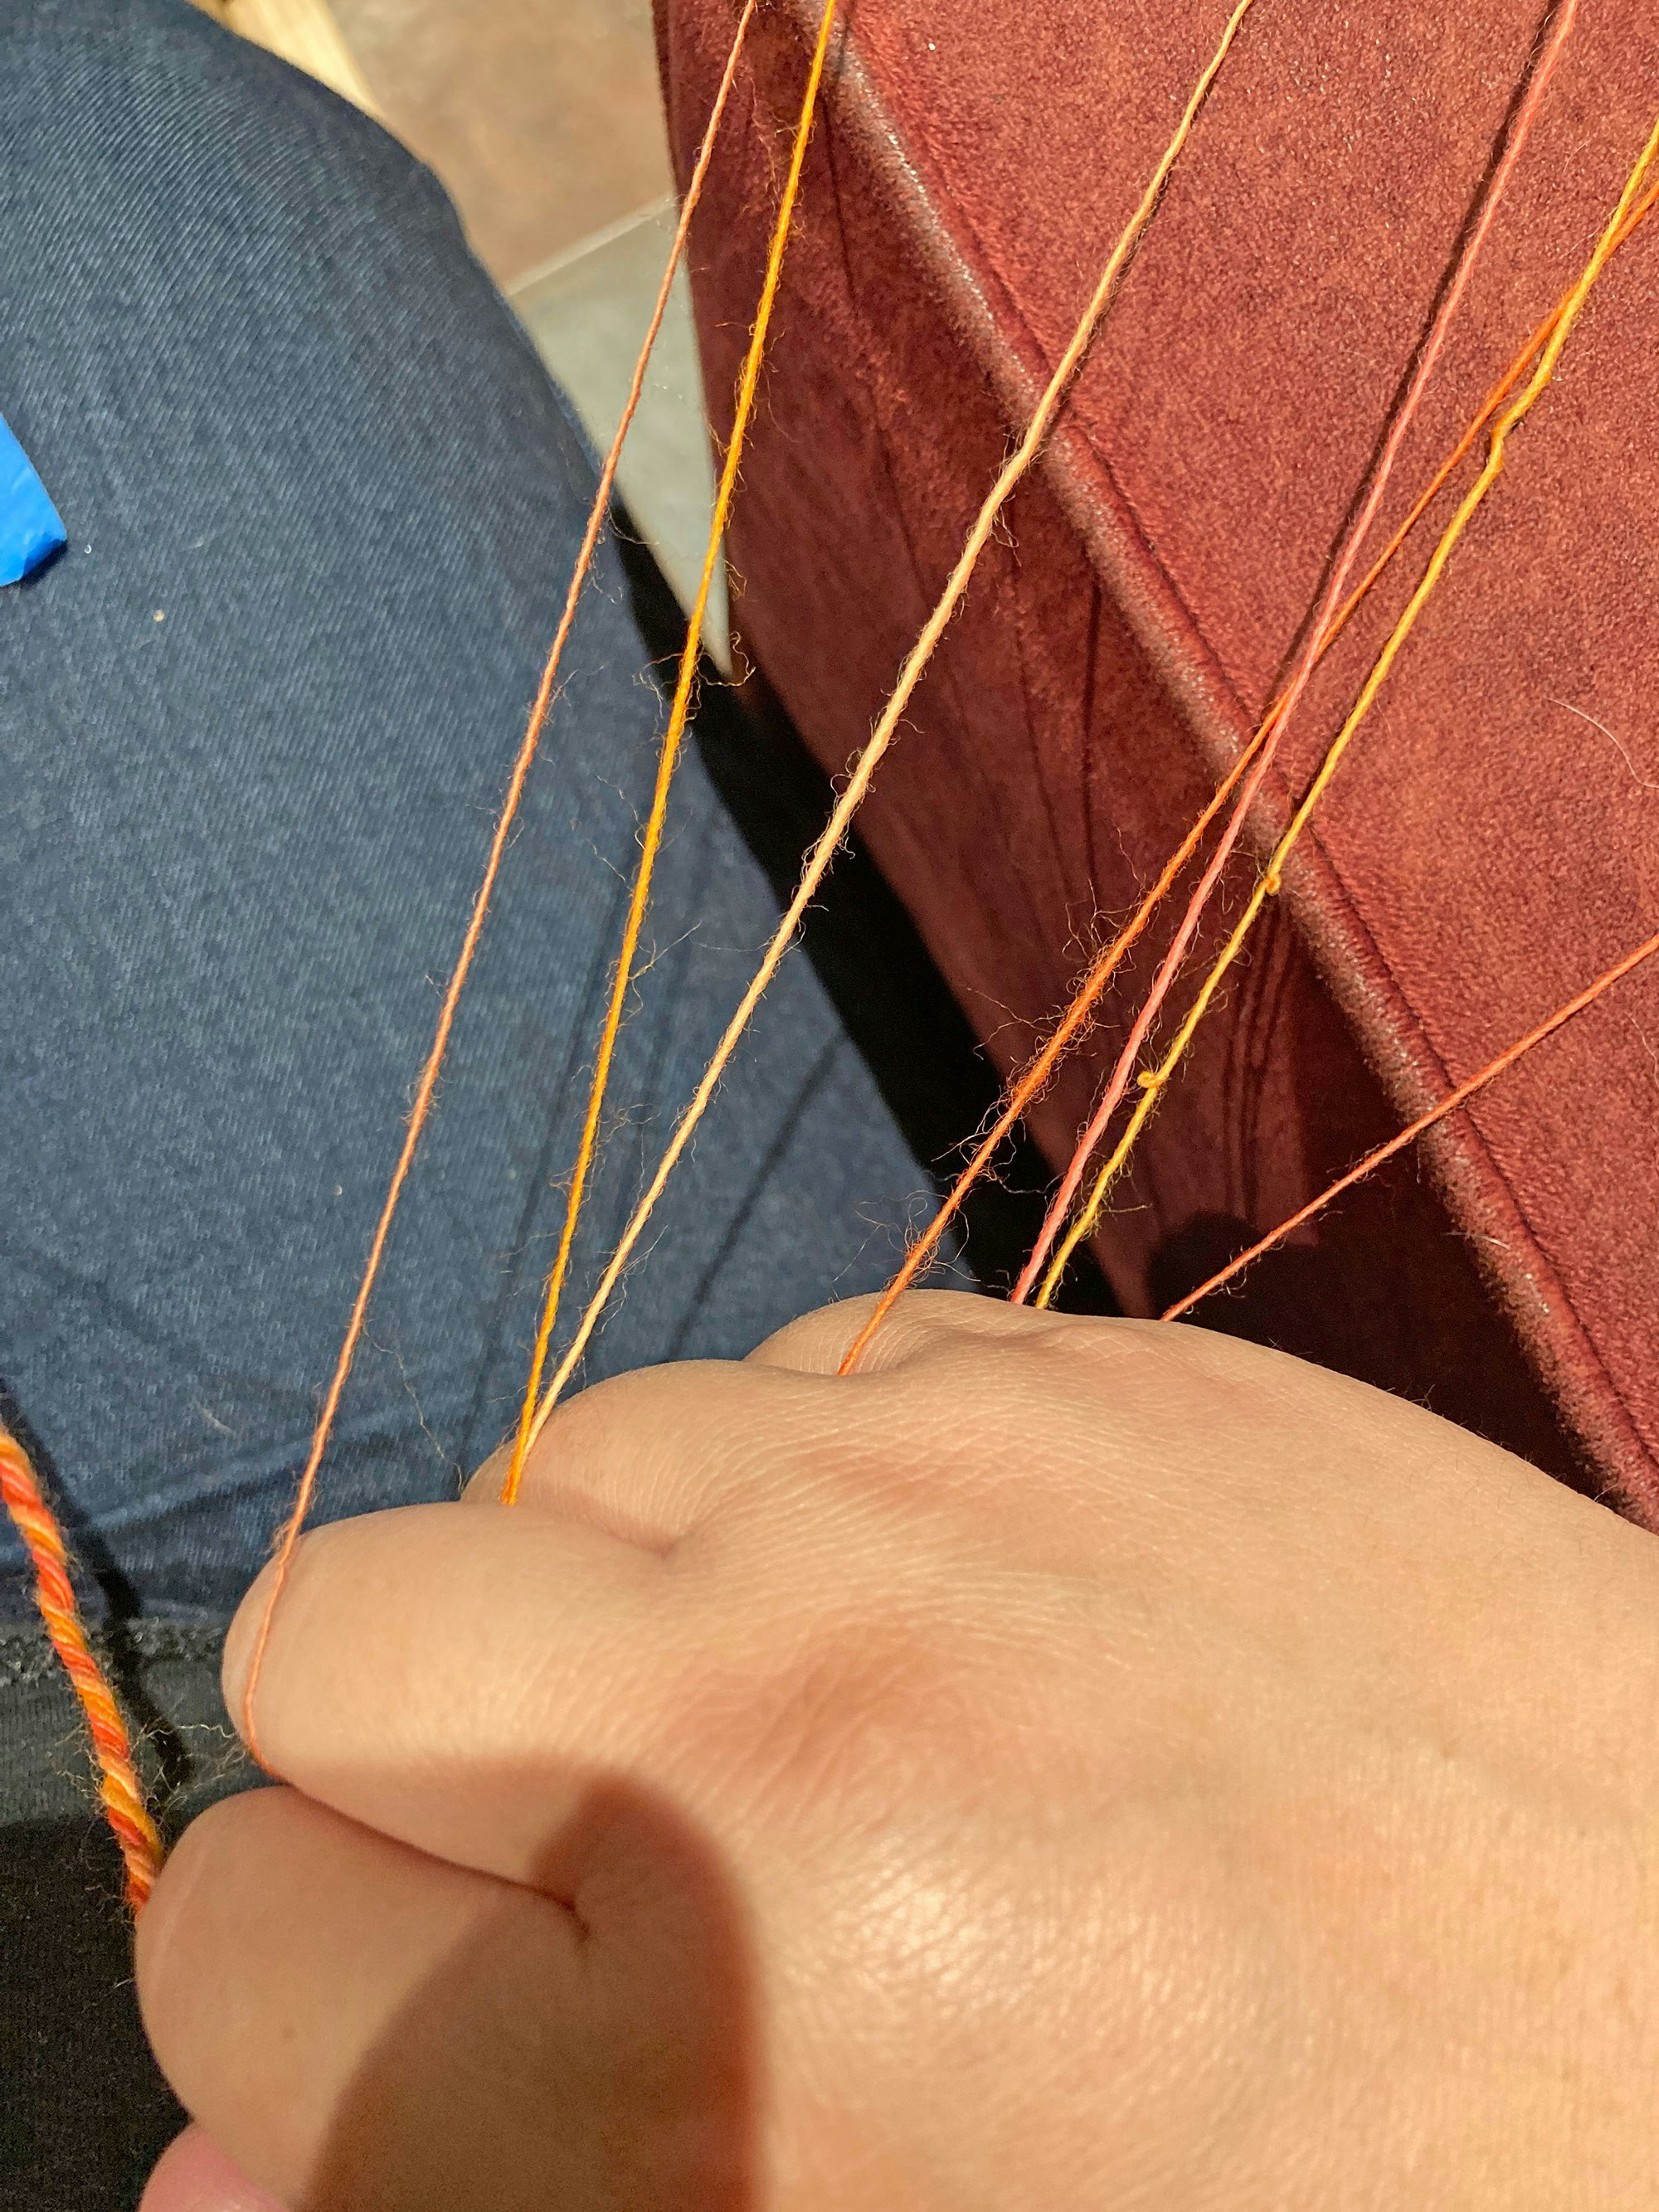
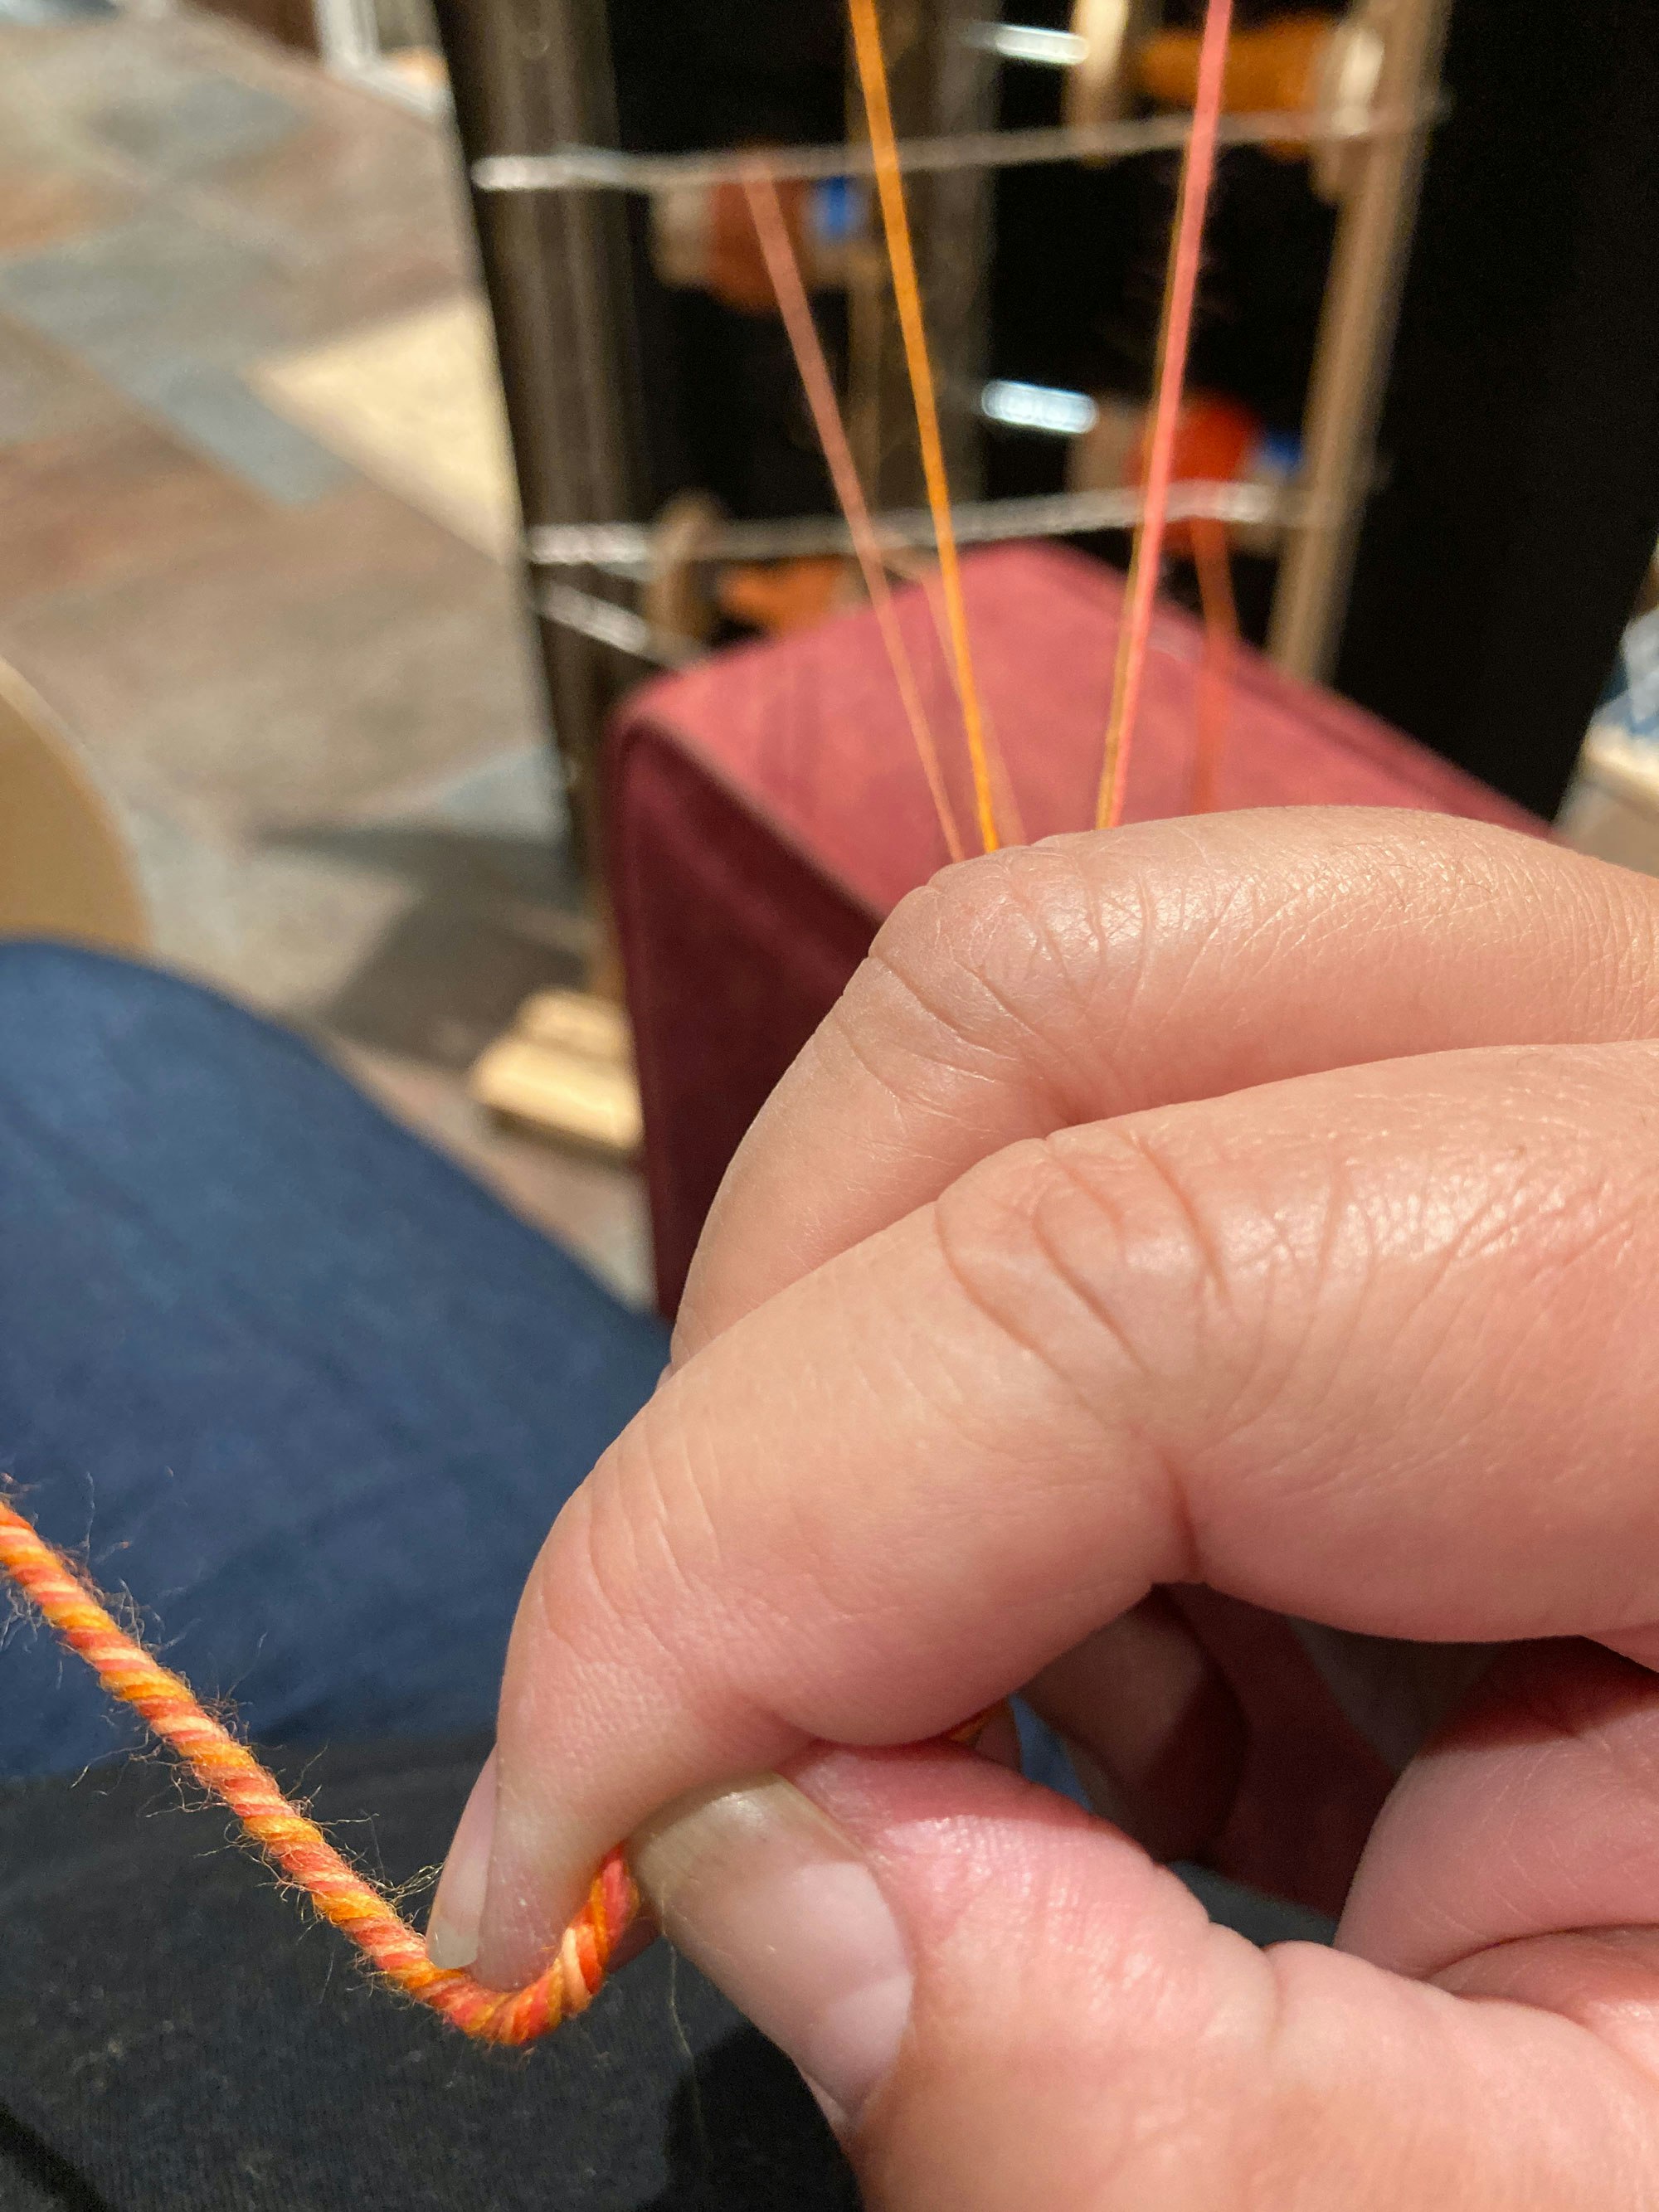
Change the ratio on your wheel to a much slower speed and crank the tension up. Distribute the singles between your fingers on the first hand closest to the kate (for me the right hand). Thread all the singles on your kate hand from the back of the hand to the palm and grasp all the strands between forefinger and thumb (as shown in the photo). Don’t move this hand until you’re done plying. If you must move this hand, use the painter’s tape to tape all the strands down at a point before they start to twist together.
Get a closer look! Click on any image below to view it in full-screen mode.
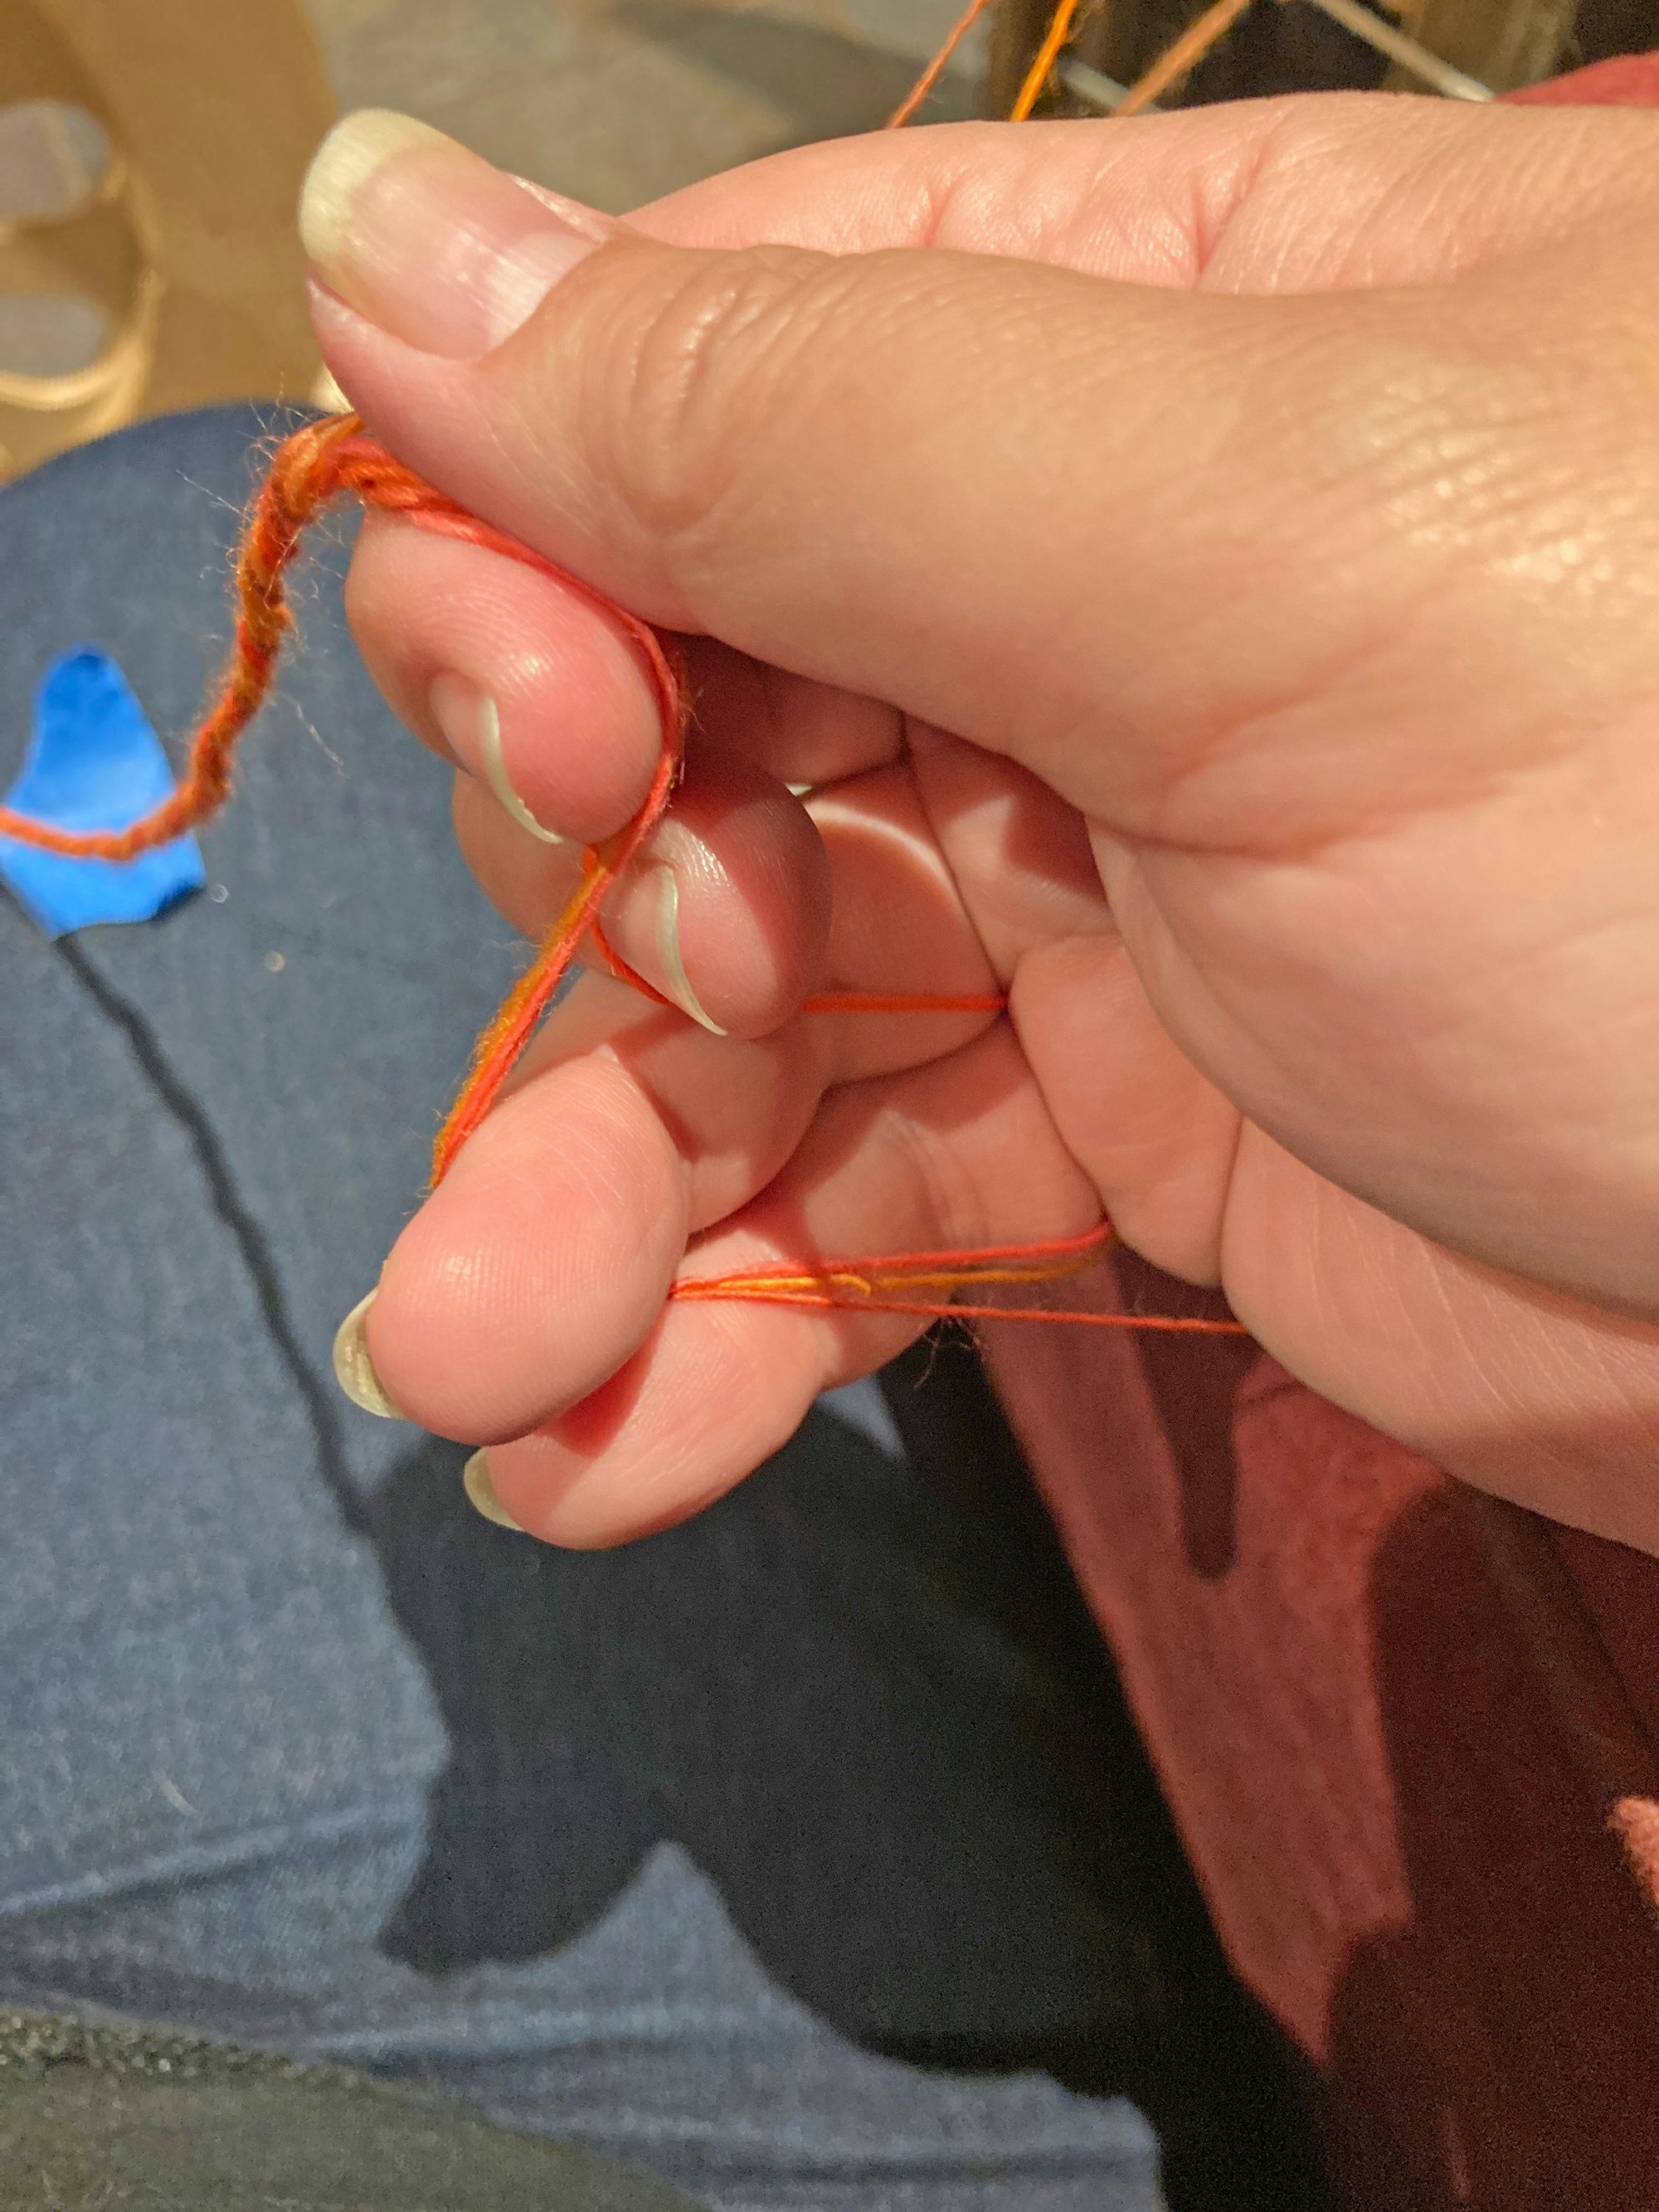
Use your other hand closest to the wheel (for me the left hand) to pinch and pull a short length of all the singles through your kate hand. If there are any pigtails in this section, use your kate hand to apply pressure and pull a bit more through. Release your wheel hand slowly while encouraging all the strands to ply together.
Once you have a short length that has begun plying, attach this yarn to the leader (being careful not to move your right hand or let go of any of the singles).
Get a closer look! Click on any image below to view it in full-screen mode.
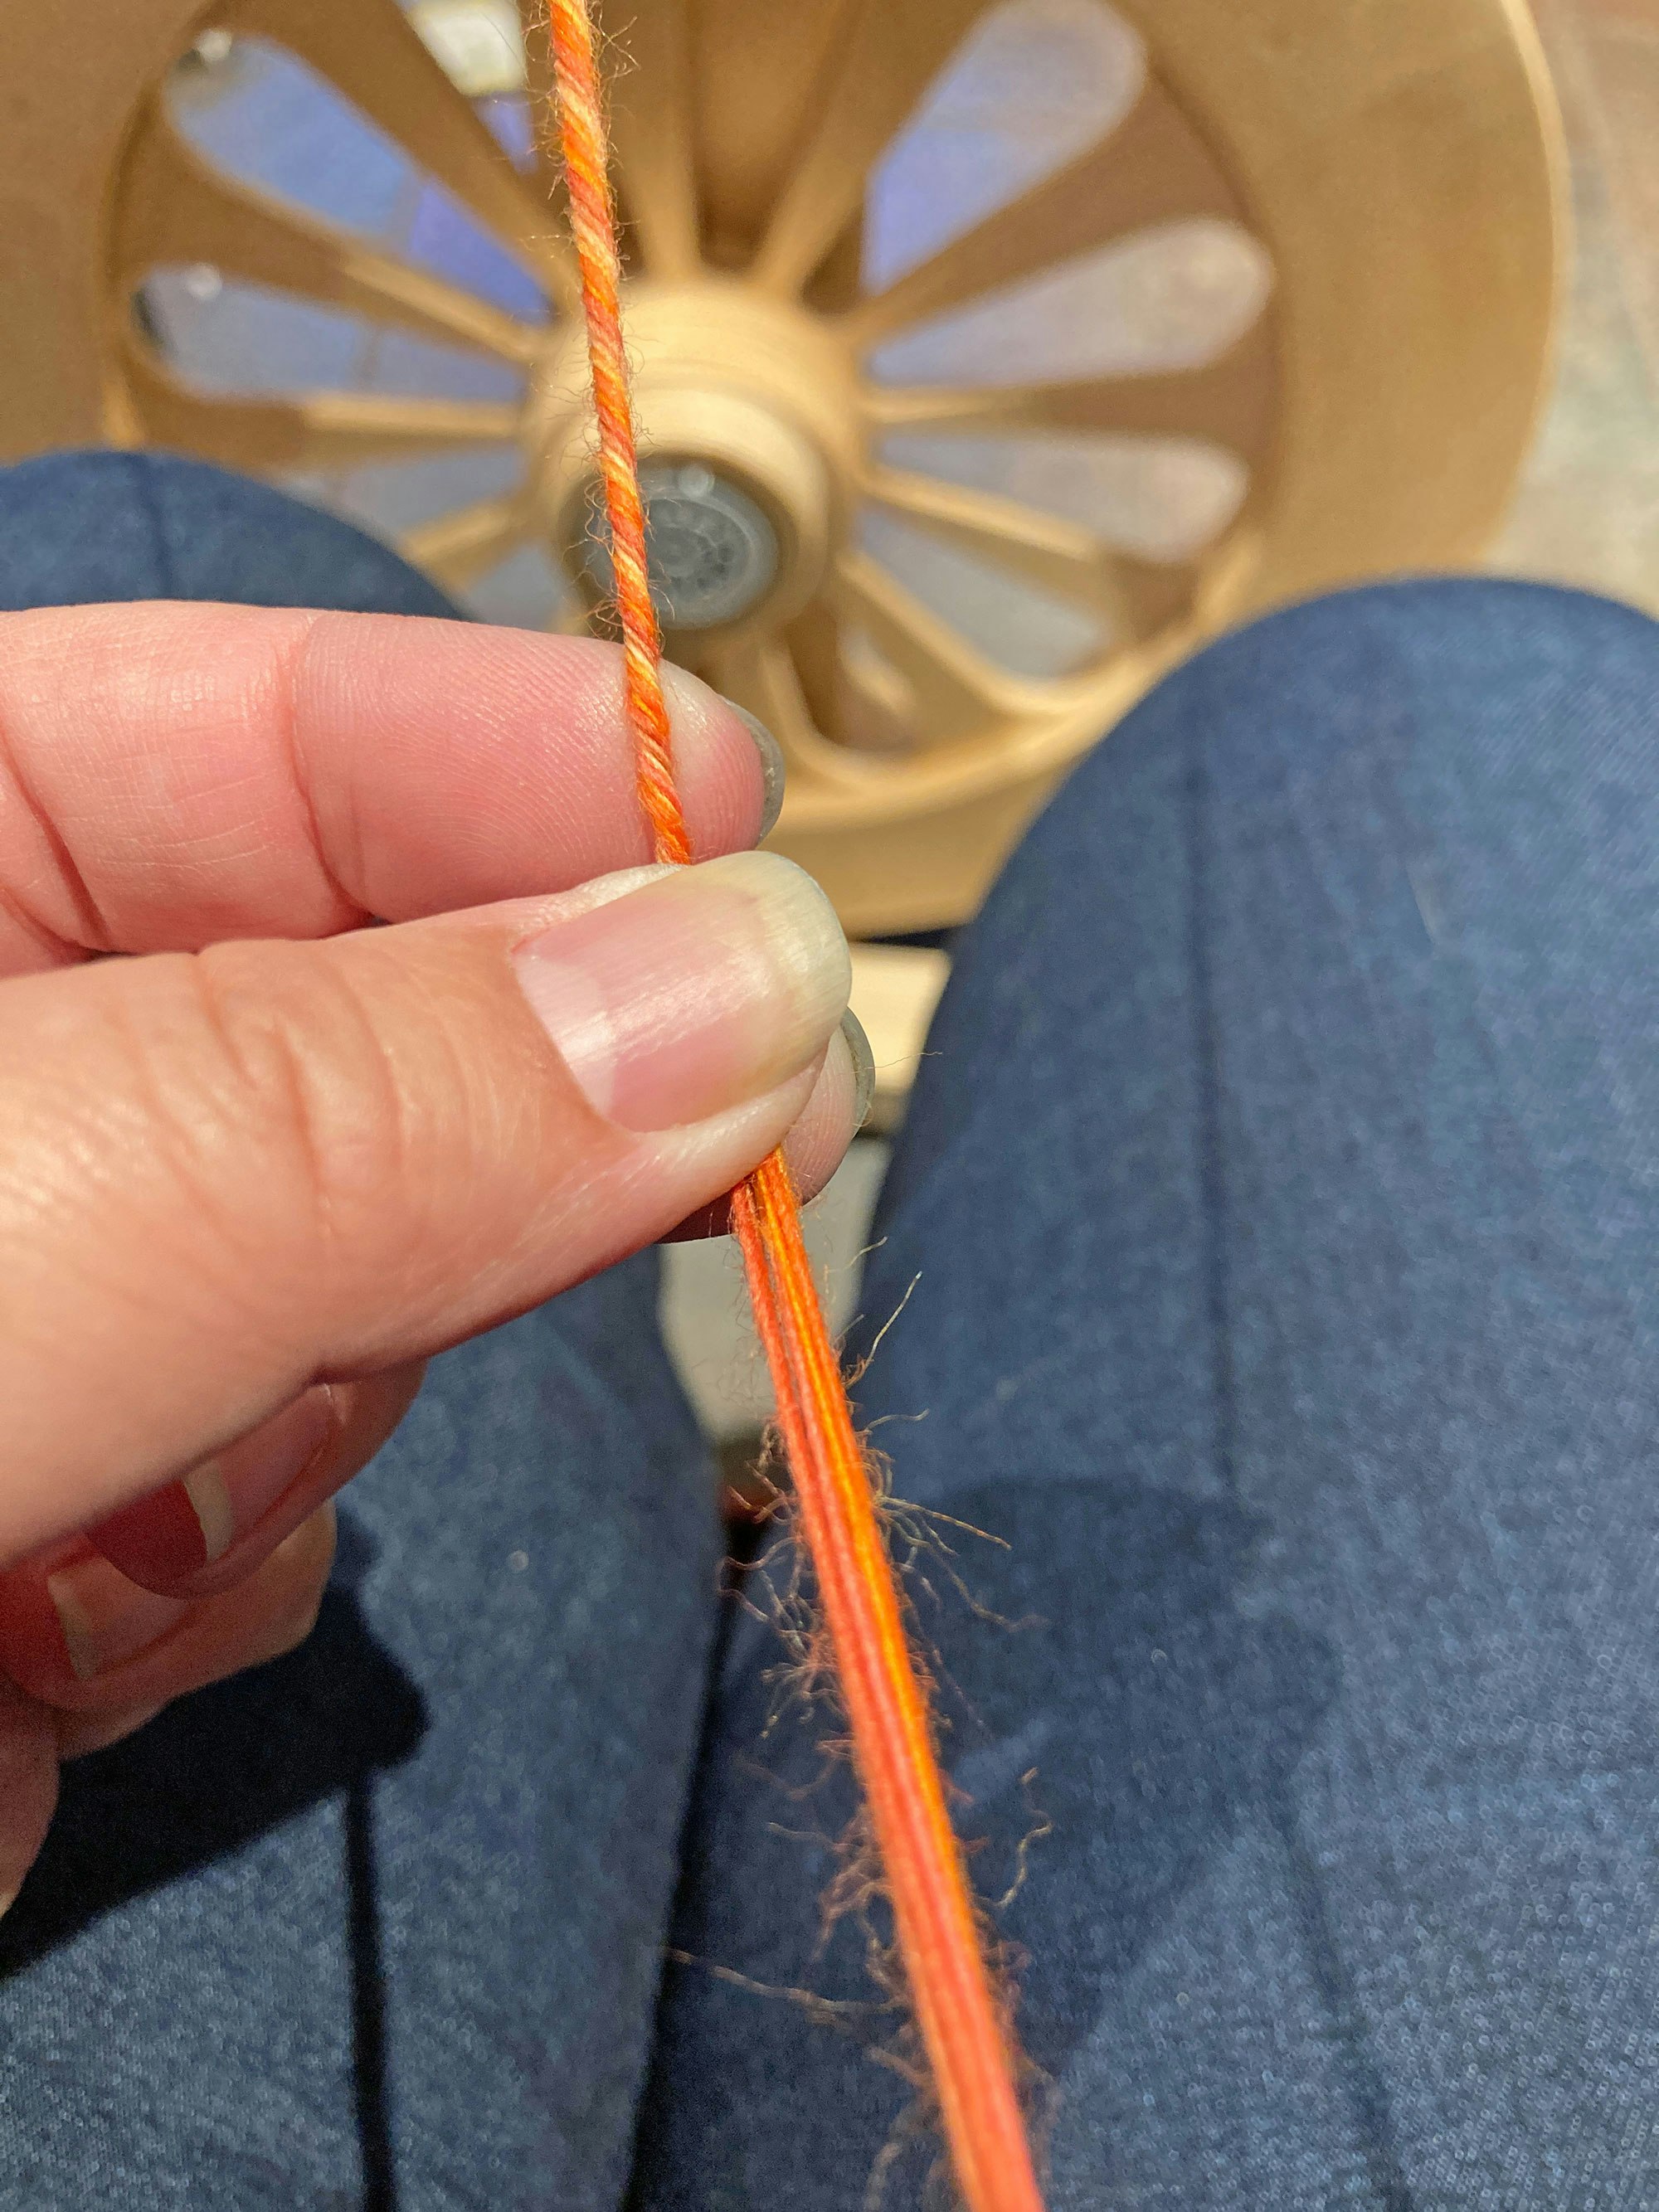
Keep the kate hand stationary and pull the strands through the plying zone with the wheel hand, feeding the finished portion onto the bobbin. Meanwhile, keep the strands below untwisted as you check for pigtails, then slide the wheel hand toward the kate hand to introduce twist. This keeps tension throughout the whole system as much as possible—that's the key!
Get a closer look! Click on any image below to view it in full-screen mode.
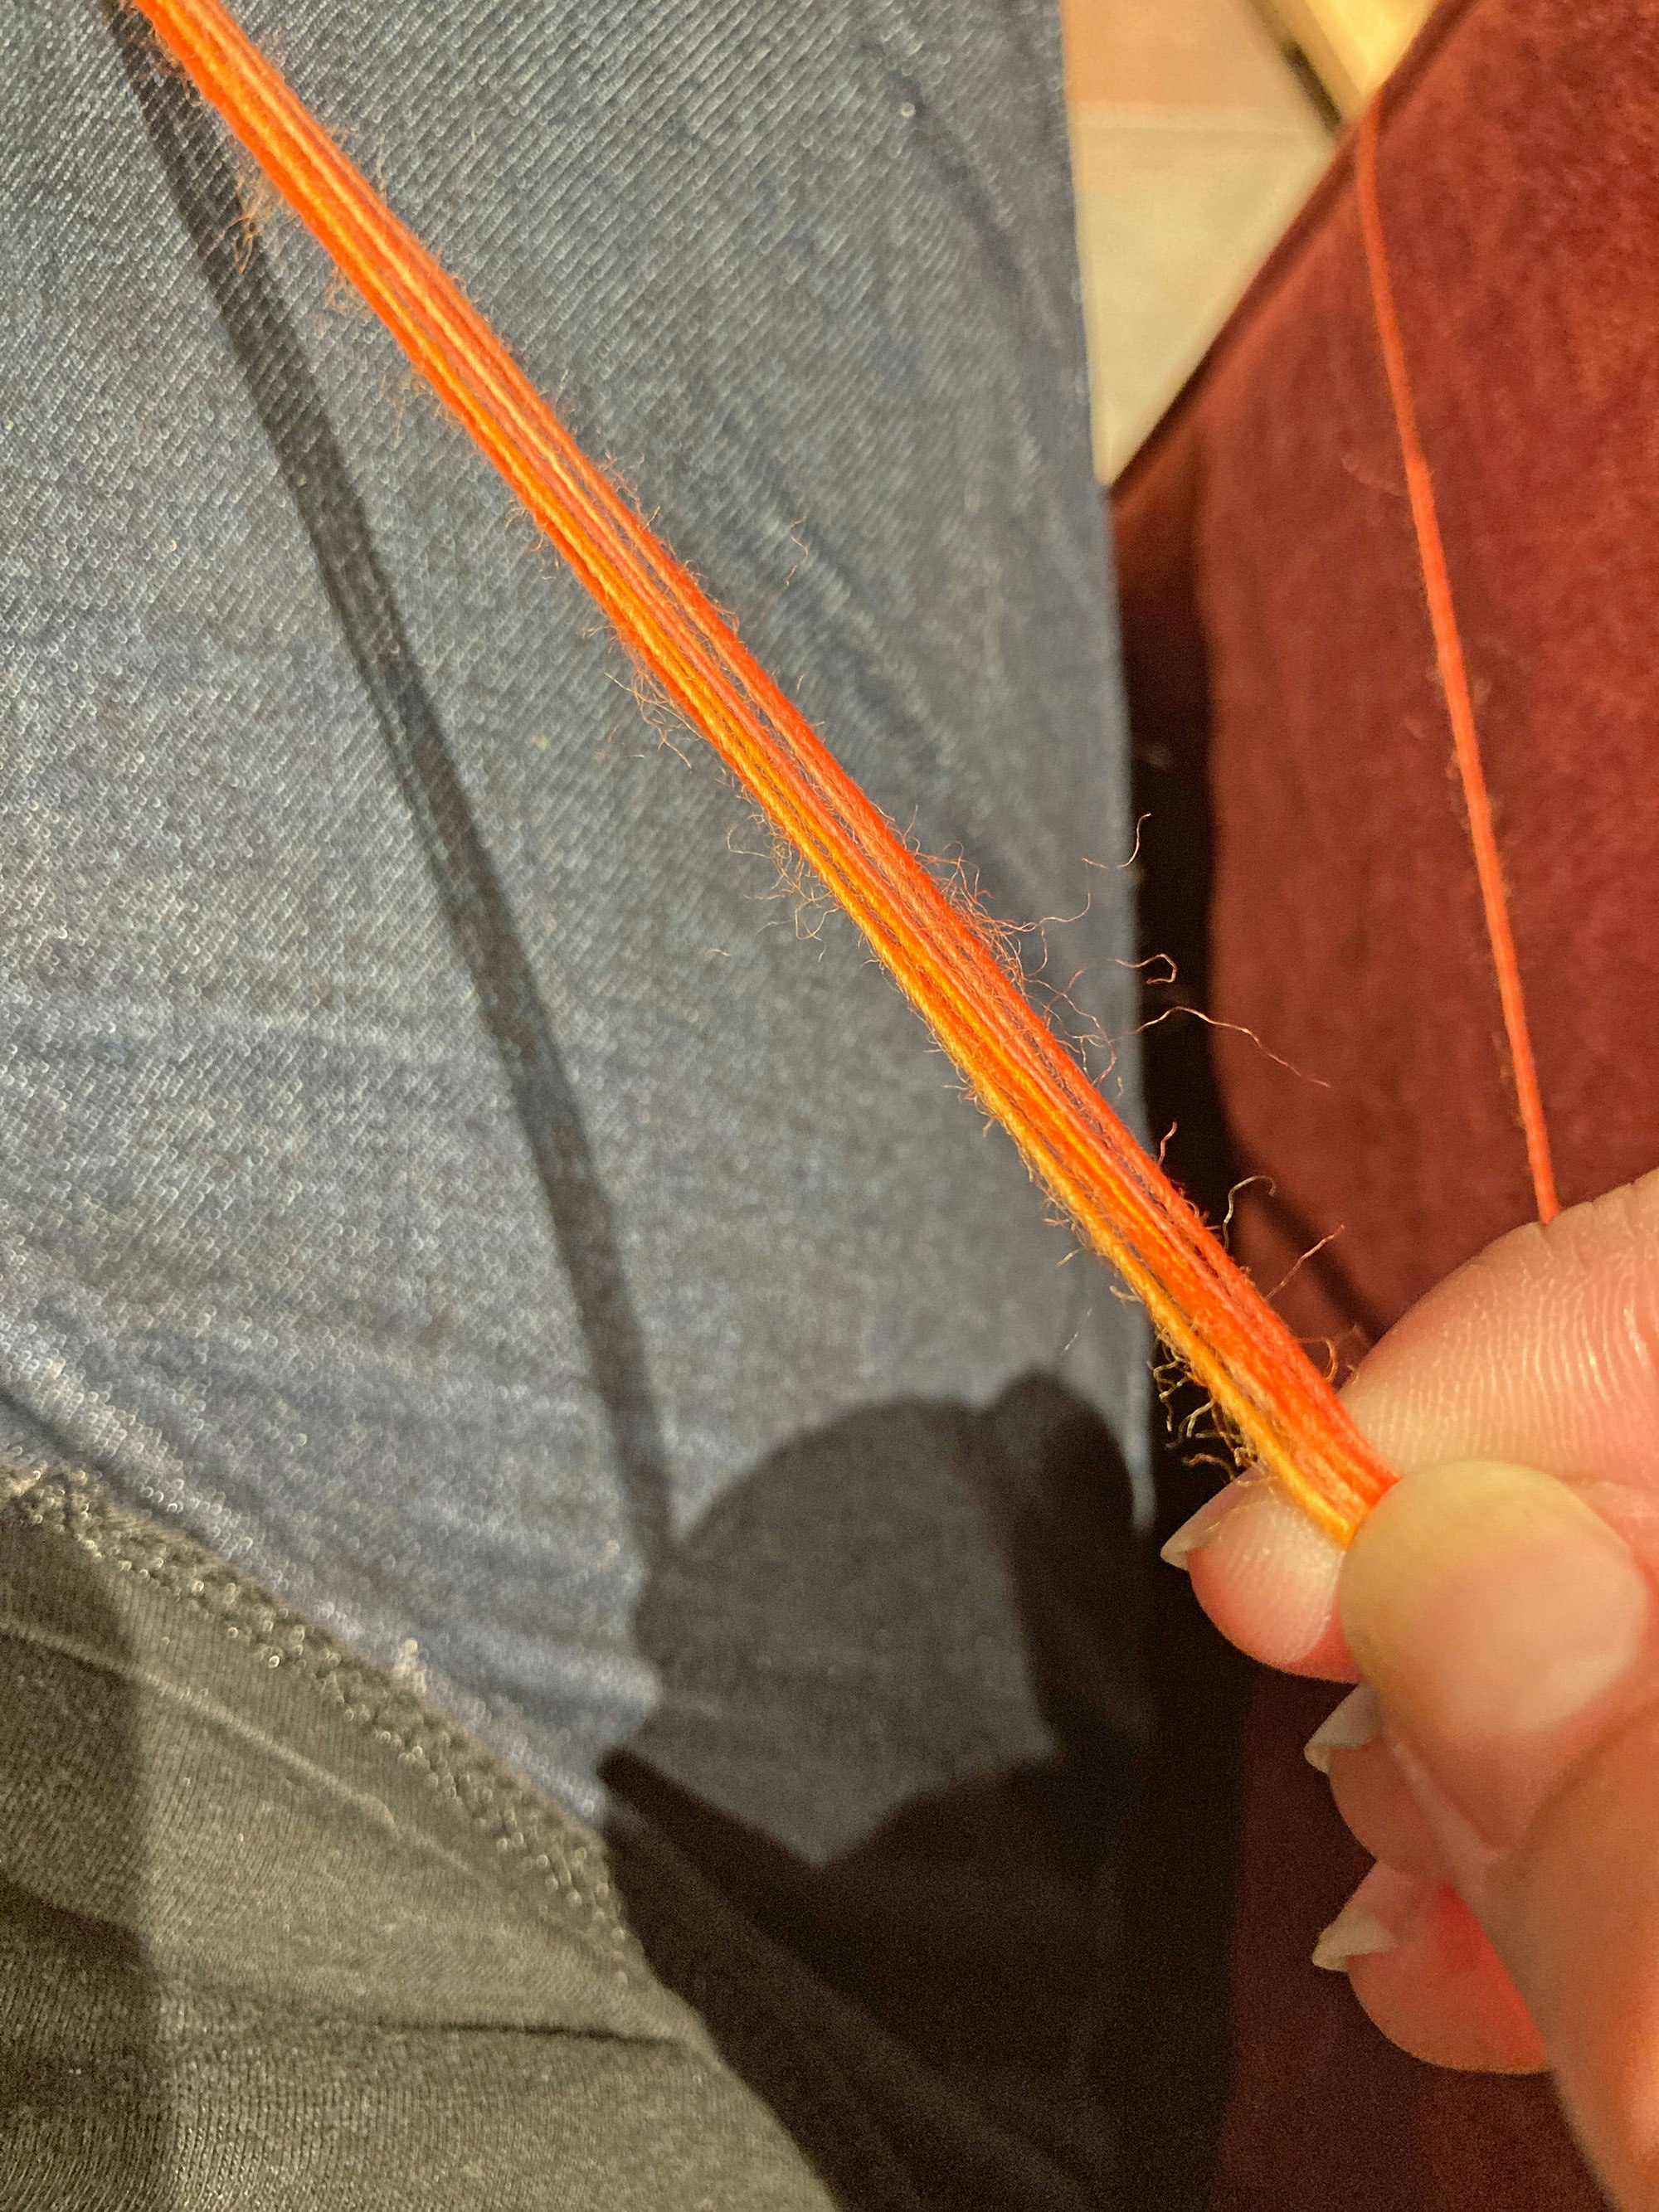
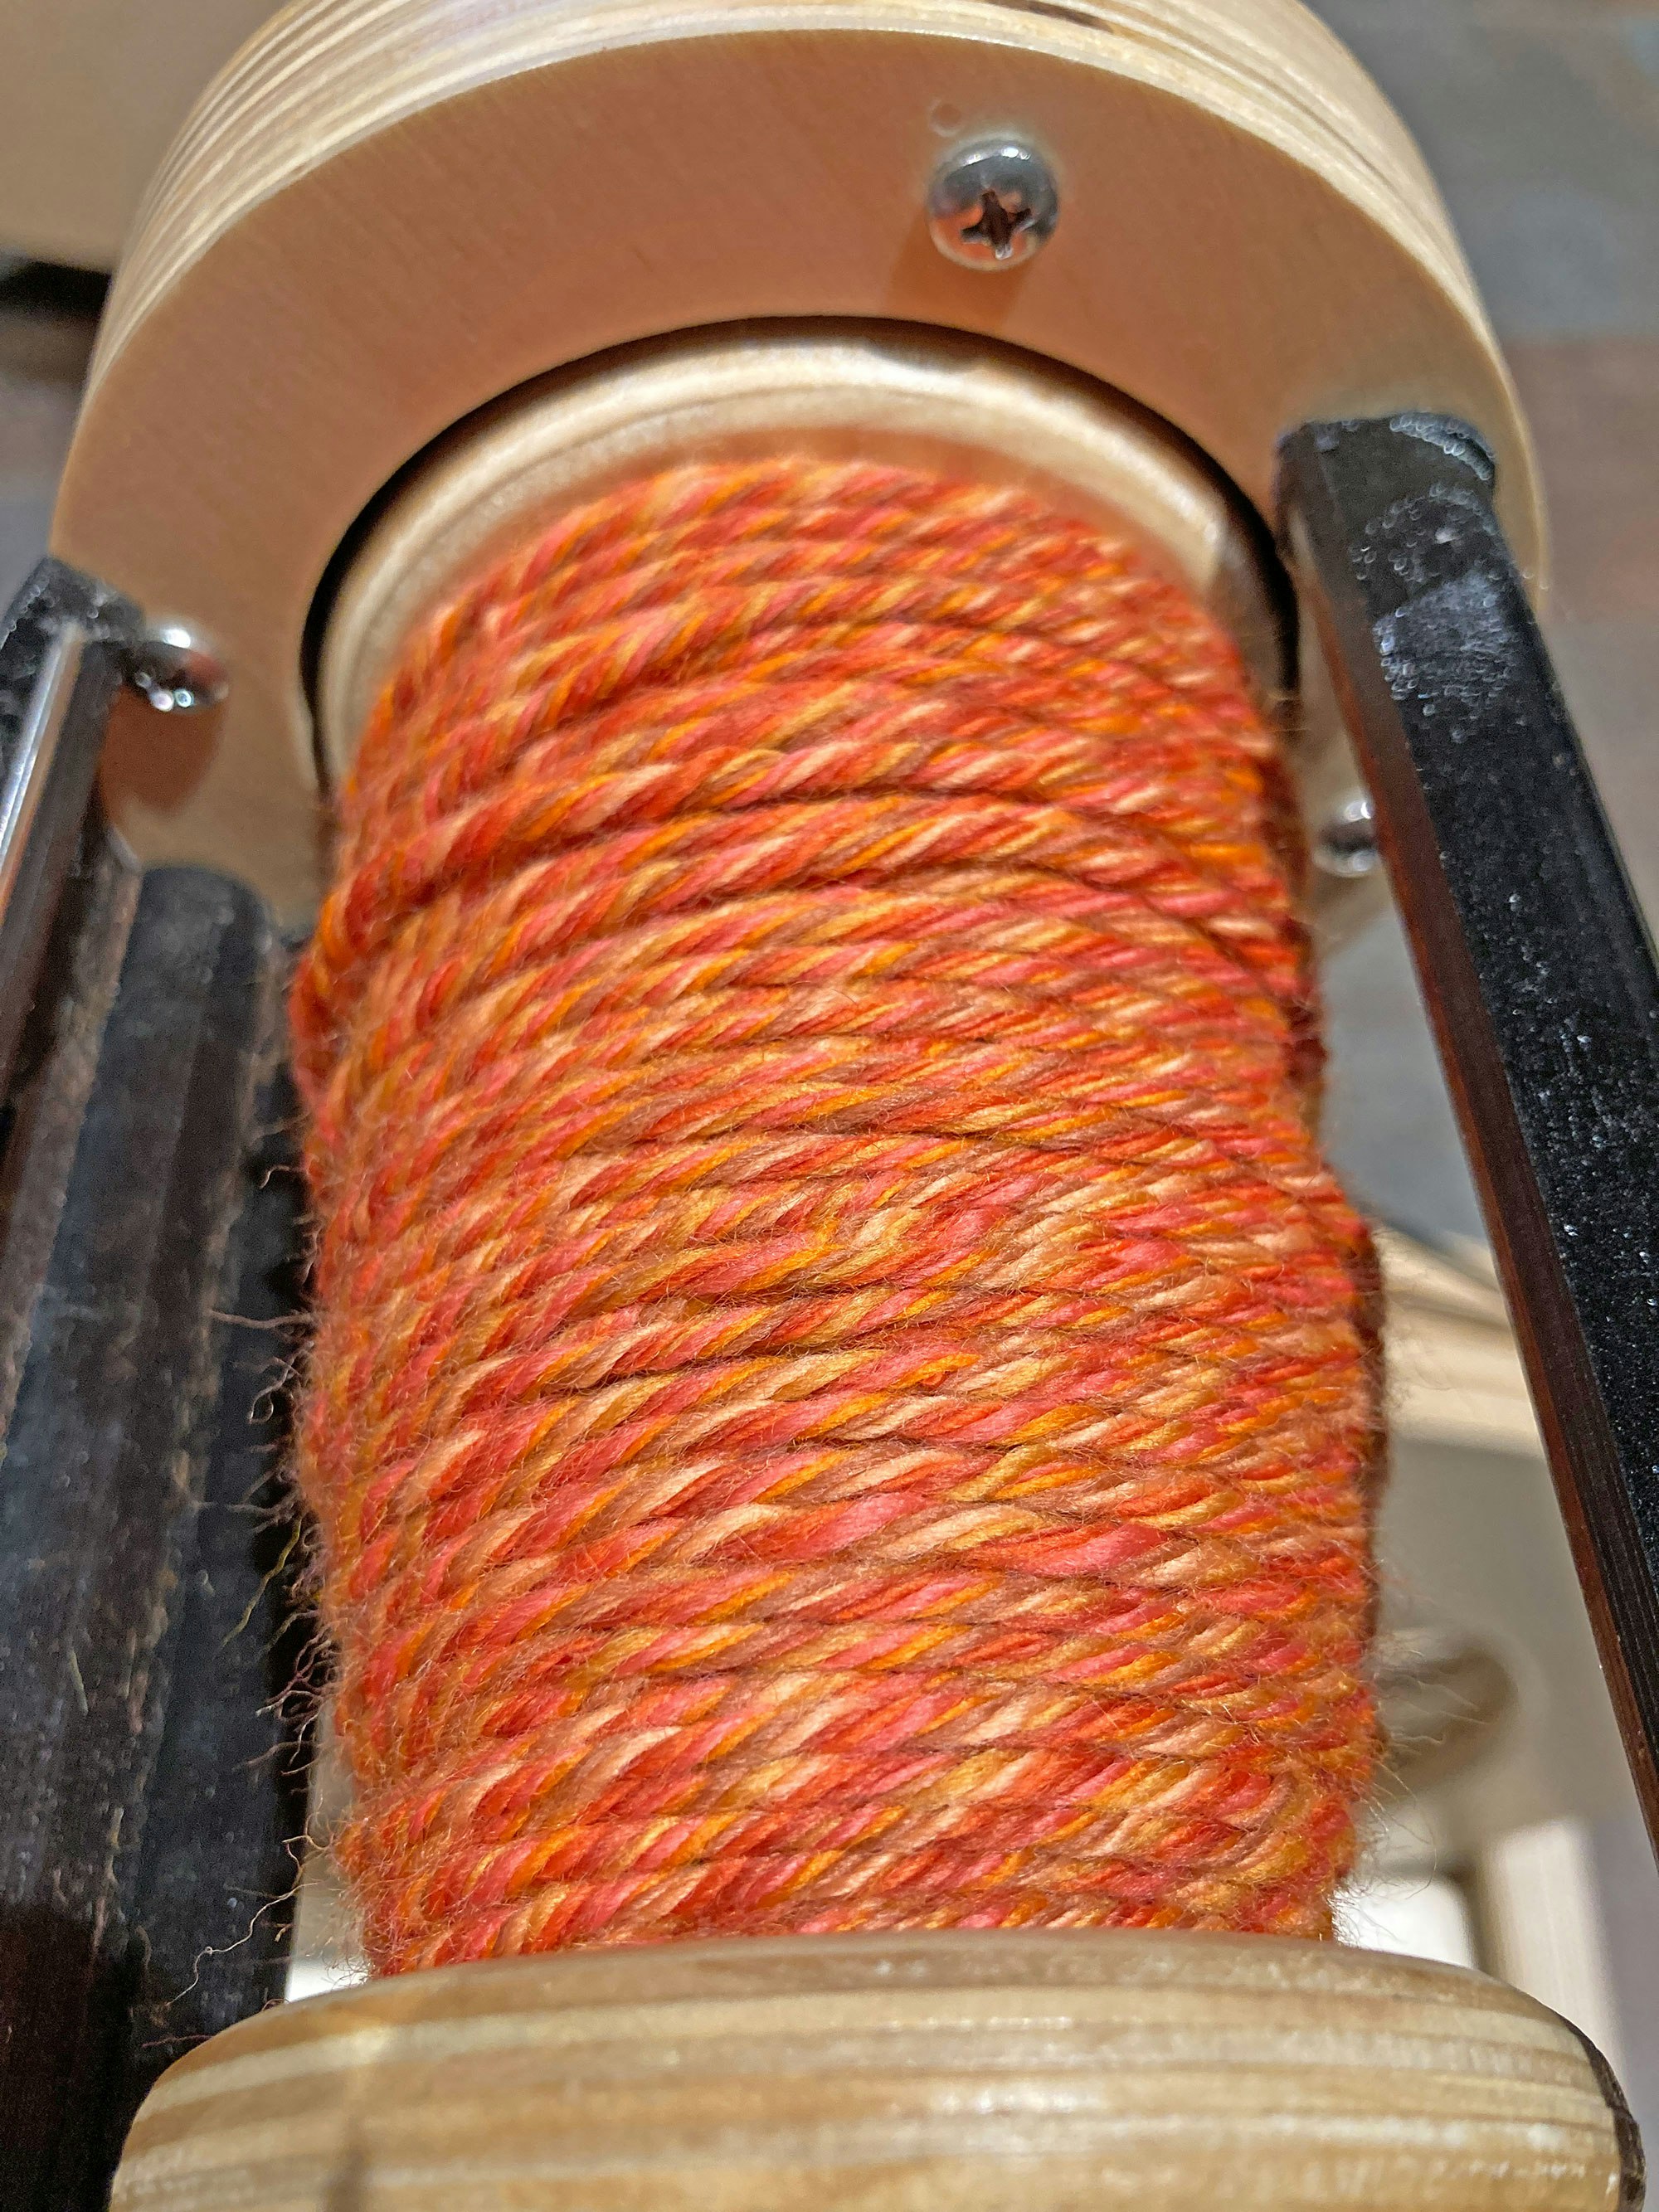
Check the yarn on your bobbin; if it looks underspun or overspun, it probably is. You can respin the whole yarn again afterward, or unwind the finished yarn and try to get the twist right.
 A few of Kat's skeins hang to dry after skeining, washing, and snapping.
Inevitably, one color will run out first, so cut the others to match. I skein-wind the yarn, and then finish it in a warm bath with a splash of vinegar and Dawn dish soap. I then do a warm rinse, roll it out on a towel, and snap a few times to help even out the twist. Then I hang my skeins to dry.
If you find a pigtail after washing, untwist that section and redistribute the loose ply. When it twists back, it’s barely noticeable because of the great number of plies.
Get a closer look! Click on any image below to view it in full-screen mode.
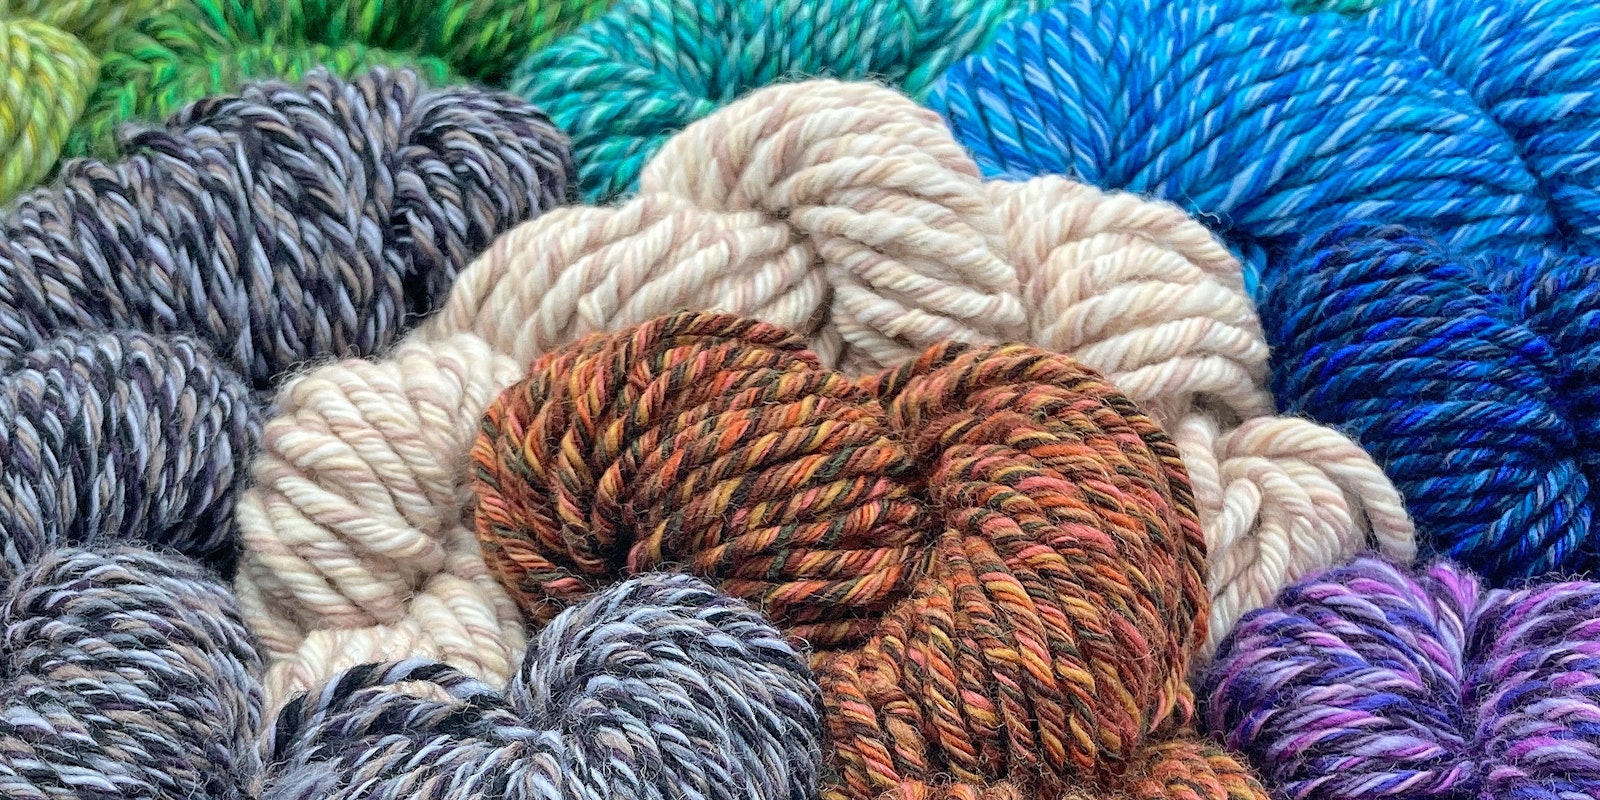
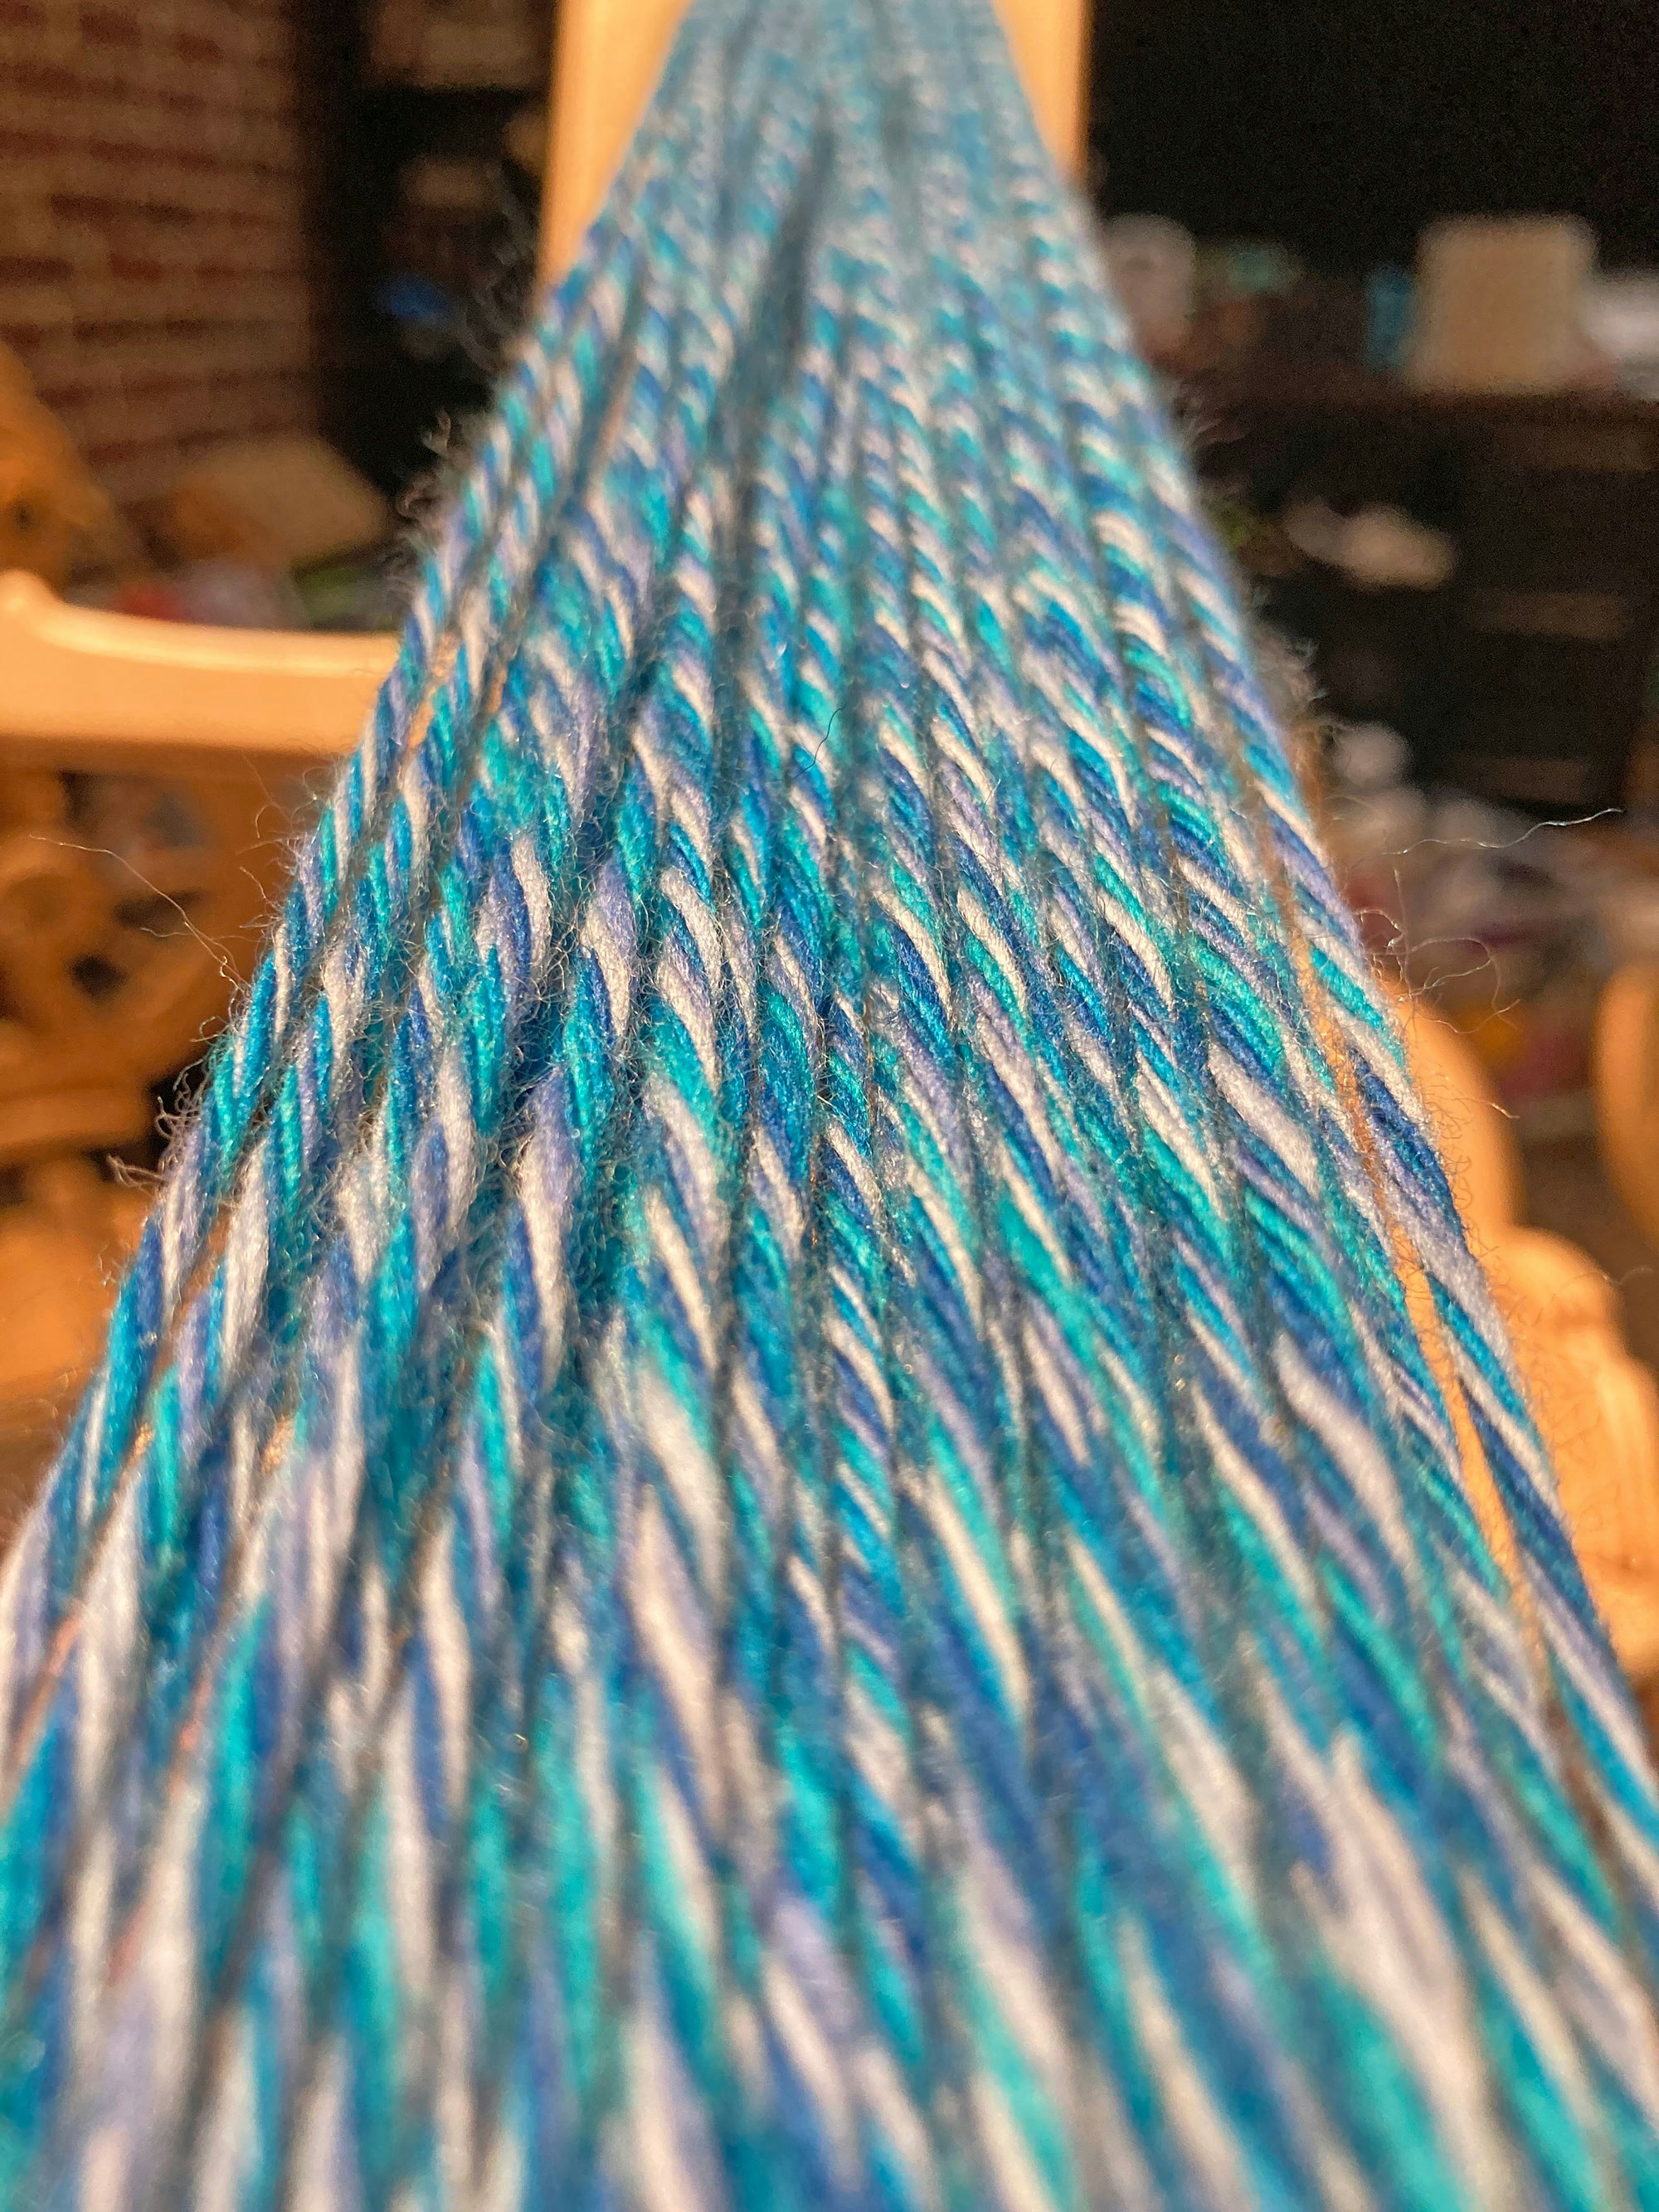
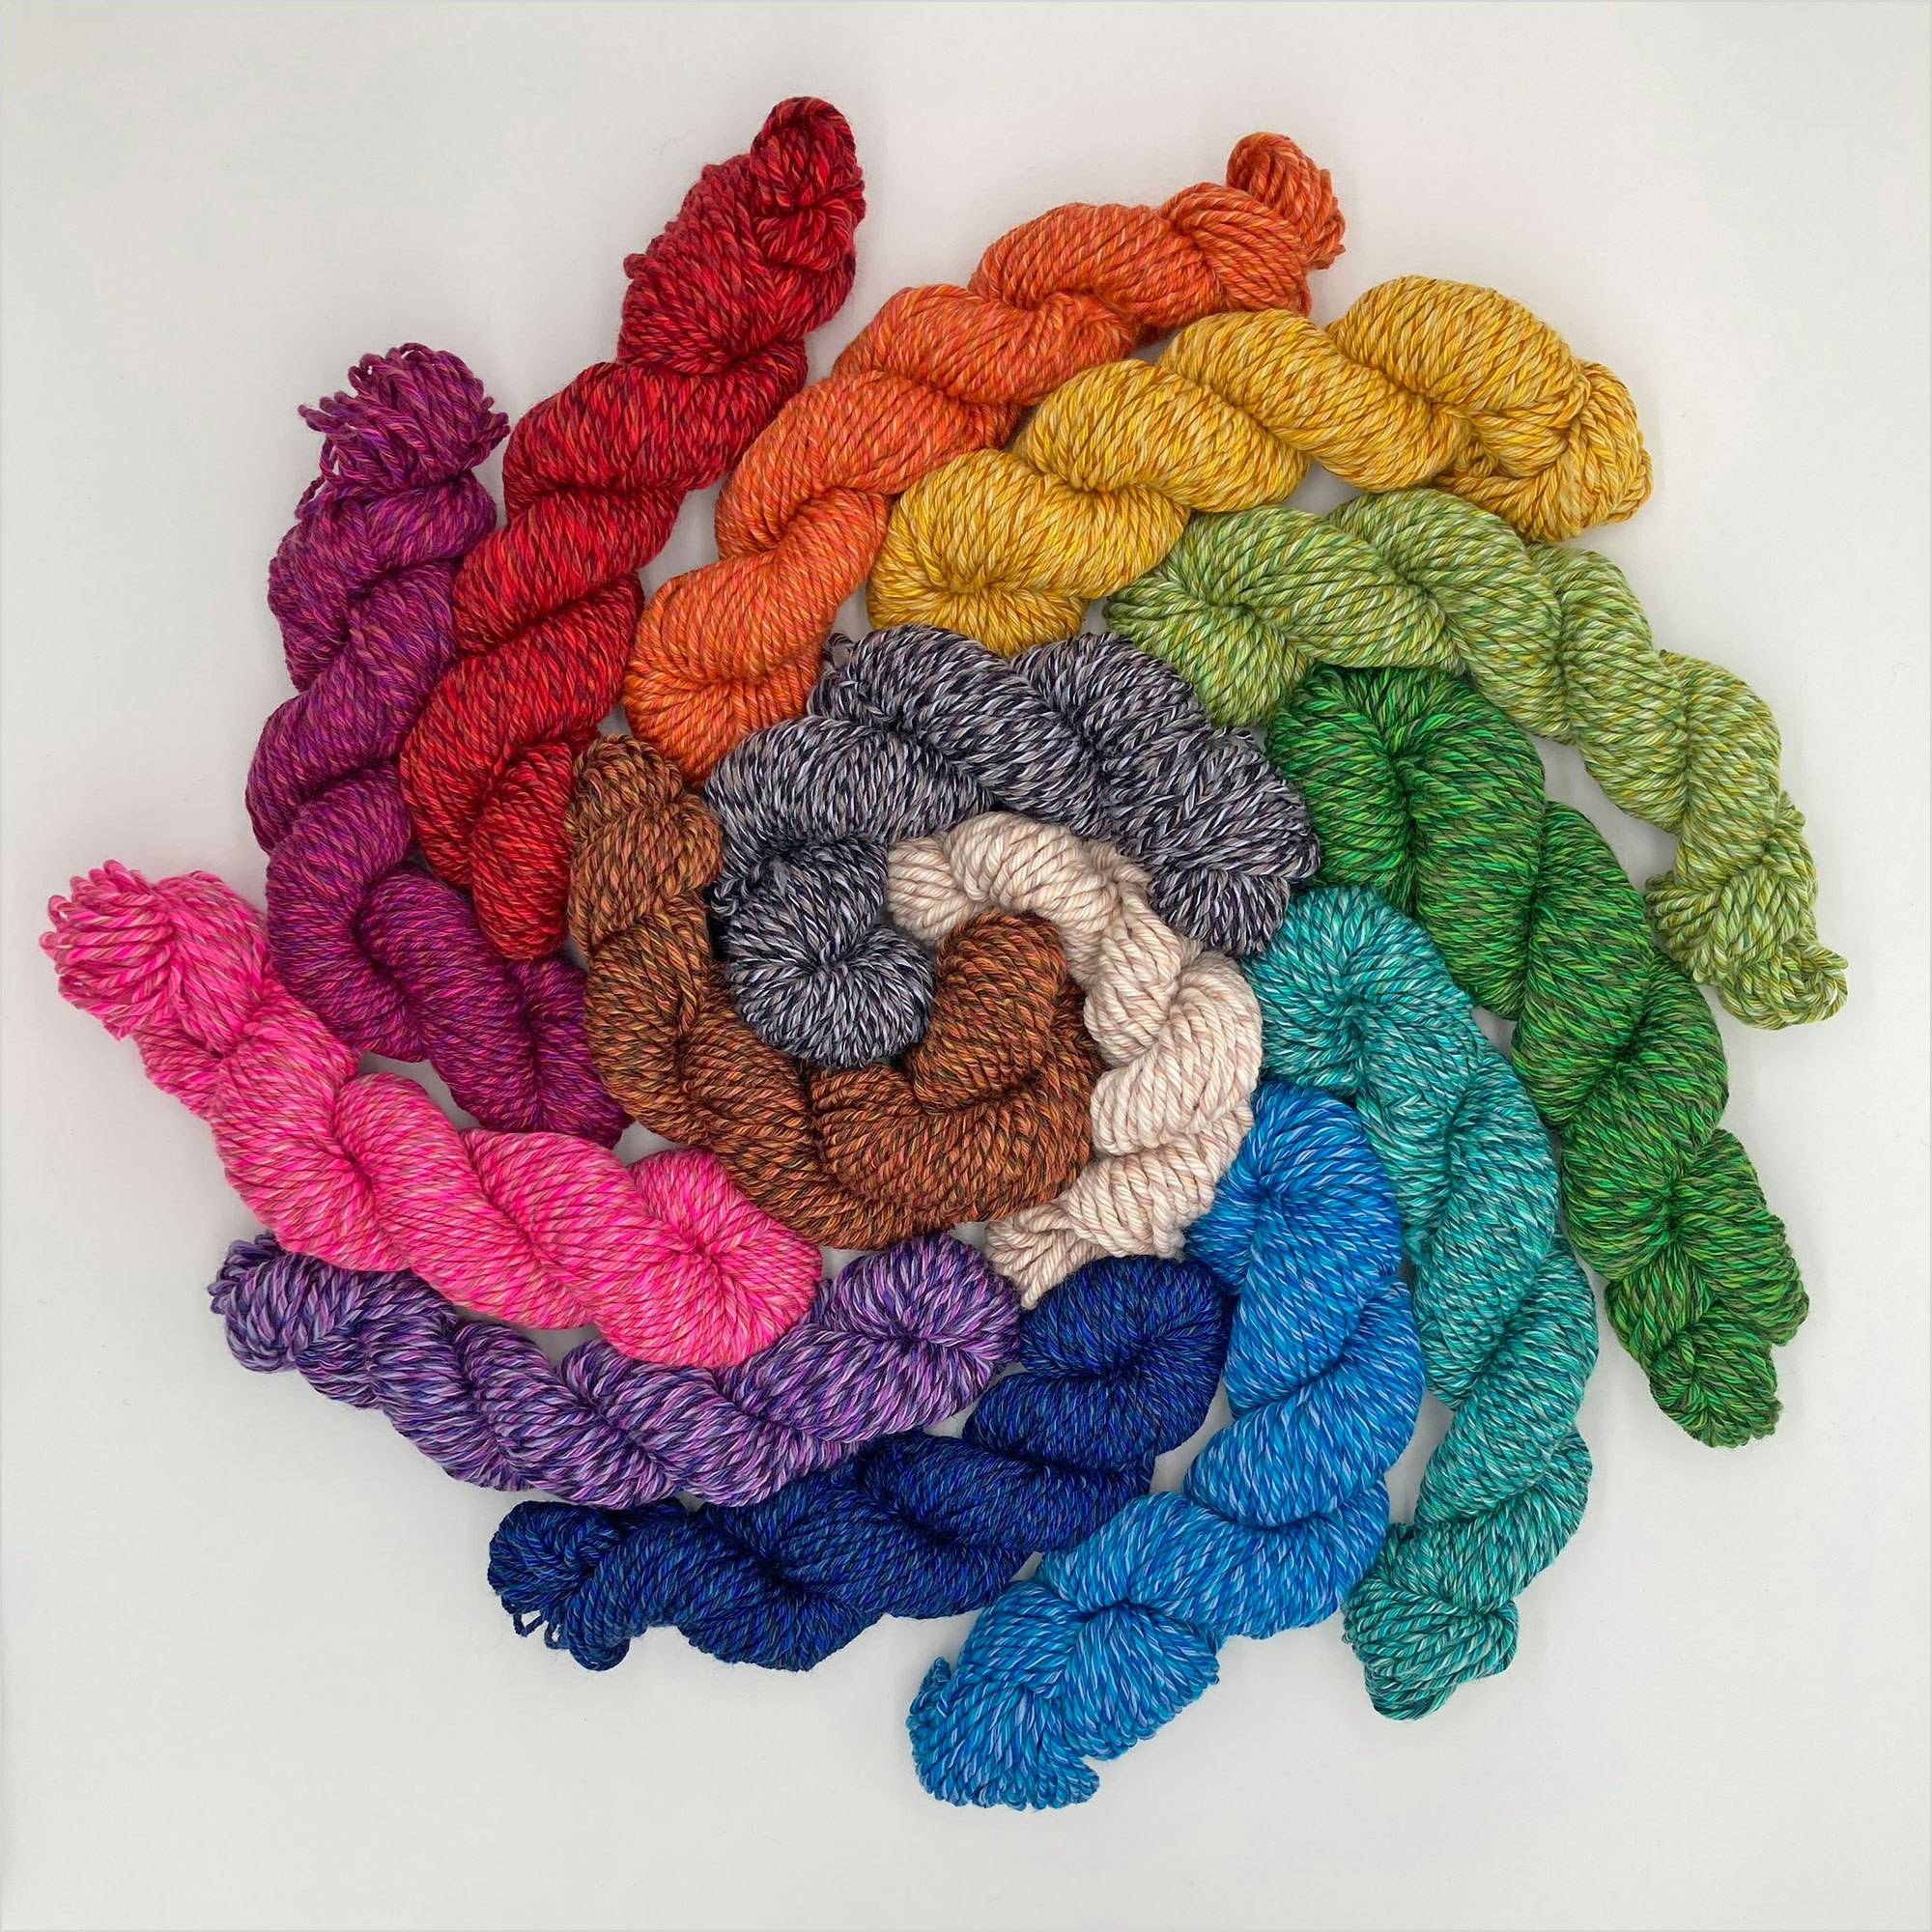
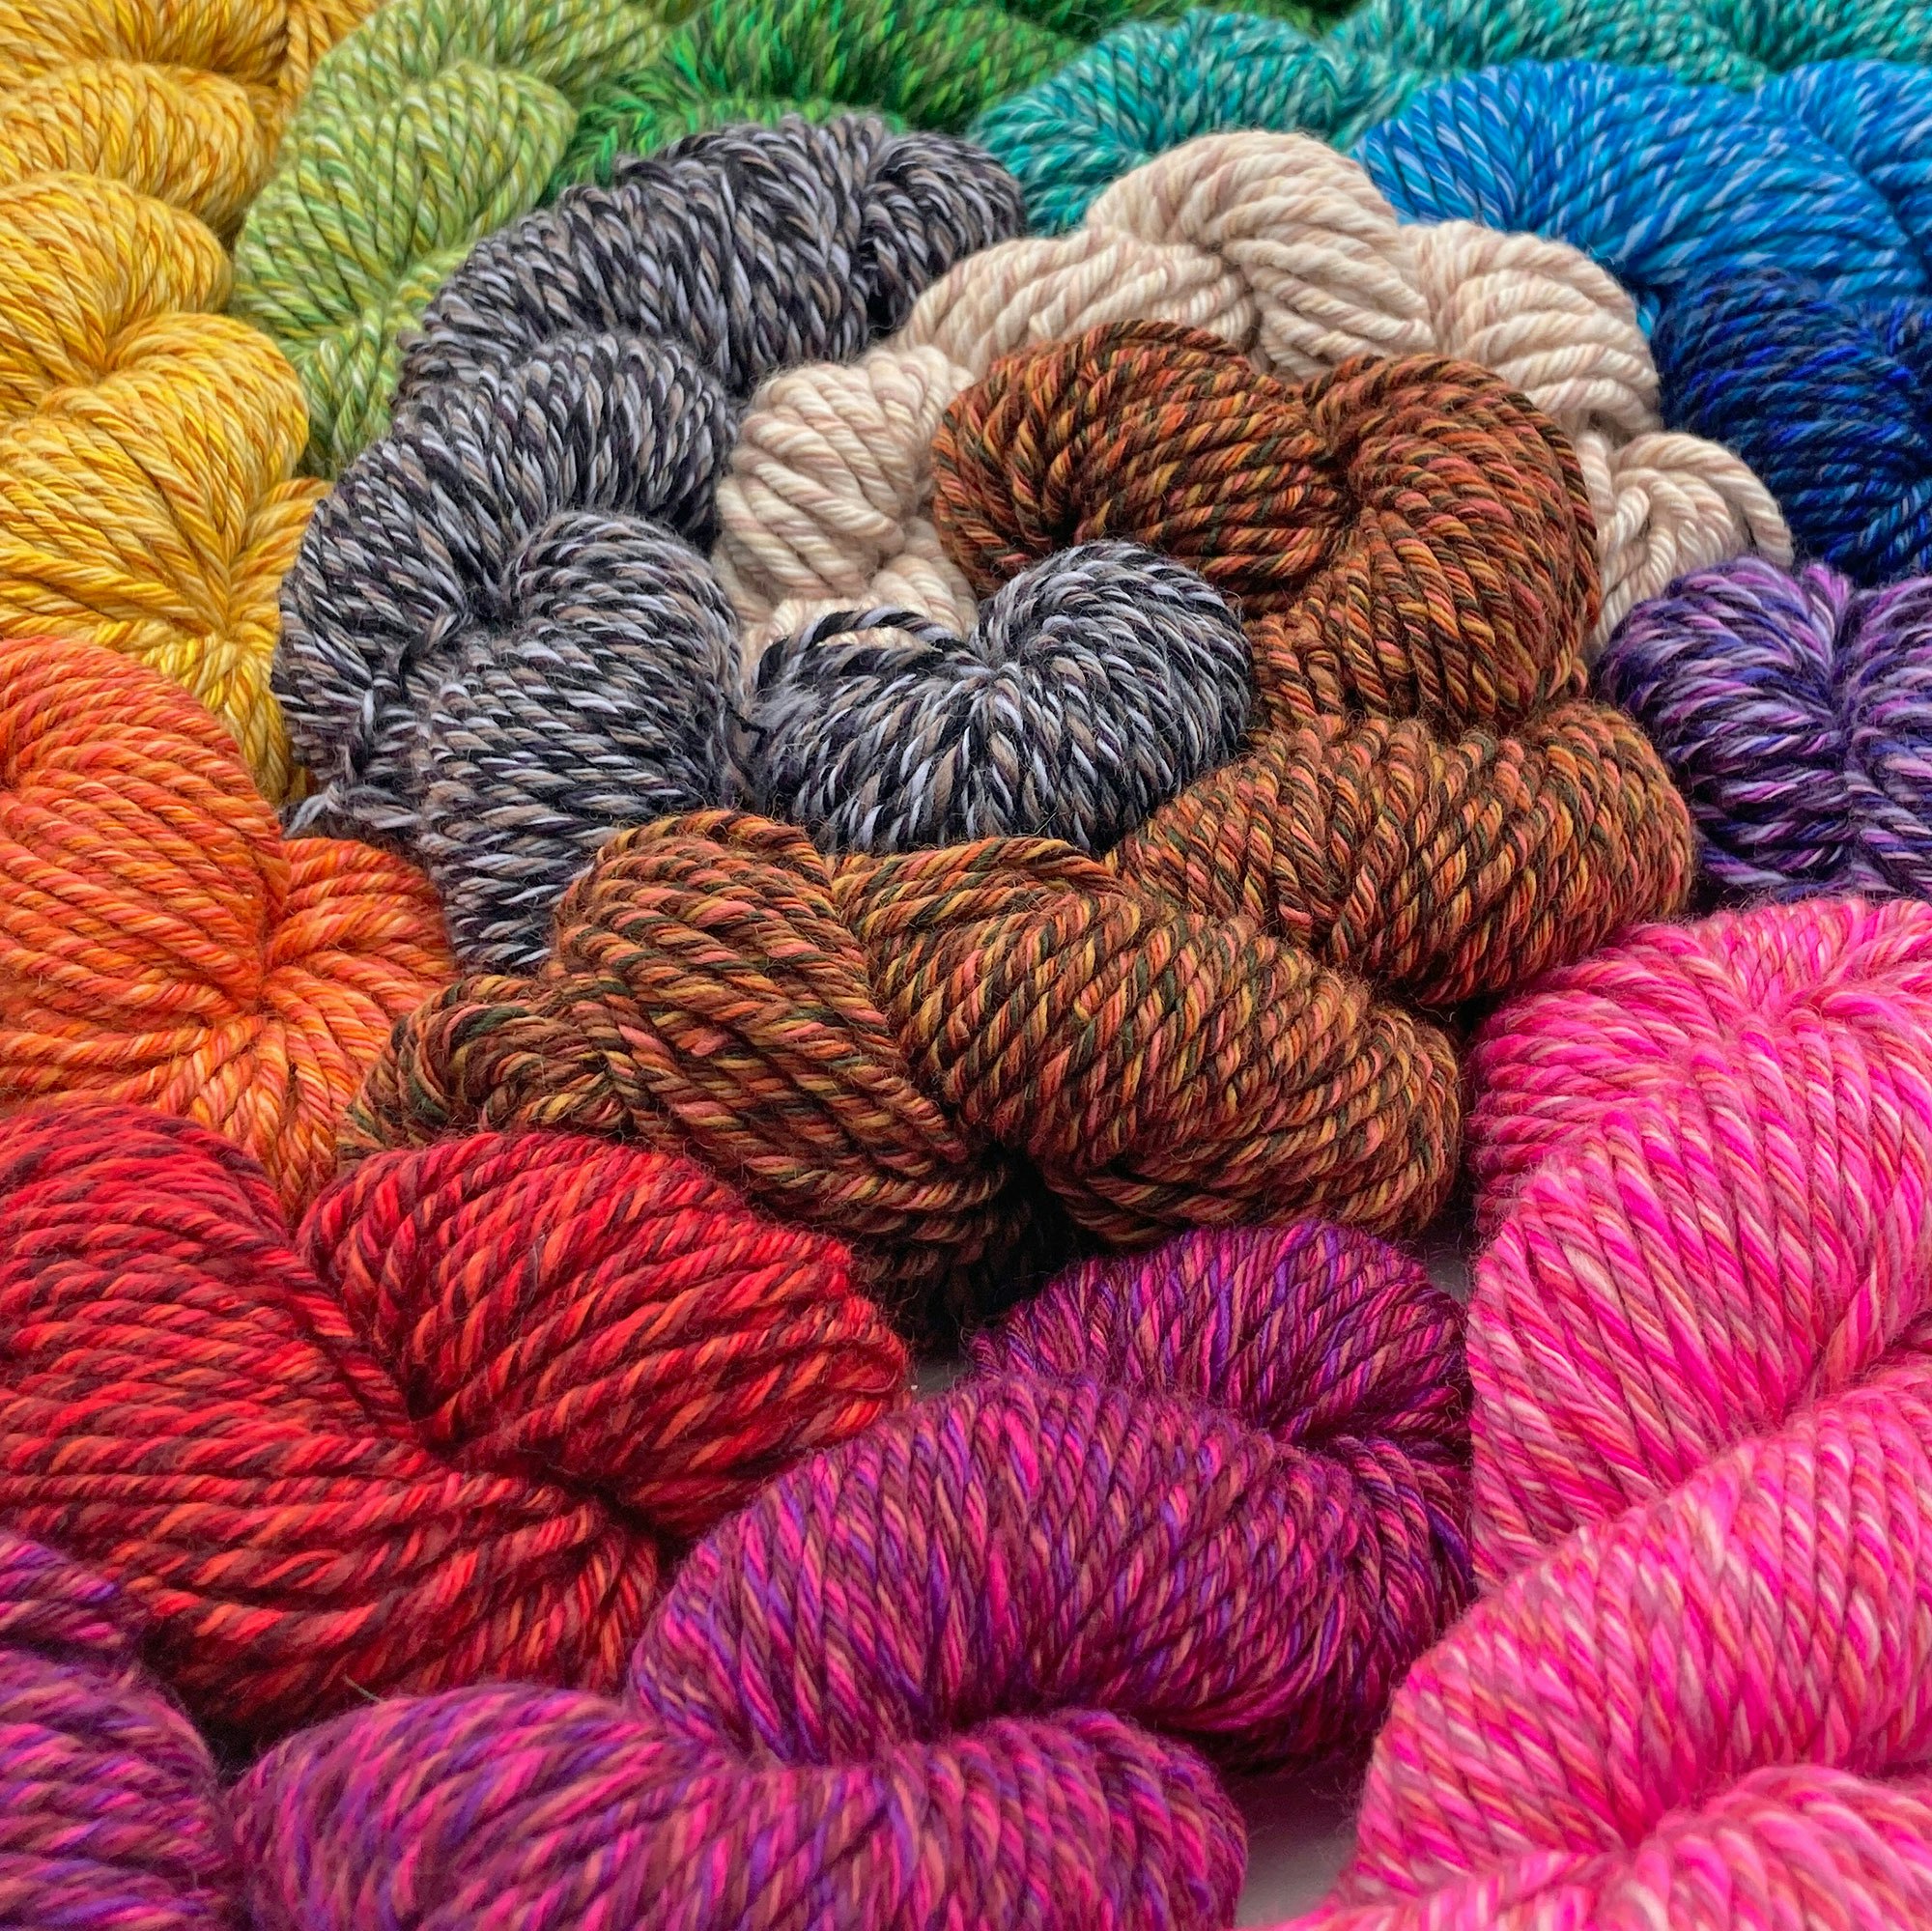
I really enjoy how the yarn has so much depth to it. From a distance, it just looks like the average color. But the closer you get, the more variation you can see.
Here are my 14 finished yarns—the 100 colors grouped into hue families.
Get a closer look! Click on any image below to zoom in on Kat's beautiful skeins.
There ended up being a lot of variation: I did this project over six months, with two different spinning wheels, two different spindles, and numerous lazy kates.
On average, the finished yarn for each color is about 90 grams, 65 meters, with a twist angle of 20 degrees, 8 wpi. I think this yarn will shine best in woven projects. It took quite a bit of labor per yard, but stands out as unique. This yarn would also look great scaled up as a bulky or super bulky yarn.
Spinning a 7- or 8-ply yarn is not quick. But seeing all of the different shades come together is quite magical.
Love color? Be sure to check out our annual color issue. The Spring 2025 issue of Spin Off comes out March 6th!
As a child, Kat Pong learned to crochet and sew from her mom. She picked up knitting and spinning as an adult. She loves natural fibers and often claims her favorite color is "Rainbow." Kat lives in Maryland, and right now her favorite thing is to come up with new yarns to spin.