
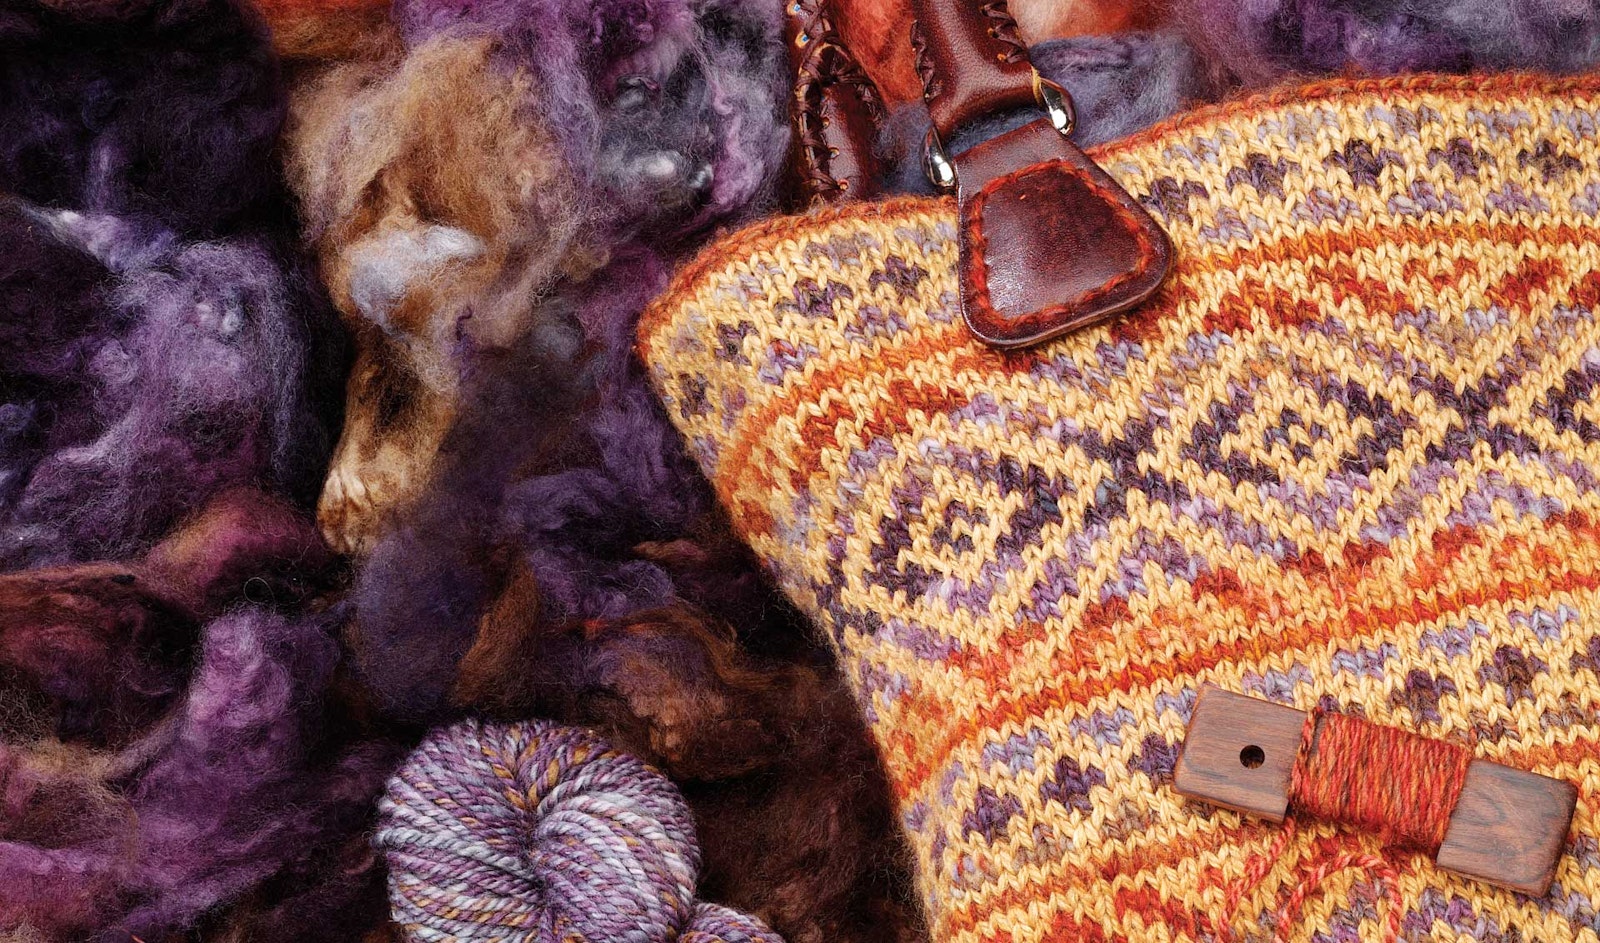
When I was a child, my pockets were always filled with treasures I had discovered here and there. I loved touching precious scraps of lace, forgotten flannel, or mislaid buttons. Now, as a handspinner, my penchant to pore over and love the bits and pieces is why I enjoy preparing fleeces lock by lock. Each lock is unique, and I love seeing how a sheep’s fleece can change from nose to tail. Flicking or combing locks requires very little equipment and is simple to do. These techniques are especially useful if spinning for color effects that begin in the lock, like the variegated dyed locks of a handpainted fleece. When I began working with a handpainted Polwarth fleece for the Golden Hour Bag, I wanted to keep the dappled colors in each lock as distinct as possible so that the variegations would show in the finished yarn. Using handcards or wool combs to prepare multiple locks at a time would have blended the colors more than I wanted for this project. My goal was to spin a smooth worsted three-ply yarn for color stranding.
Flicking vs Combing Locks
Both flicked and combed locks fall within the worsted preparation sphere, in my opinion, because the fibers are aligned. There are many almost-worsted preparation techniques, and most experienced spinners agree that a true worsted (or full-worsted) preparation would align the fibers as well as remove any short fibers. The two methods outlined here will differ in how many short fibers are removed, but both will result in a far more organized spinning fiber than a typical woolen preparation such as a handcarded rolag.
The primary difference between flicking locks and combing locks is the direction in which the tool meets the fiber. In flicking locks, the teeth of the flick card move mostly vertically, perpendicular to the staple. When combing locks, the tool moves through the fiber parallel to the staple in a brushing motion. The two methods may produce similar results when using locks that are clean and easily prepared, as was the case with the Polwarth fleece I used for the bag project. The difference can be dramatic when working with imperfect fleeces. Combing locks tends to result in more fiber loss but can also remove more vegetable matter, short fibers, and tender tips, and will loosen areas of the lock that are slightly cotted (or felted).
Safety tip
Before working with these fiber preparation tools, make sure your tetanus shot is up to date.
Tools and techniques
Flicking
Flickers, or flick cards, come in a variety of shapes and sizes. The carding cloth is covered in wire teeth that are slightly bent (this bend is called the knee). The stiffness of the teeth varies widely by maker, as do the opinions of experienced spinners on which is best. I keep an assortment of flickers so that I can choose the one that works best for the type of fiber I am working with at the time.
Flicking a wool lock: Use a piece of denim, leather, or cardstock to protect your lap while you flick. I like to hold the lock of wool between my ring finger and middle finger and then pinch the end between my thumb and first finger (Figure 1).
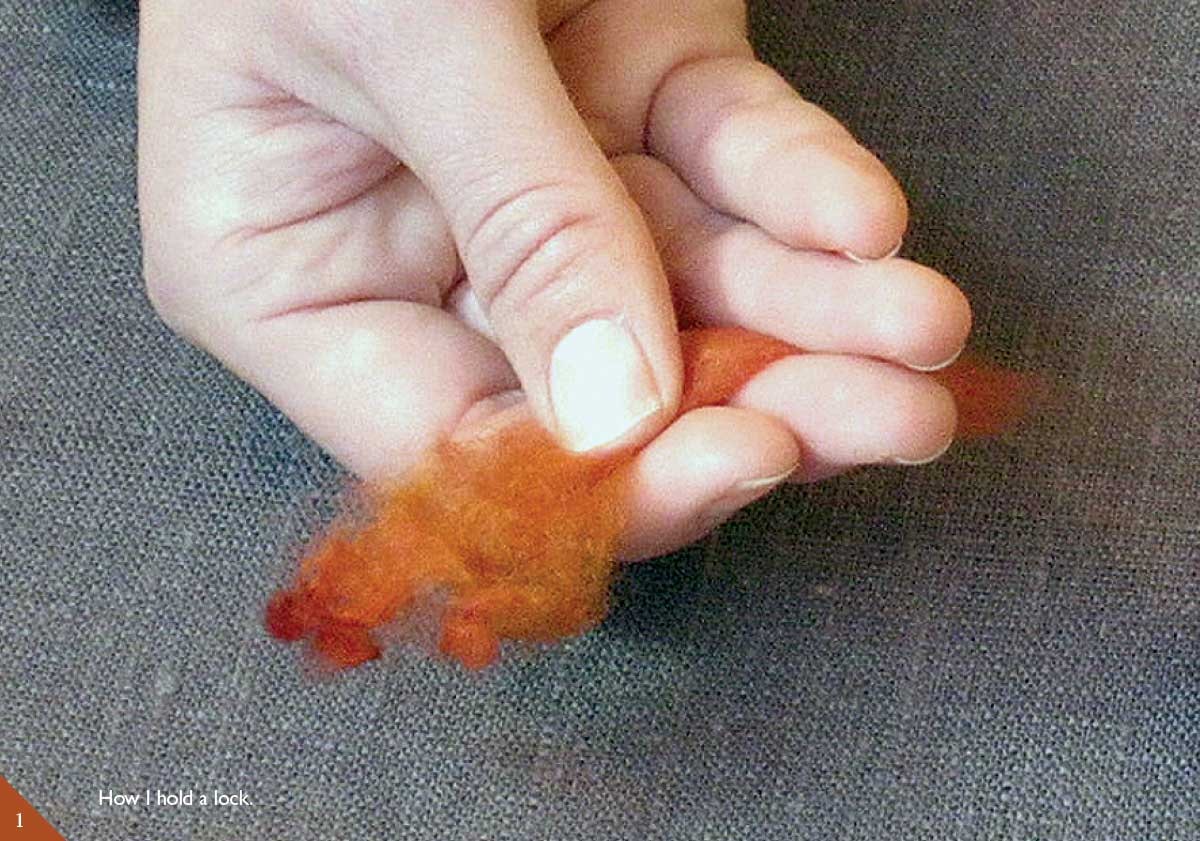
Figure 1: How I hold a lock. Photo by Olaf Larsen
Bring the flicker down onto the tip of the lock (Figure 2a). With a flick of the wrist (so to speak) move the flicker up and out of the lock (Figure 2b). Avoid dragging the teeth through the fiber horizontally, as this would be combing. Instead, think of bouncing up and out of the lock. Repeat this patting motion once or twice more, turn the lock around, and repeat for the other end. If the lock is not open after a few flicks on each end, try smaller locks. If you are still left with neps, too much vegetable matter, or tangles, try combing the lock instead.

Figure 2a: The flicker engages the lock. Figure 2b: An upward flick of the wrist. Photos by Olaf Larsen
Combing
Different types of tools can be used to comb locks. The classic book In Sheep’s Clothing refers to this technique as handcombing using a single comb. A dog comb, flicker, or even a fork may be used while holding the lock as if to flick. Alternately, the tool can be held stationary while the lock is combed against it. Alden Amos covers how to comb a lock using a wool comb or hackle clamped to a table in the Big Book of Handspinning, and Maggie Casey uses a handcard in Start Spinning. The latter method is the technique I use most often. Using a stationary handcard is similar to working with teasing boards that clamp on a table, which are often used to prepare locks before drumcarding. I usually sit at my desk with a Schacht curved handcard on a tea towel. I prepare each lock and then lay them in piles so I know the tip end from the cut end when I begin spinning.
Combing a wool lock with a flicker: Hold the lock as described for flicking on a lap cloth. Instead of bouncing the flicker, draw it through the lock in a brushing motion. Turn the lock around and repeat (Figure 3).
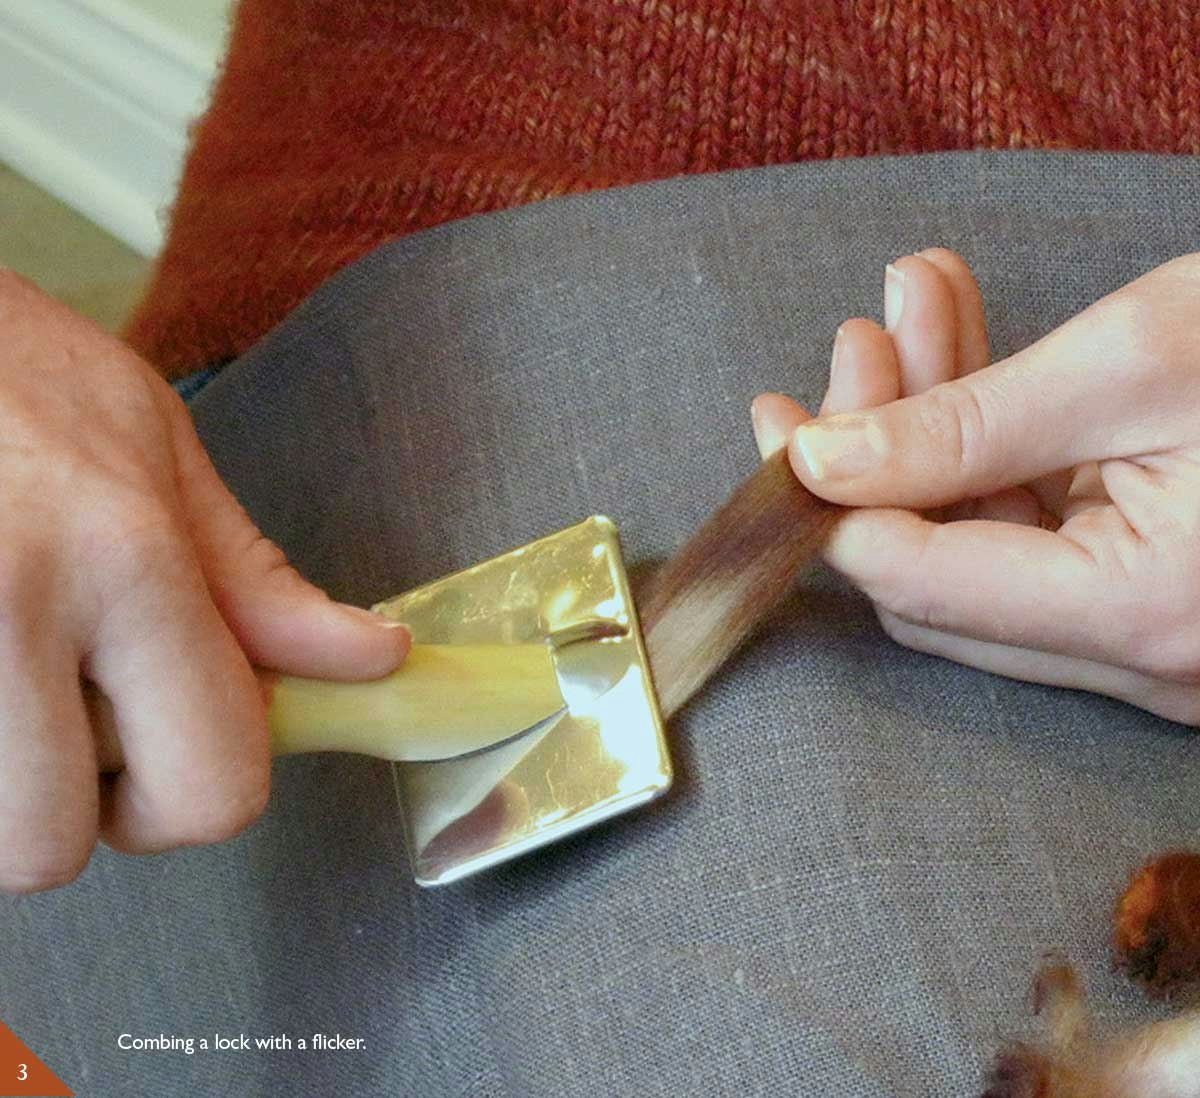
Figure 3: Combing a lock with a flicker. Photo by Olaf Larsen
Combing a wool lock using a handcard: Hold a handcard on your lap or place it on a flat surface. Hold the lock as before or give the lock a twist (Figure 4a) and pinch the twist in the center of the lock (Figure 4b).
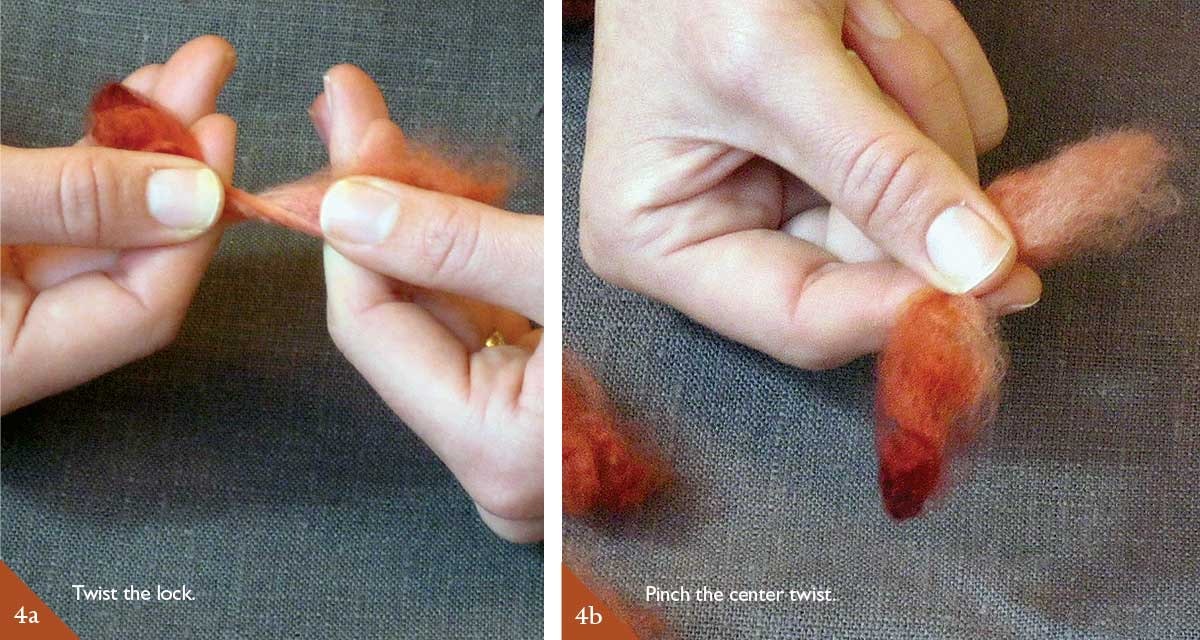
Figure 4a: Twist the lock. Figure 4b: Pinch the center twist. Photos by Olaf Larsen
Draw one end through the card once or twice (Figure 5).

Figure 5: Draw end of twisted lock through card. Photo by Olaf Larsen
Turn the lock and repeat (Figure 6).
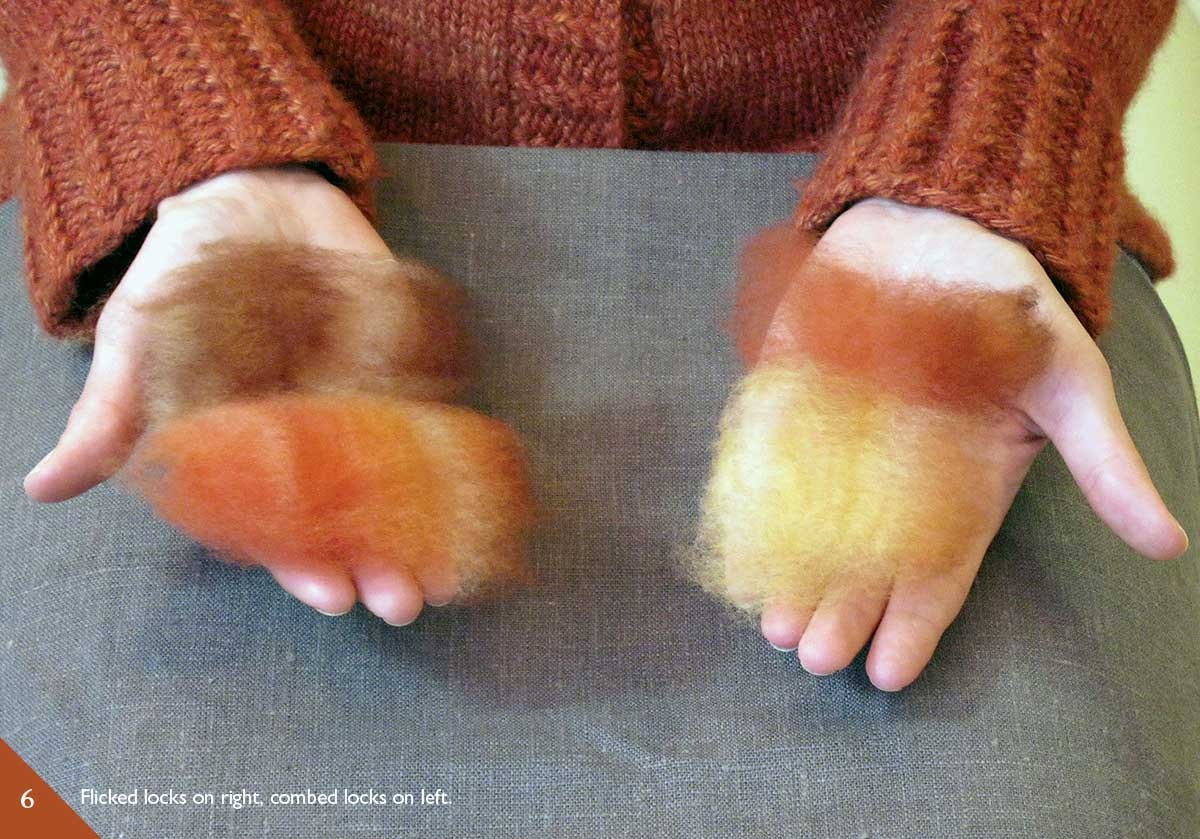
Figure 6: Flicked locks on right, combed locks on left. Photo by Olaf Larsen
Note
Being consistent in spinning locks from the tip end or cut end first is a good practice. Closely examine the cuticle (or the dead layers of the epidural scales that compose the outer husk of the individual fibers) of a wool fiber to quickly tell you which end is which. Gently slide your fingers over the lock in each direction. The cuticle will feel smooth as your fingers move toward the tip of the lock and rougher as your fingers move toward the cut end.
Resources
- Amos, Alden. The Alden Amos Big Book of Handspinning: Being a Compendium of Information, Advice, and Opinions on the Noble Art and Craft. Loveland, Colorado: Interweave, 2001.
- Casey, Maggie. Start Spinning: Everything You Need to Know to Make Great Yarn. Loveland, Colorado: Interweave, 2008.
- Fournier, Nola, and Jane Fournier. In Sheep’s Clothing: A Handspinner’s Guide to Wool. Loveland, Colorado: Interweave, 1995.
—Kate Larson
This article was published in the Spring 2012 issue of Spin Off.