
Have you gotten started with spinning? Do you have bobbins full of singles and wonder what comes next? Plying could be the answer.
How to ply yarn
To make a plied yarn, spin two or more singles together in the opposite direction the singles were spun. If you spun the singles to the right (Z-twist), then you’ll need to spin your plied yarn to the left (S-twist). The word “singles” refers to a yarn with a single twist; a plied yarn has two or more singles with two directions of twist, and a cabled yarn has three (or more!) directions of twist. Plying makes a stronger, more stable, and more consistent yarn. It averages out the diameters of the singles as they are plied together. The more singles used to make a plied yarn, the more even the resulting yarn will be.
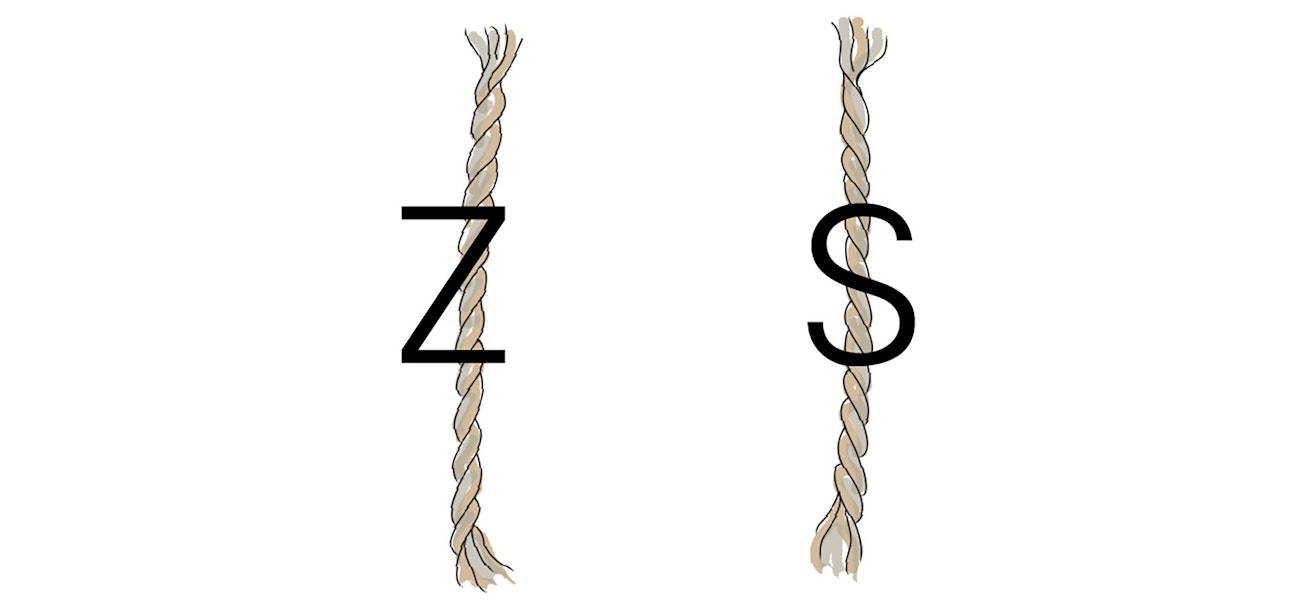 Most modern commercial yarns and handspun yarns are created with Z (right) spun singles and S (left) ply twist. Illustration by Ann Sabin Swanson
When plying, twist enters all the singles at once. To make a 2-ply yarn, you hold 2 singles together and twist them in the opposite direction the singles were spun. To make a simple 4-ply yarn, you hold 4 singles together and twist, again in the opposite direction the singles were spun. Another way to make a 4-ply yarn is to twist together two 2-ply yarns; this is called a 4-strand cable and feels and acts differently than a simple 4-ply yarn when it is worked into cloth. To ply yarn, start by spinning—all in the same direction—the amount of singles you want to ply.
Yarn control for plying
Once you have spun your singles, place the bobbins on an apparatus that allows them to spin, such as a lazy kate. Many spinning wheels have built-in racks or rods for extra bobbins; however, unless the wheel is designed with a vertical plying frame, such as Louet and Schacht Ladybug wheels, the odd angles make them difficult to use for plying.
If you don’t have a kate, you can quickly fashion one! All you need is a shoe box wide enough to accommodate your bobbins, and two knitting needles. Poke a knitting needle through one side of the shoebox, slide the bobbin onto the needle and poke the needle through the other side of the box. Repeat with the other needle, spacing the bobbins far enough apart that the singles won’t tangle and, voilà! You have a lazy kate that allows the singles to feed off of the bobbins freely. When you put your bobbins on any type of kate, make sure the singles are pulling off in the same direction to avoid tangling.
 Left: Debbie Held made a lazy kate from a plastic basket, knitting needles, and point protectors; photo by Debbie Held. Right: Kate Larson plies with the lazy kate an arm’s length away, beside and slightly behind her; photo by Donald Scott.
How to ply yarn step-by-step
Now that you have your bobbins on a lazy kate, tie the singles onto your leader and organize the singles for plying. While there is no set way to ply yarns, this is the method Judith MacKenzie suggests in her article “The Art of Plying” in the Summer 2006 issue of Spin Off.
With the palm of your drafting hand facing you, place your middle finger (and ring, and pinky fingers for more plies) under and between each single close to where they come together in the twist. Use your fingers to guide the individual singles so that all enter the twist at the same time. This leaves your thumb and forefinger free to pinch and draft as you would when spinning short draw. If for any reason you need to let go, say to give the wheel a nudge in the right direction, let go with this hand. Your other hand is the tensioning hand, you’ll use it to keep everything in order. Keep the tensioning hand in one place, holding the strands apart as they come off the bobbins.
 Use the front hand to keep the two singles separate as the twist enters; the back hand keeps the singles under tension. Photo from New Spinner's Guide to Plying, Long Thread Media
Start spinning in the opposite direction to which the singles were spun. With your thumb and forefinger of your drafting hand, grasp the singles and pull them through the tensioning hand and forward toward the wheel’s orifice. When your fingers reach the orifice, loosen your grip and draw or slide smoothly back along the singles toward the tensioning hand. The twist will follow your fingers back. When you reach your tensioning hand, pinch your thumb and forefinger around the yarn so the twist can’t go any farther.
Pull the pinched singles forward, feeding the plied yarn onto the bobbin. The slower you draw back and then feed the yarn onto the bobbin, the more twist you will add to your yarn, the faster you move the less twist you create. Repeat this process until you are done plying all your yarn singles. Add new bobbins by tying them on or grafting the ends together.
To learn more
If that sounds daunting, don’t worry—you’ve got the likes of Maggie Casey, Judith MacKenzie, Rita Buchanan and other spinning masters within the pages of our free eBook,“How to Ply Yarn: From Plying on a Drop Spindle to Creating Plied Yarn on a Wheel,” to guide you through the process.
Find the “How to Ply Yarn” eBook in the Spin Off Library.
More resources:
- New Spinner's Guide to Plying video, with Anne Merrow
- The Gentle Art of Plying video, with Judith MacKenzie
- “Plying Yarn from Spindles”
- “Plying Balls: How I Ply on Spindles”
- “How to Ply on the Fly”
- “Spinning and Plying for Twined Knitting”
- “Plying for Balance”
Originally published October 20, 2017; updated May 23, 2022; updated April 23, 2025.