
Children can craft their own little loom using a piece of cardboard and use it with their handspun (or other) yarn to create a small woven bag our pouch that’s just right for holding coins, candy, pencils, toys, makeup, bead or rock collections, or even small spindles!
What you’ll need:
- A piece of heavy cardboard
- Scissors
- Masking tape
- Tapestry needle
- Yarn
- Wide-tooth comb
Instructions:
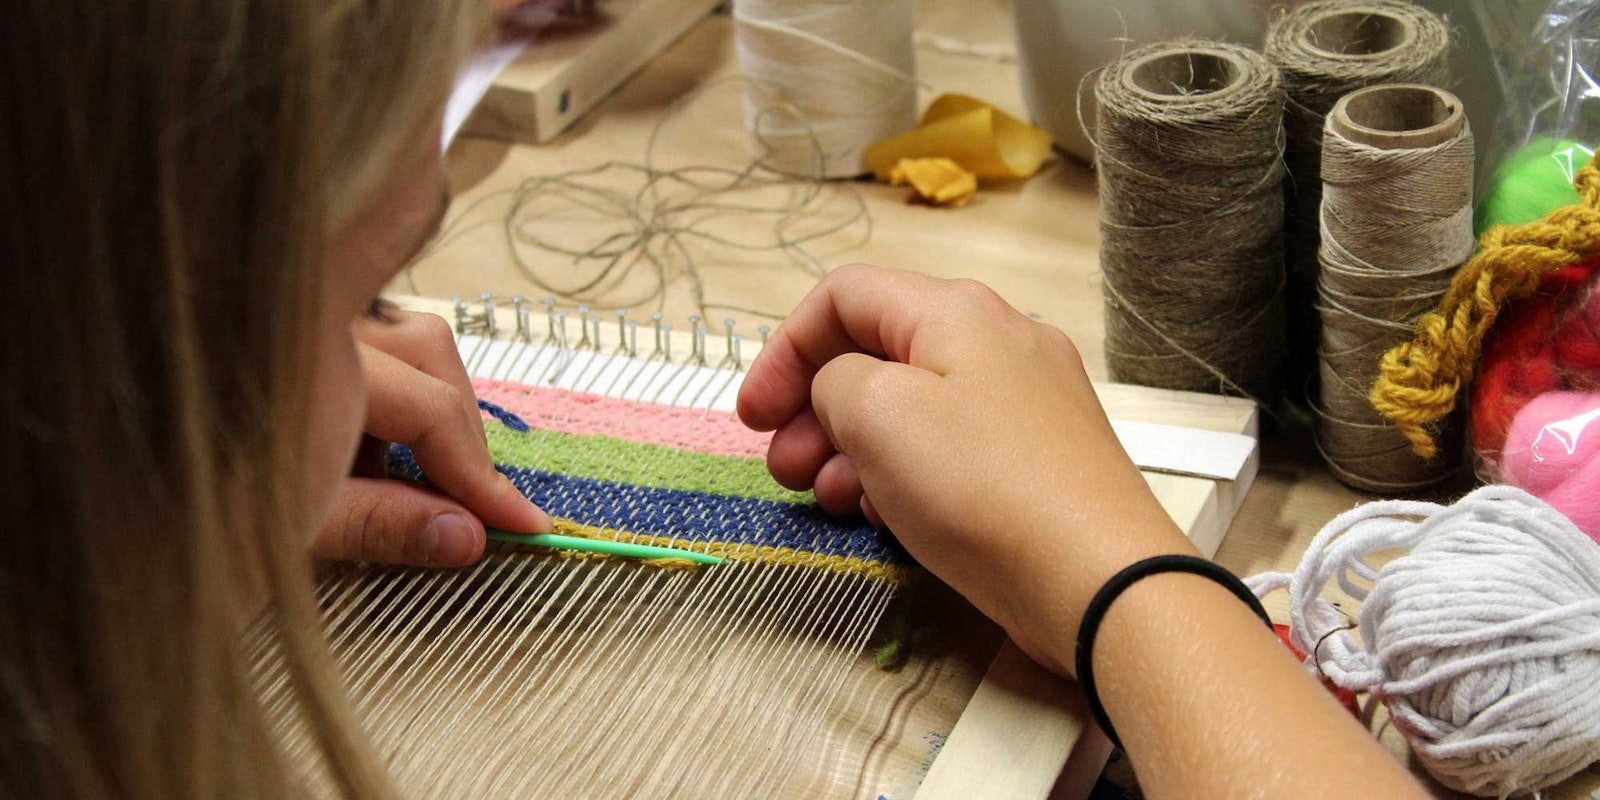
Cut a piece of heavy cardboard to the size you want your finished pouch to be. Mark off its top in ¼-inch (6 mm) increments; you may want to add an extra notch on each end. Cut the notches about ¼-inch (6 mm) deep. Note: You’ll need an odd number of total warps for weaving-in-the-round to work.
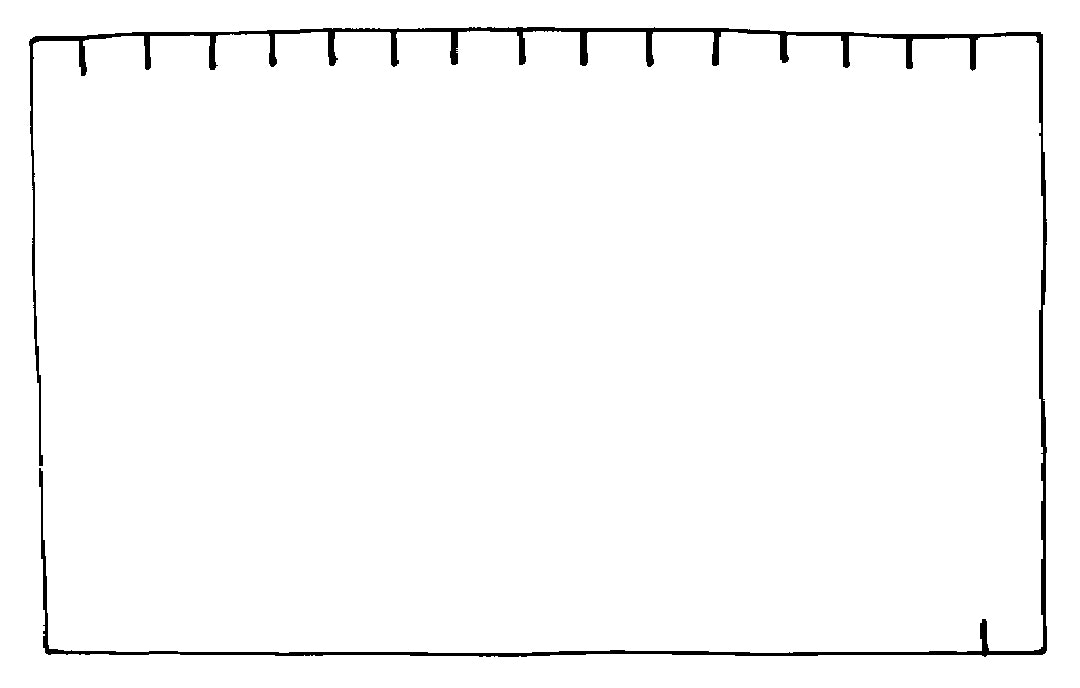
Leaving a three-inch tail of yarn at the beginning and at the end, wind your yarn up, down, and around the loom, as illustrated. This allows loops to form alternately on both sides of the notches, which will make an opening at the top of your weaving. Use a fairly strong thread for your warp, but it can be handspun!
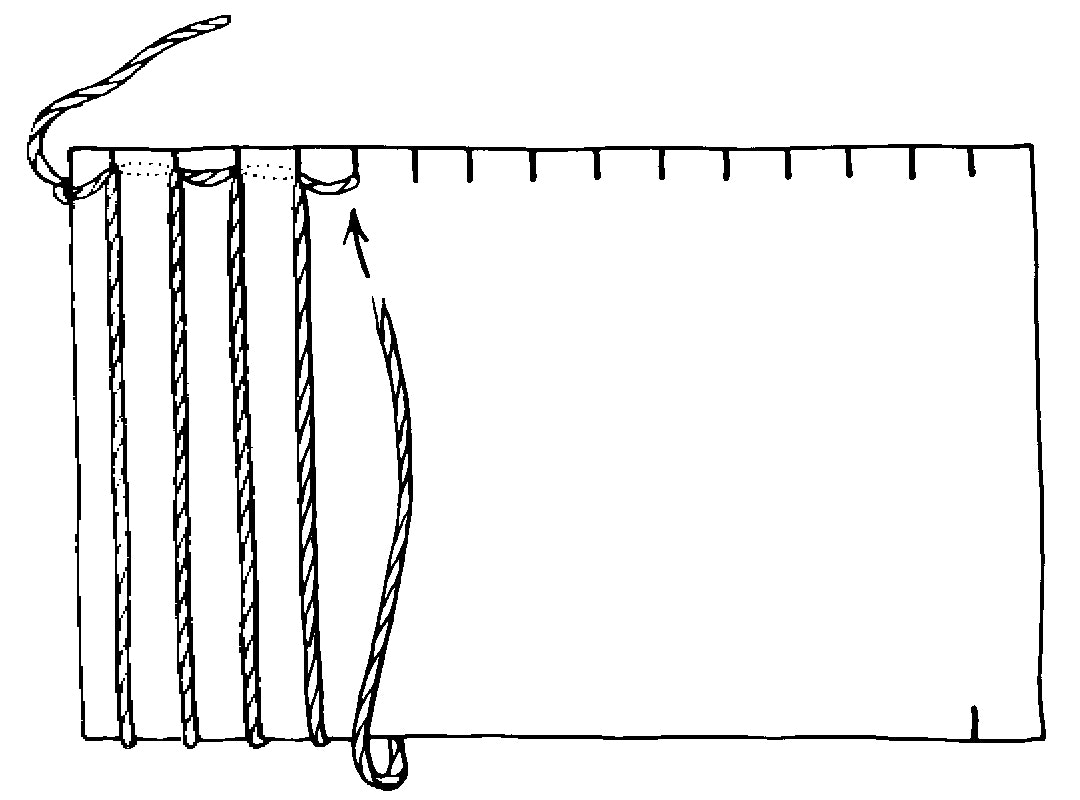
Fold a piece of masking tape over the top edge of the loom to secure the loops and tails of yarn while you are weaving. Thread a tapestry needle with a piece of yarn about 5 feet (1.5 m) long. Start at the bottom (the un-taped end) and weave a row under and over each thread, all around the cardboard. Keep weaving around and around the cardboard loom, packing the rows down very tightly using a comb as a beater.
When beginning each new thread, overlap the yarn ends, even when changing colors, unless you are working on a special pattern design. You may switch colors at any time, or use simple patterns (such as one row in a dark color, followed by one row in a light color), or try two contrasting colors threaded through your needle at once.
When you get near the top, weaving proceeds more slowly. Finally, remove the tape and squeeze in a few more rows. This takes patience! (If the weaving is being done by a small child, an older child or adult will need to help at this stage.)
Now slip the loops off the top using your needle. Bend the cardboard and carefully slip the pouch off. Turn it inside out. Weave in any loose ends. Line the pouch if it is loosely woven. Insert a drawstring, if you like, or close with a button and a yarn loop, or even add a zipper or a Velcro closure.
Other resources for teaching children about spinning and weaving:
- “How I Turn Children into Spinning Wheels”
- “Connecting Kids and Cotton”
- Zoo Crew: 12 Pin Loom Animals to Weave eBook
This article was first published in Spin Off Winter 1995, where the text and drawings were contributed by several readers. The words here are Judith Towers’ and the illustrations combine materials from several teachers. –Editors
Also, remember that if you are an active subscriber to Spin Off magazine, you have unlimited access to previous issues, including Winter 1995. See our help center for the step-by-step process on how to access them.
Originally published April 21, 2020; updated July 5, 2023.