
Contents
Any fiber enthusiast understands the Call of the Accessories, that urge to gather tools that help make our fiber activities the best they can be. I think of my blending board as an accessory to my spinning, and I find a certain glee in having accessories for that accessory.
Although most blending boards sold today come with several standard accessories, adding a few helpful tools to your blending kit can help you work more easily and even expand the creative preparations you produce.
Basic Structure of a Blending Board
At its simplest, a blending board is a flat piece of wood with carding cloth mounted on one side. The tines that make up a carding cloth have a bend in the middle, called the knee. Tines can be stiff or flexible, long or short, widely or closely spaced. All of these factors influence the nature of blending. Most blending boards have carding cloth with longer tines than the carding cloth on handcards.
The bend in each tine gives directionality to the blending board cloth; this means the fibers will catch in one direction while being easily removed in the other. The tines are pointed toward the top of the blending board. The opposite end of the board is therefore the bottom.
 A blending board is a flat piece of wood with carding cloth mounted on one side.
Standard Accessories
Most blending boards come with some sort of brush. These range from a stiff paintbrush to something like a flick carder, except that the tines point in the opposite direction from those on a flick carder; I think of it as a “reverse” flick carder. This tool is necessary for brushing the fiber onto the blending board.
Many blending boards provide a keel, or block, that attaches to the underside of the board, allowing you to work with the blending board in your lap in a variety of orientations or at an angle on a tabletop.
Most blending boards also come with two (or more) dowels or a dowel and a thin metal rod. These tools are used for rolling rolags as the fiber is removed from the blending board.
 Standard blending board accessories include a keel that lets you angle the blending board, dowels for rolling rolags, and a brush. As you build you build your blending board accessory kit, you may also find other accessories helpful.
Helpful Tools
Blending accessories include anything that helps you get the fiber onto the blending board and back off again. Here are a few to get you started.
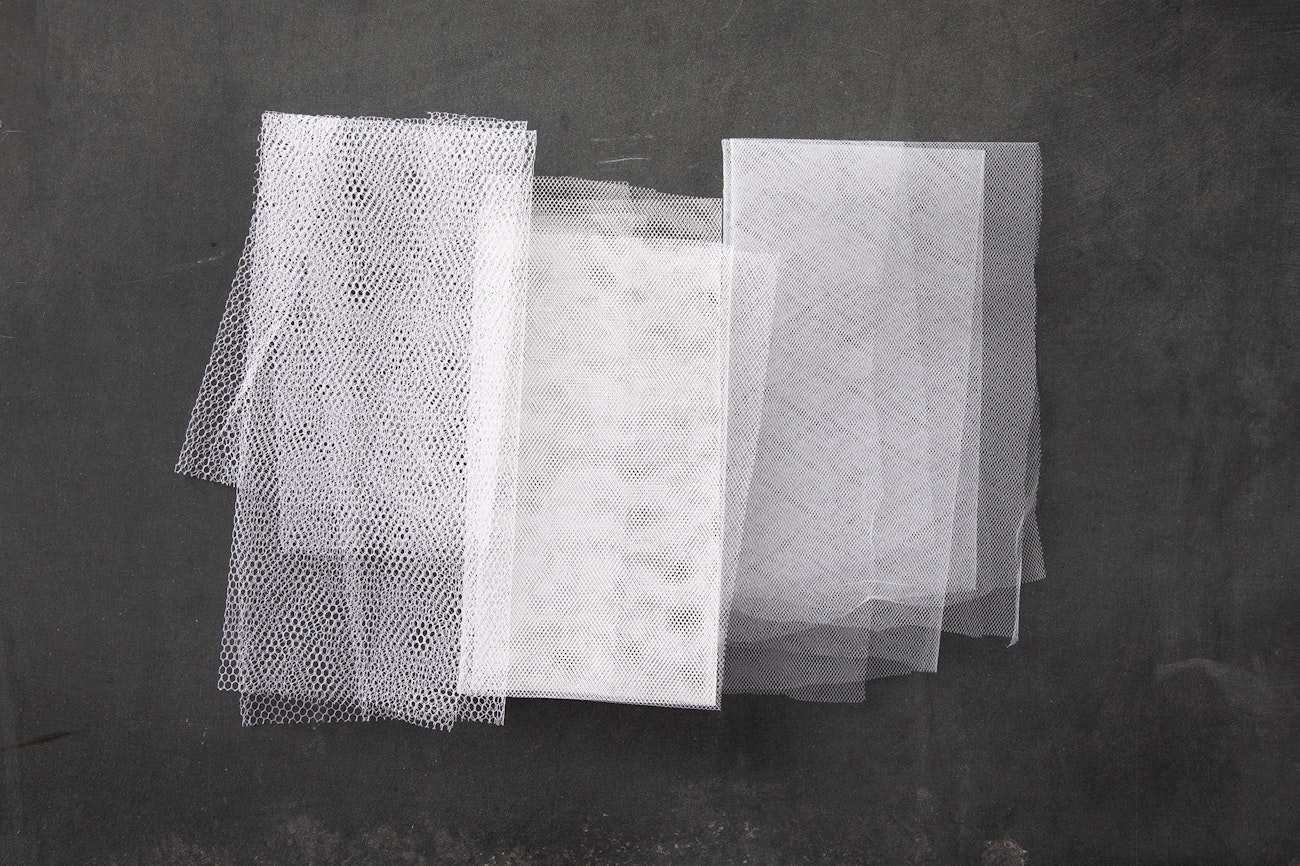
Tulle comes in a variety of weights and sizes.
Tulle
Tulle, or netting, is an incredibly useful accessory for the blending board. The basic idea is to apply a layer of tulle to the base of the carding cloth tines on the blending board before you begin adding fiber.
This base of tulle does several things. First, you can use it to remove the fiber from the blending board in the form of a batt instead of as rolags. Second, the tulle protects the board so that tiny bits such as vegetative matter and noils do not get stuck at the bottom of the tines. In this case, I think of the tulle as acting like an apron, keeping things tidy. Third, if you are interested in creating batts for wet-felting, use two layers of tulle: one at the base of the boardand one on top of the fiber. When you remove the tulle and fiber sandwich, you are ready to begin felting.
I have tried several “gauges” of tulle, from very fine (small holes) to medium (holes a bit larger). I have had the best luck with tulle that is not extremely fine, but more importantly, the tulle should be rather stiff. If it is stiff, then you can use it over and over again. If the tulle is flimsy or stretchy, it tends to rip as it is applied to the blending board, making it more of a single-use accessory.

A variety of brush and sandpaper options.
Brushes
I am of the opinion that the greater the variety of brushes you have, the better. Sometimes if you aren’t getting the effect you want, a simple change of brushing tool will help.
For applying fiber to the blending board, a very stiff paintbrush about three inches wide works well. A flick carder is also helpful for applying fiber to the blending board. Because of the orientation of the tines on a standard flick carder, you will need to brush the fiber from the top of the blending board toward the bottom (as usual), with the handle of the flick carder pointing toward the top of the blending board.
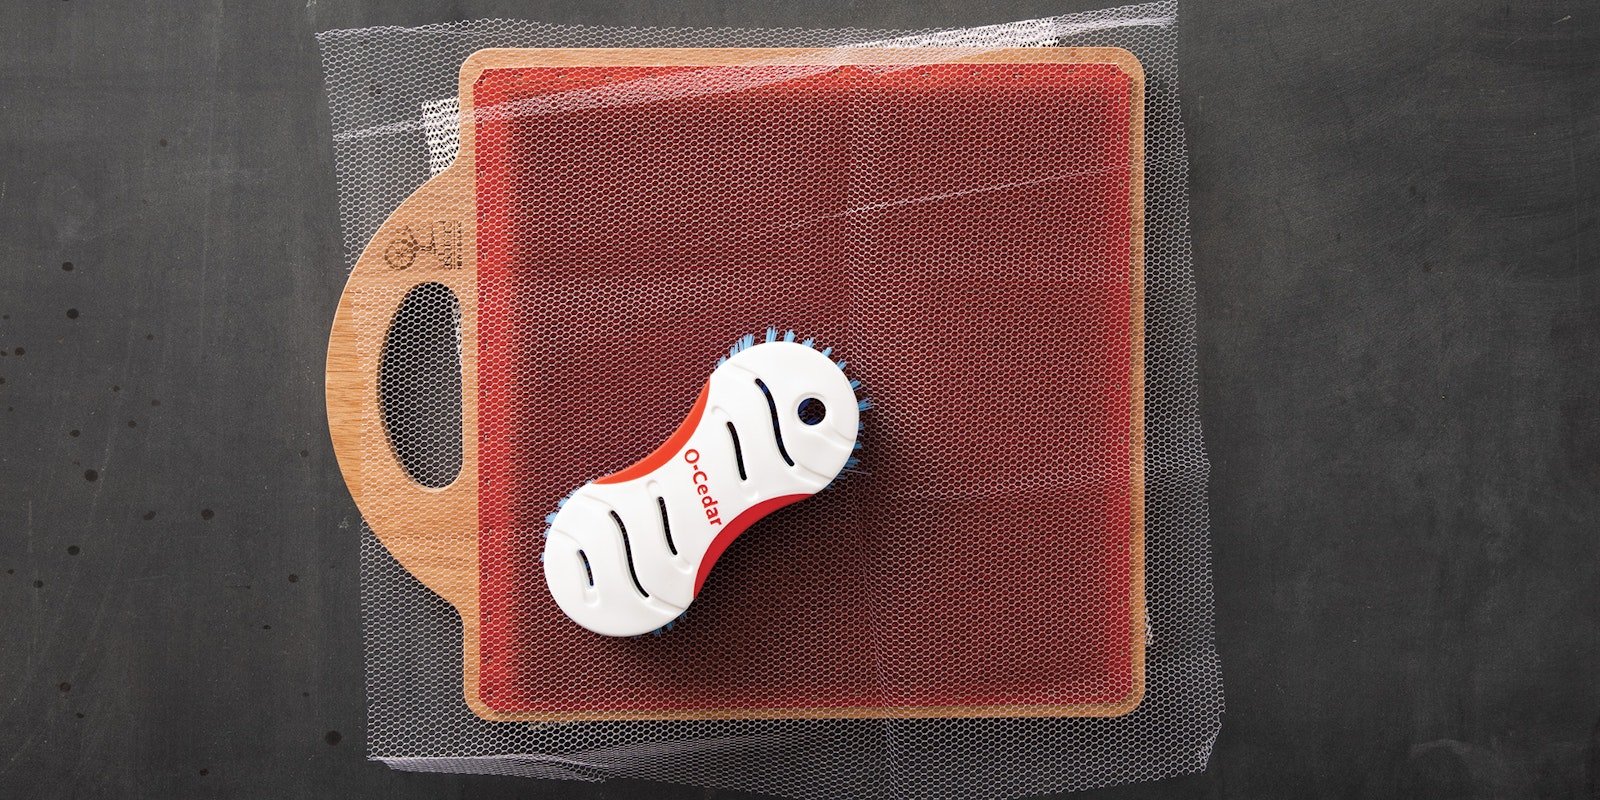
For applying tulle to the blending board, I have found that a plain old scrub brush works beautifully. Indeed, any brush with stiff bristles will work: nail brushes, grout brushes, or other small scrub brushes. (These are the same type of brushes I use for fuzzing up yarn when I am preparing to make tweed yarns.)
For applying fiber for wet-felt “painting,” I’ve found that art paintbrushes work well. I have a variety of sizes on hand. You don’t need to get high-end paintbrushes, but those with stiff bristles tend to work best for me. I have even used a toothbrush with firm bristles successfully.
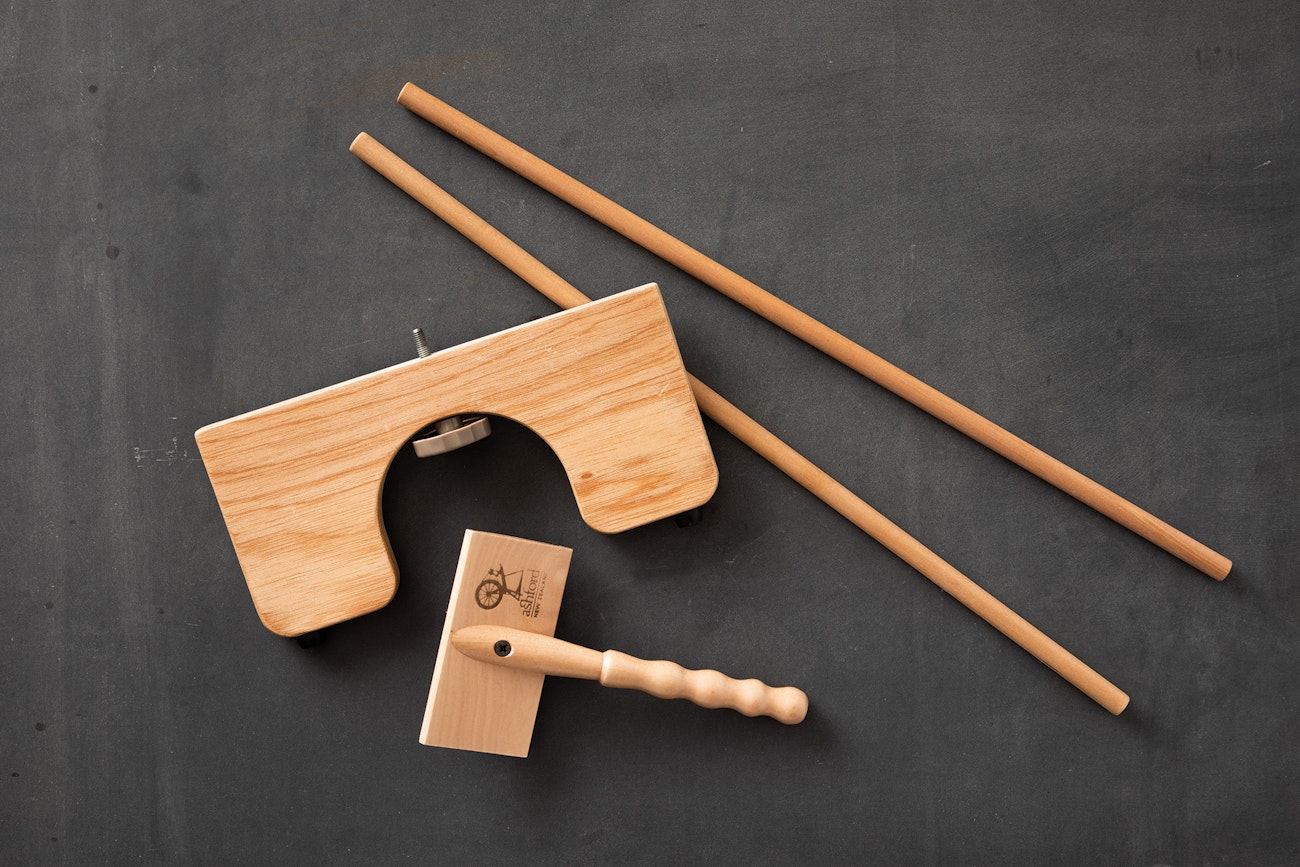
Ashford blending board accessories. Clockwise from bottom: brush, keel, and dowels.
Other Useful Accessories
When using a blending board on a tabletop, nonskid shelf liner is great for stabilizing the board while you work. If you have new wooden dowels, fine-grit sandpaper will help smooth the surface of the dowel so that the rolags slide off easily. You might find that having several dowels with a variety of diameters can be beneficial. Clemes & Clemes has dowel sets available; Henry Clemes told me that the larger dowels work well for long-staple fibers, while the small dowels are best for short-staple fibers.
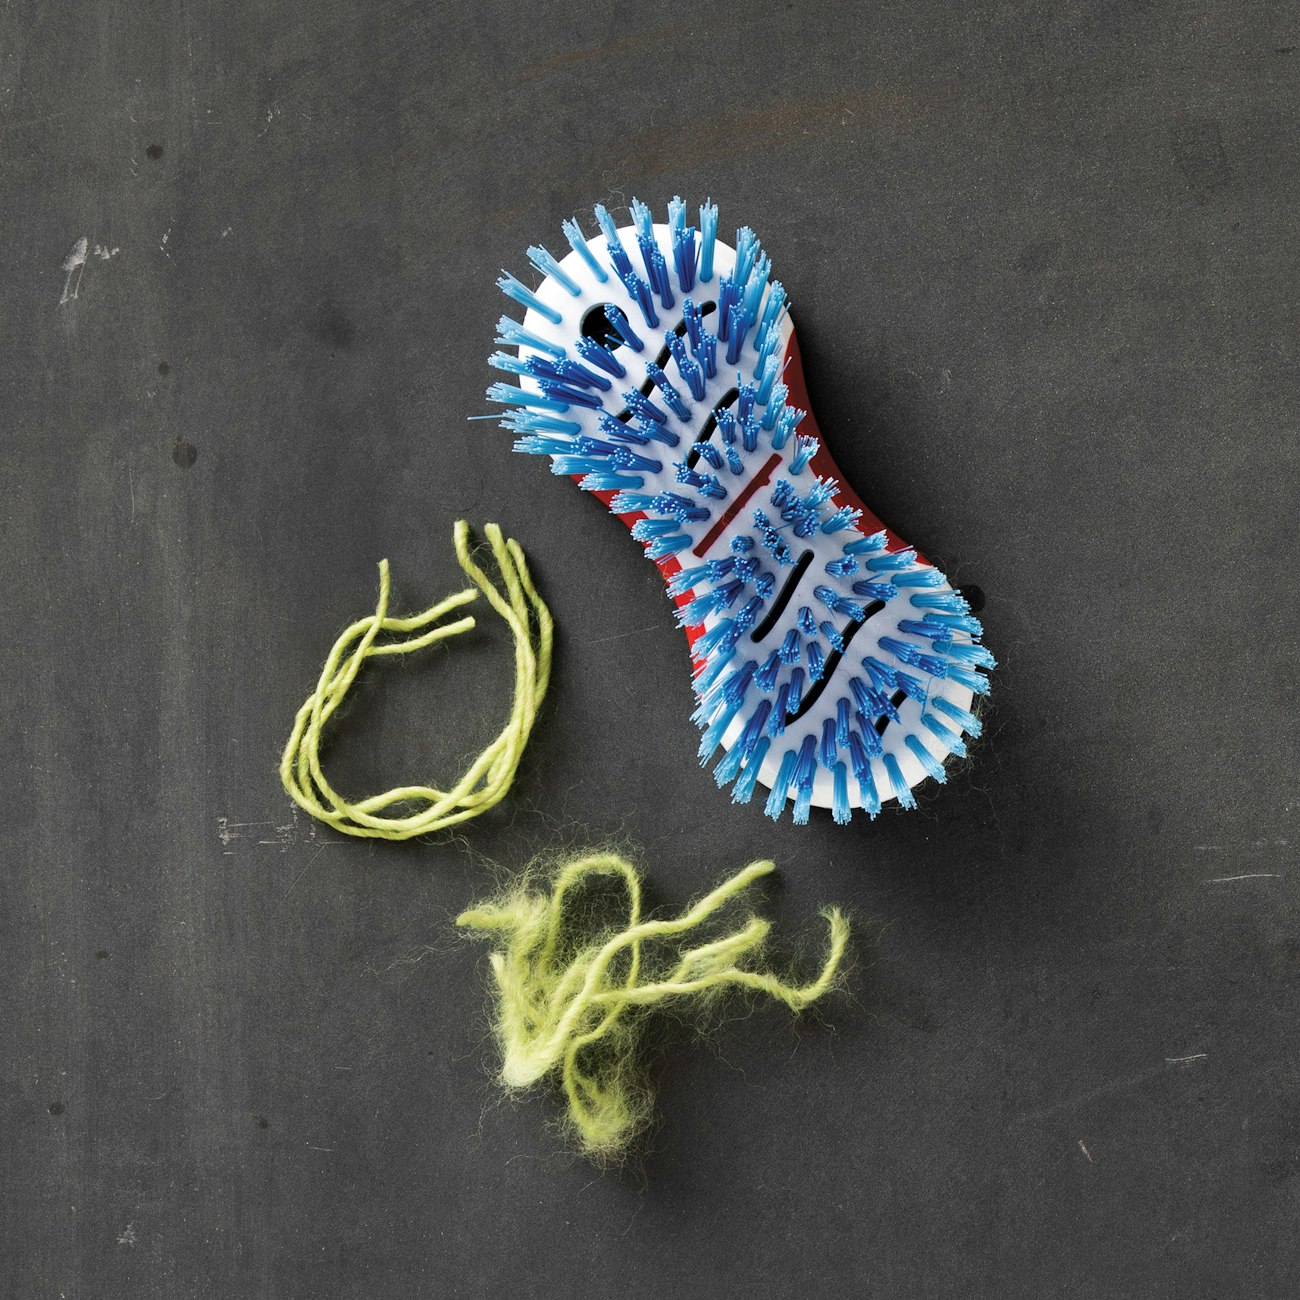
Scrub several short lengths of leftover yarn between two stiff brushes.
Batts on the Blending Board
To get started, cut the tulle so that it is larger than the carding cloth on the blending board; a border of about two inches works well. I use a scrub brush with very stiff bristles to apply the tulle. First, lay the tulle over the carding cloth, being careful to center the tulle over the board, then press directly down very firmly with the scrub brush. This pushes the tulle to the base of the tines on the blending board. I typically start in the middle of the board and work outward until all the tulle is at the base of the tines, but some prefer to start at the top of the blending board and work toward the bottom.
Once the tulle is in place, apply your fiber. When the blending board is full, start at the bottom of the board and carefully lift the tulle away from the board to produce a classic batt for spinning.
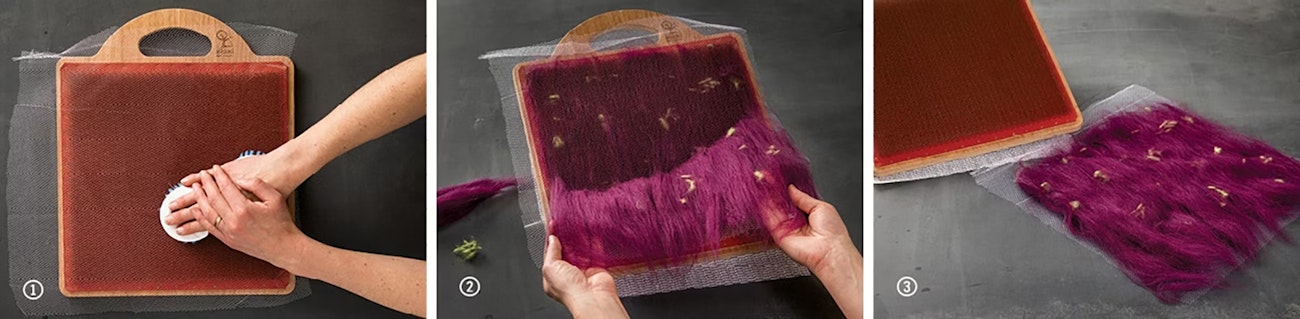
1. Press the brush down firmly, pushing the tulle against the base of the carding cloth. 2. Beginning at the bottom edge, lift the tulle to remove a batt. 3. After removing the batt, you can spin it in any way you choose.
Tidy Tweeds
One of my favorite ways to use the blending board is to make a spinning preparation for tweed yarns with tiny bits of color on a more or less solid background.
Tulle is especially helpful in preventing the tiny bits from being left behind on the carding cloth. After applying the tulle, apply a layer of background fiber, then sprinkle bits or dots of contrasting color fiber bits. You don’t really need lots of dots. Distributing them evenly will work better than globs of dots. Alternate layers of background fiber and dots as many times as you’d like, finishing with a layer of background fiber. You can then take the fiber off in rolags or as a batt.
I use leftover bits of yarn to create garnetts, the flecks and dots of contrasting color. Abrading the scrap yarns before cutting them into bits will help them stick better to the background fiber. I tried several techniques for doing this, but I got the very best suggestion from Emily Johnston when she took my blending board workshop. She suggested rubbing the yarns between two scrub brushes—brilliant! After the yarns are abraded and fuzzy, cut them into small pieces. I prefer teeny tiny bits; they seem to stay embedded in the background fiber better. Also, I’ve had best results if the yarn I am adding is on the soft side (either fine fibers or loosely spun).
You can use a similar tulle strategy for garnetts other than bits of yarn: silk noil, strips of fabric, locks, ribbon, or lengths of yarn. The tulle will keep all of these additions from stubbornly getting stuck in the blending board.
Blending for Wet-Felting
The blending board is the perfect canvas for painting with wool. After blending and removing the fiber, you can felt the batt to create fabric, which can be used as a picture or incorporated into garments or other items. Although I am not particularly adept at painting, I would like to make a tea cozy using this technique someday.
Start by applying a layer of tulle to the blending board. Then apply feltable fibers in four layers: vertically from top to bottom, horizontally from side to side, diagonally from top corner to opposing bottom corner, and diagonally from the other top corner to its opposing bottom corner. Varying the orientation of the fibers will help make a cohesive felted fabric. Finally, you’re ready to apply your “painting” fiber to the top layer.
After all of the fiber is in place, apply another layer of tulle. Starting at the bottom edge, lift all three layers (tulle, fiber, tulle) together carefully. My preference is to loosely baste the three layers together before wet-felting to finish the painting.
Resources
- Powell, Gwen. Blending Board Basics and Beyond. Self-published, 2015.
- Tortora, Phyllis G., and Robert S. Merkel. Fairchild’s Dictionary of Textiles, 7th ed. New York: Fairchild Publications, 2009.
- Held, Deborah. “Why Choose a Blending Board if I Already Have a Drumcarder?”
- Learn more about making tweeds in Spinning Garneted Fibers.
- Find this article and others in the Fall 2019 issue of Spin Off.
Originally published January 1, 2020; updated October 15, 2025.