
Contents
As spinners, we know that twist is what holds our fibers together as yarn. Because twist always wants to travel to areas of less resistance, thick spots tend to untwist and draft apart. Slubs, on the other hand, can stay intact by relying on the twist of the surrounding thin spots to hold them in place. The trick is that a slub needs to be slightly shorter than the staple length of the fiber it is made from.
Knowing that a slub, accidental or intentional, is just a group of fibers held together by twist on either end allows spinners to have better control over their yarn. A quick pinch and twist (and some practice) is all you need to start adding or removing slubs from your singles to create the perfect texture for your yarn.
Making Slubs
These basic steps can be adjusted as you’d like for large or small slubs, frequent or infrequent slubs. Your choice of fiber and preparation can also greatly impact the size, texture, and durability of your slubs. In general, more “worsted” features (longer staple, combed preparation, subdued crimp) will lend themselves to strong and smooth slubs. More “woolen” features (shorter or mixed staple length, carded preparation, active crimp) will create loftier, but weaker, slubs (see Resources). For the best of both worlds, a commercial combed top preparation of breeds such as Polwarth, Merino, or Targhee is an easy place to start for most spinners.
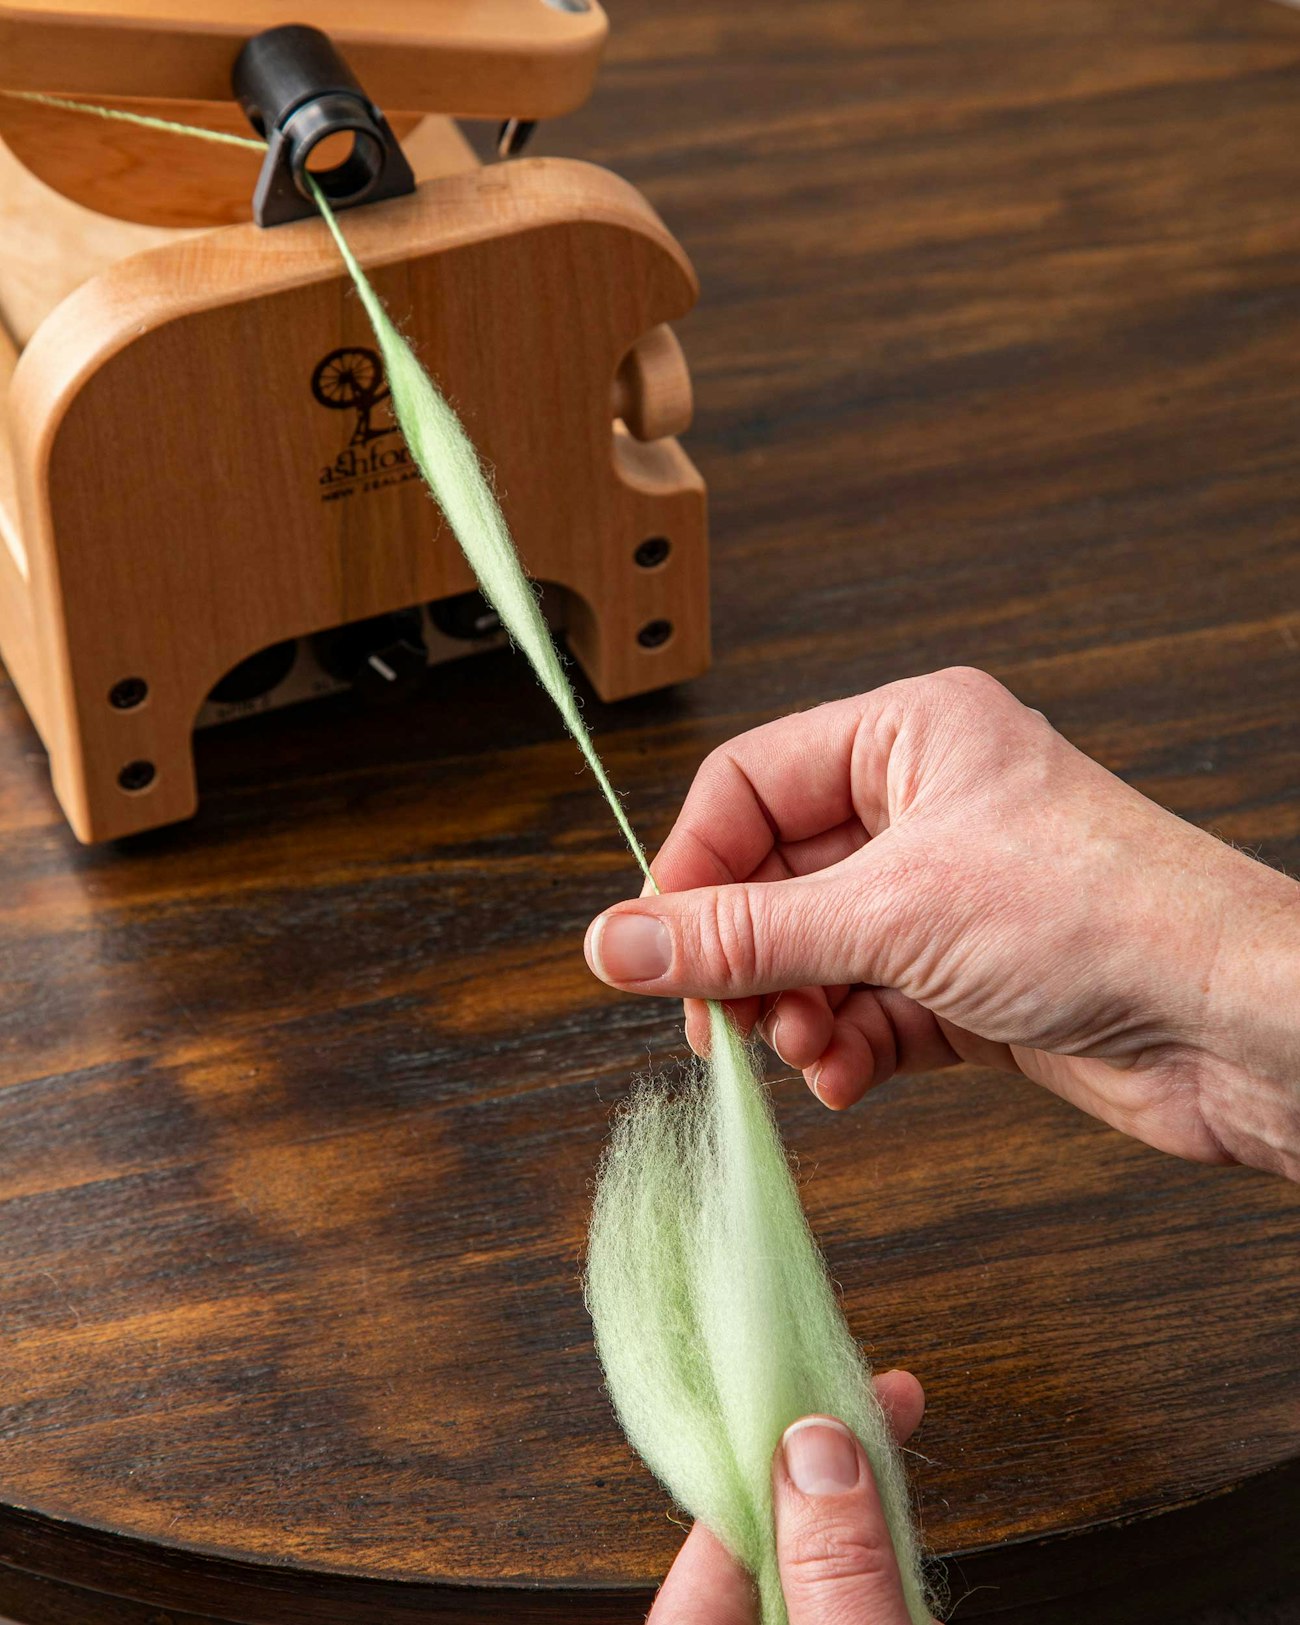
Step One Start spinning a thin singles yarn until you reach the spot where you would like to add a slub. The fingers of the forward hand here have stopped where we usually pinch to draft forward or backward for a consistent yarn using a worsted draw.
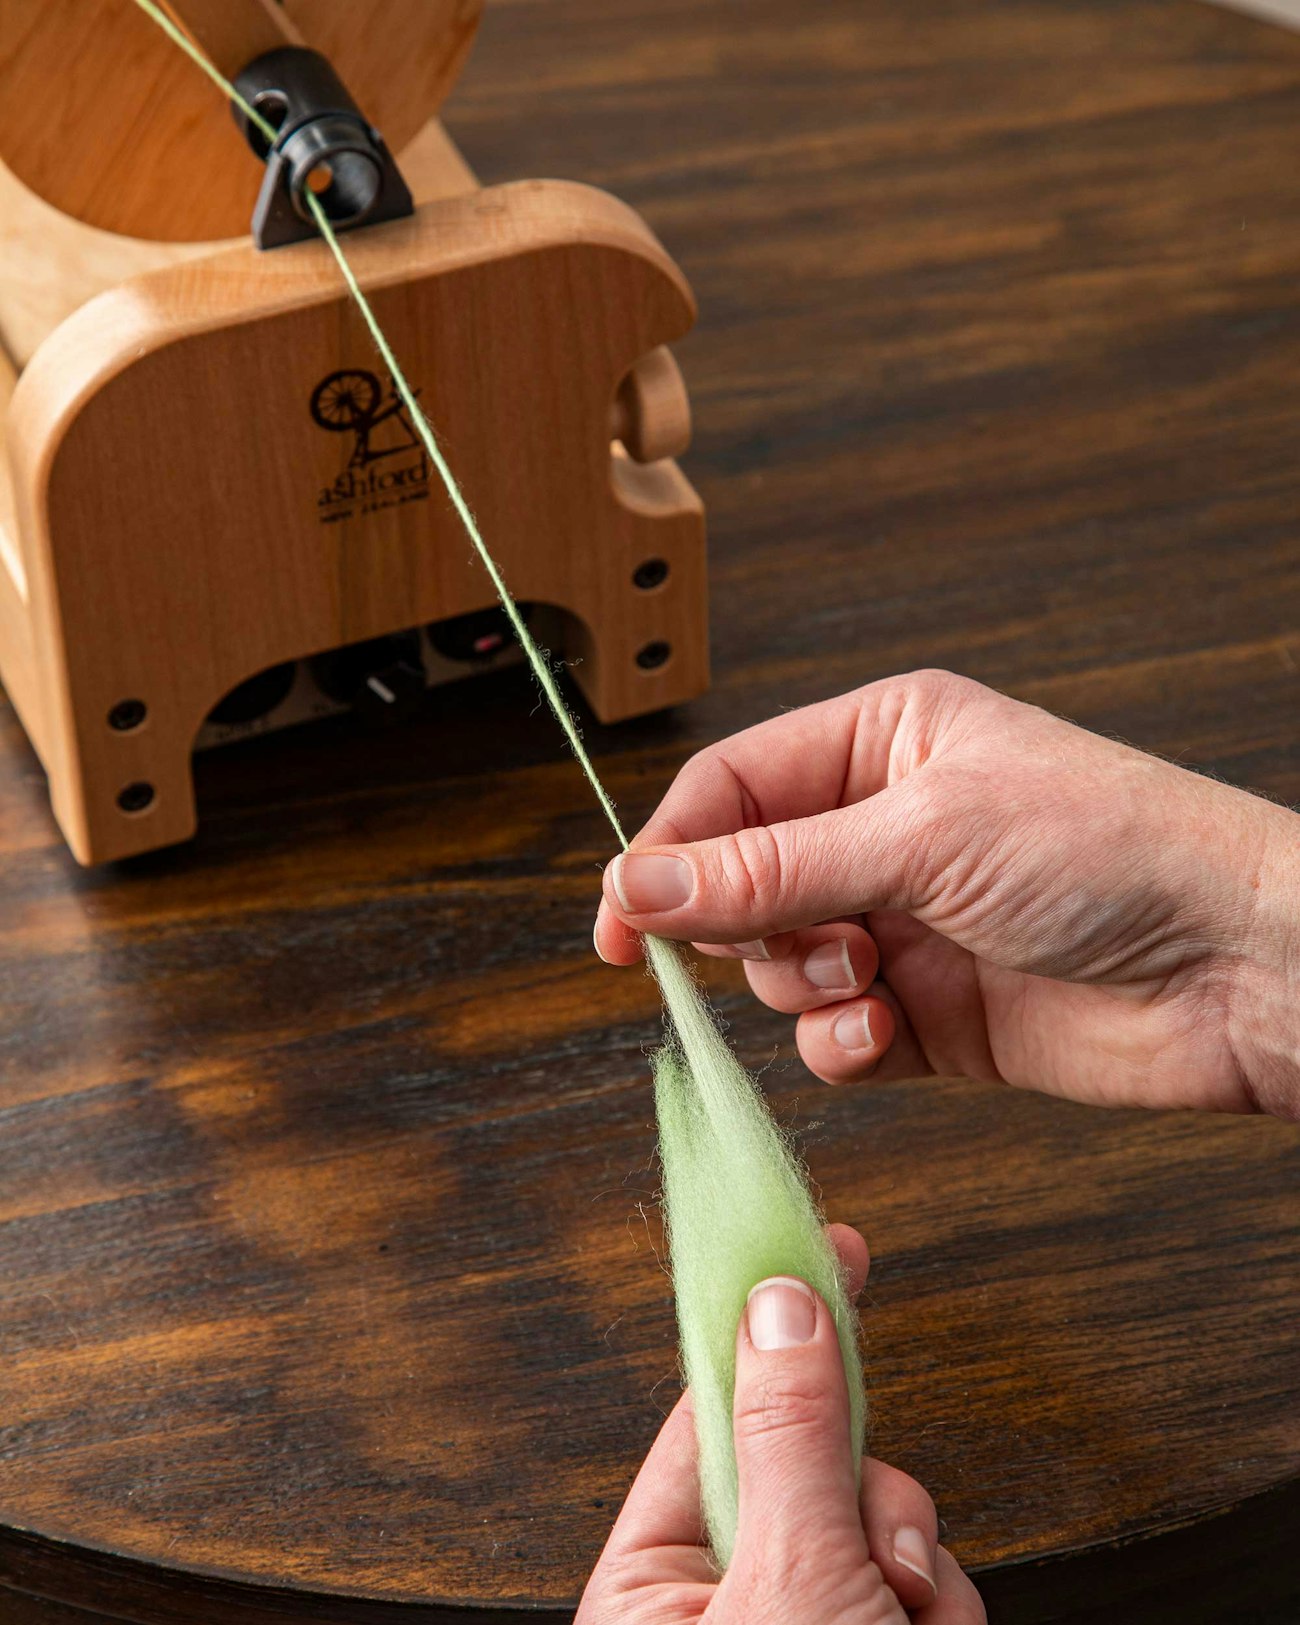 Step one of making a slub.
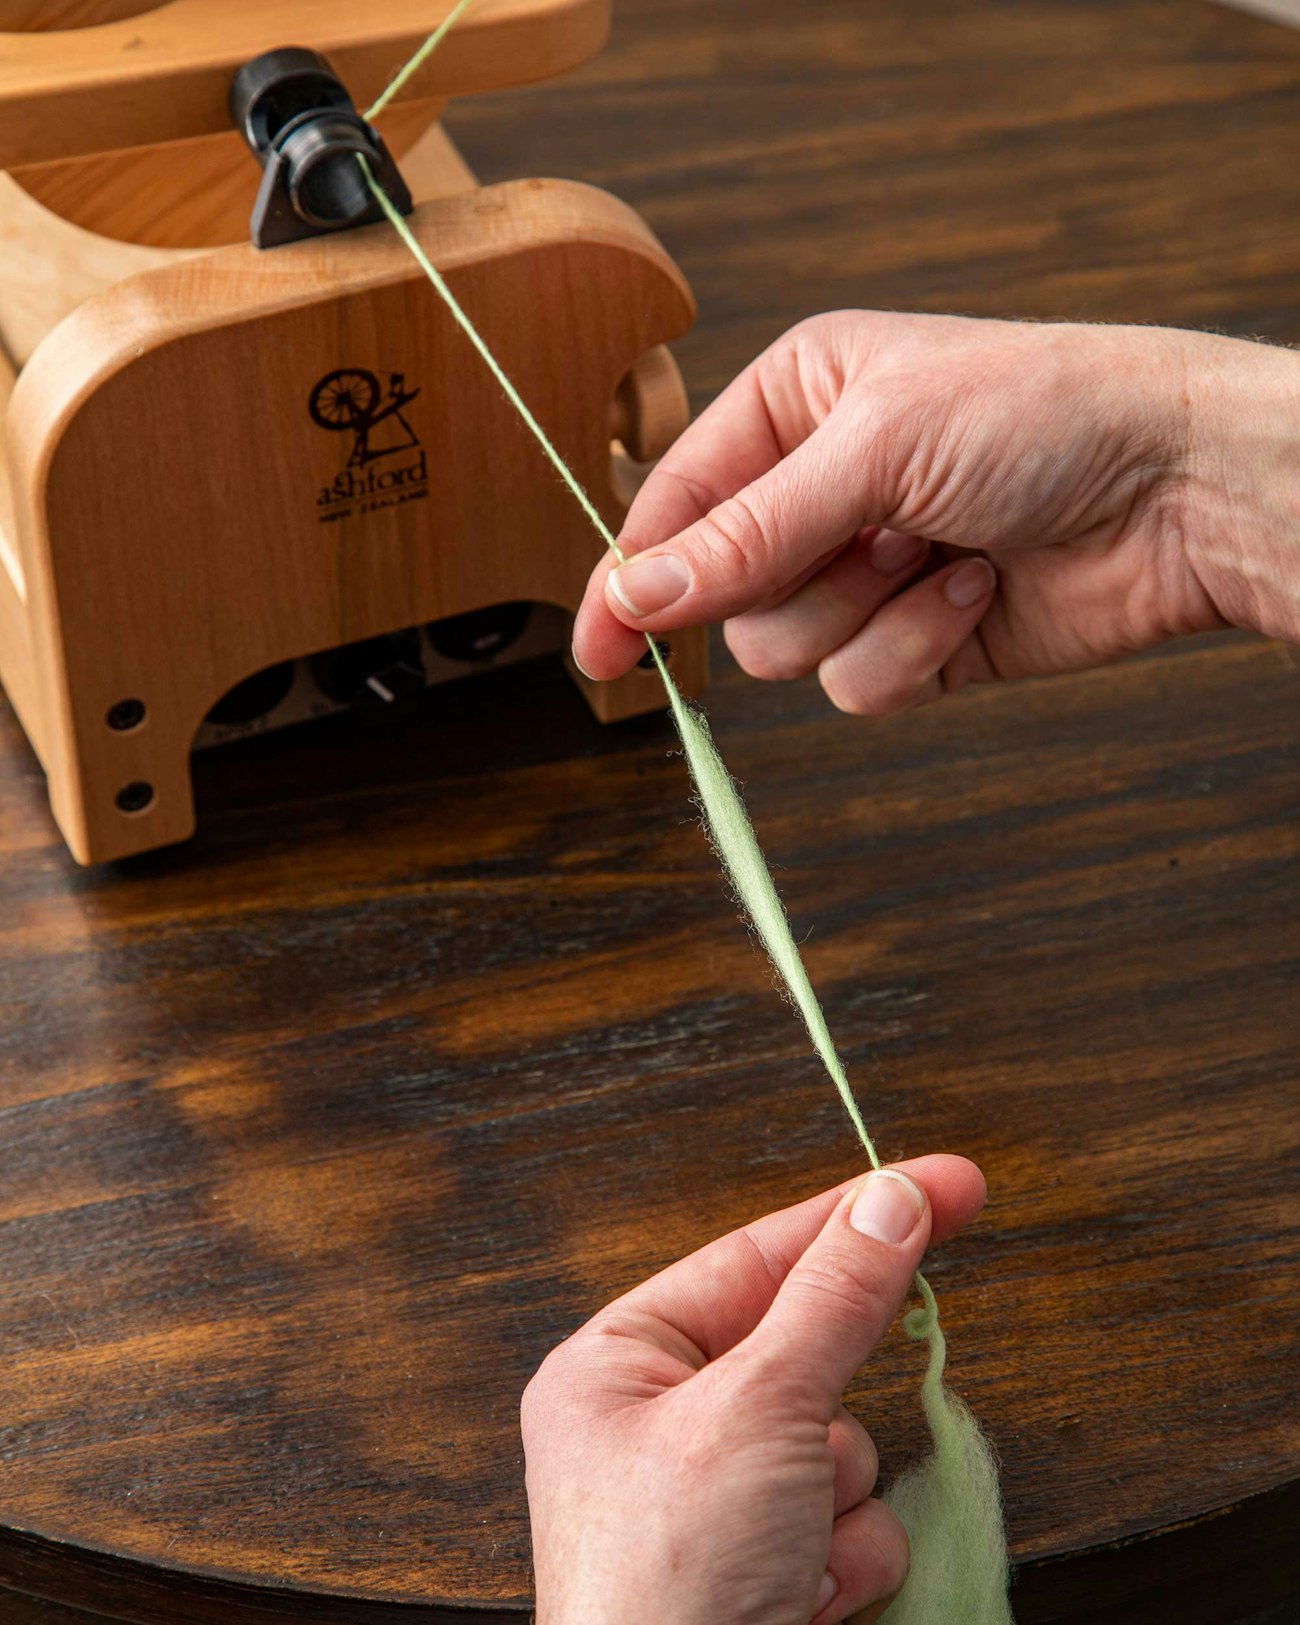
Step Two To make a slub, the forward hand moves farther into the fiber supply to take a larger “bite” of fiber. Here, the bite is about a half inch deeper into the fiber supply. Pinch and begin to draft forward toward the orifice or move the hand holding the fiber supply back.
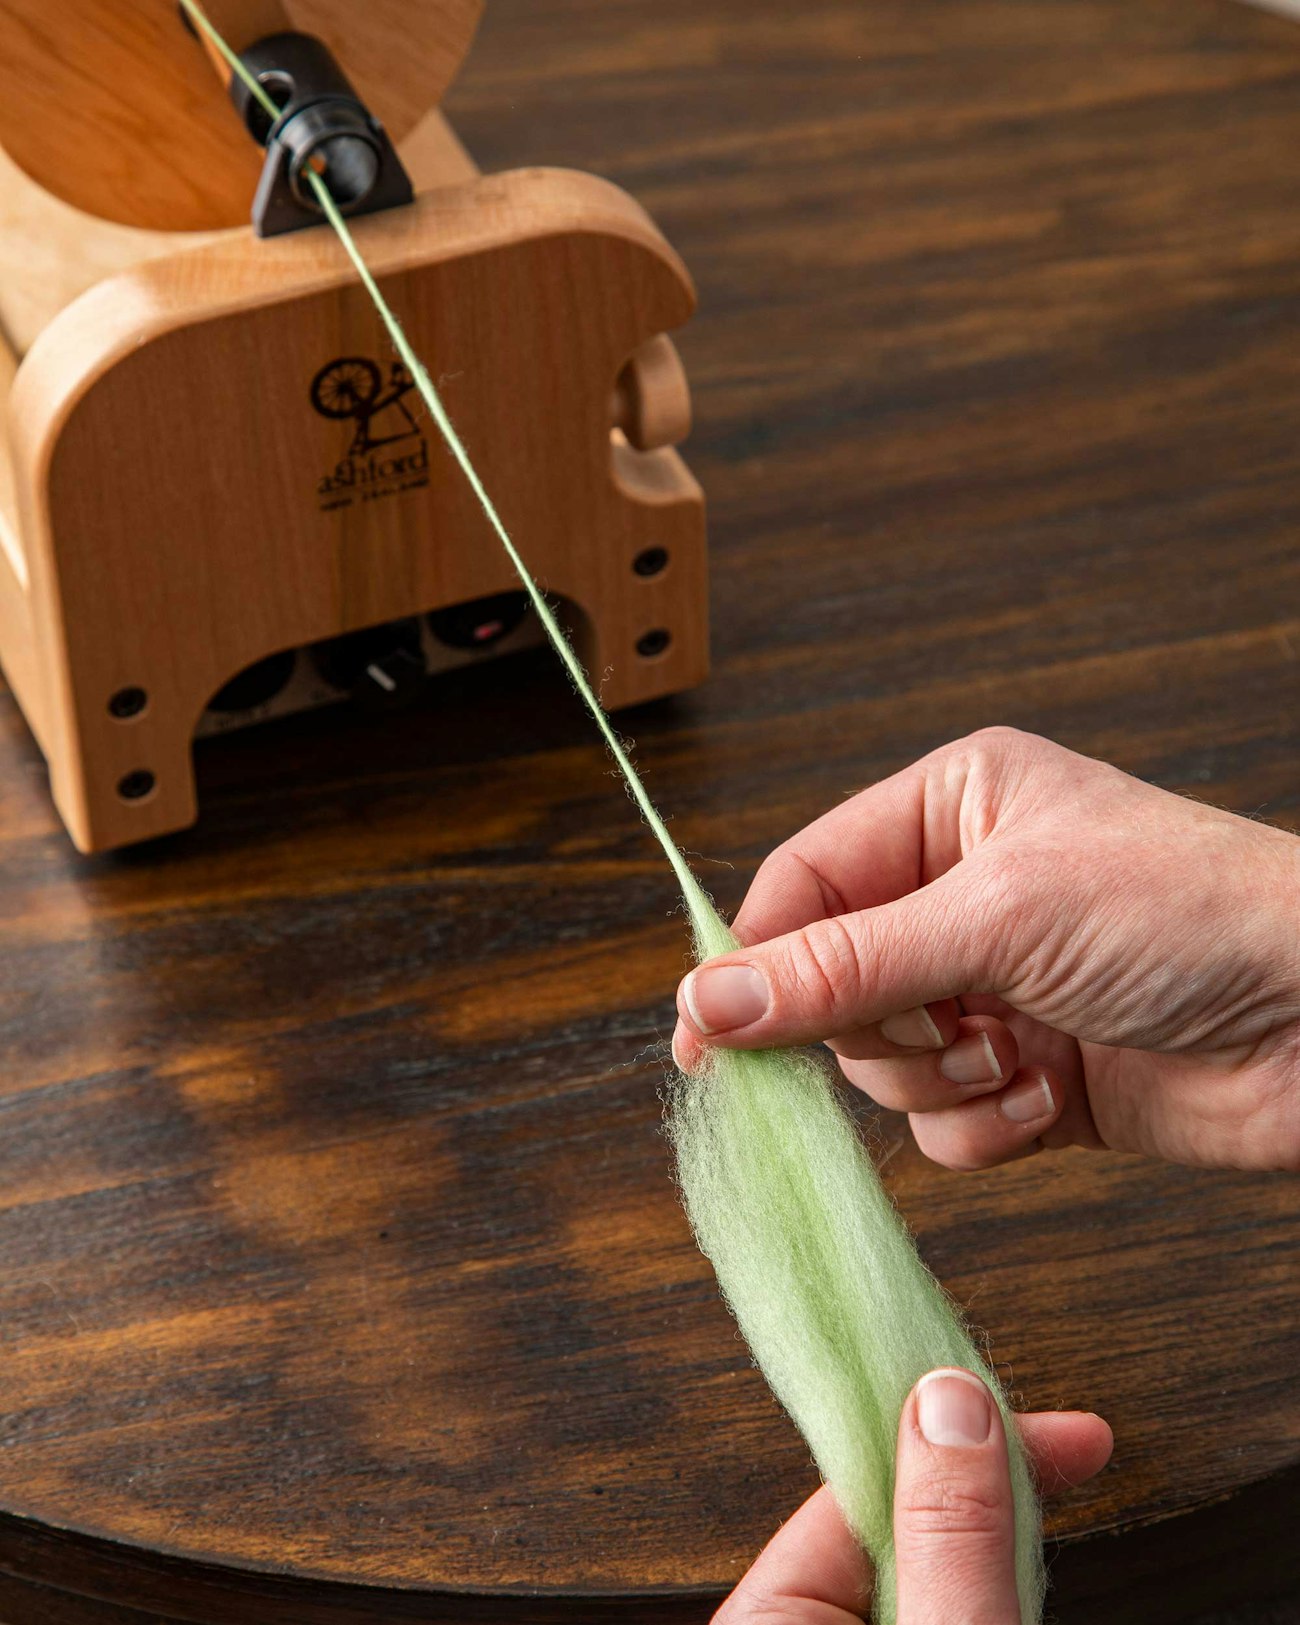 Step two of making a slub.
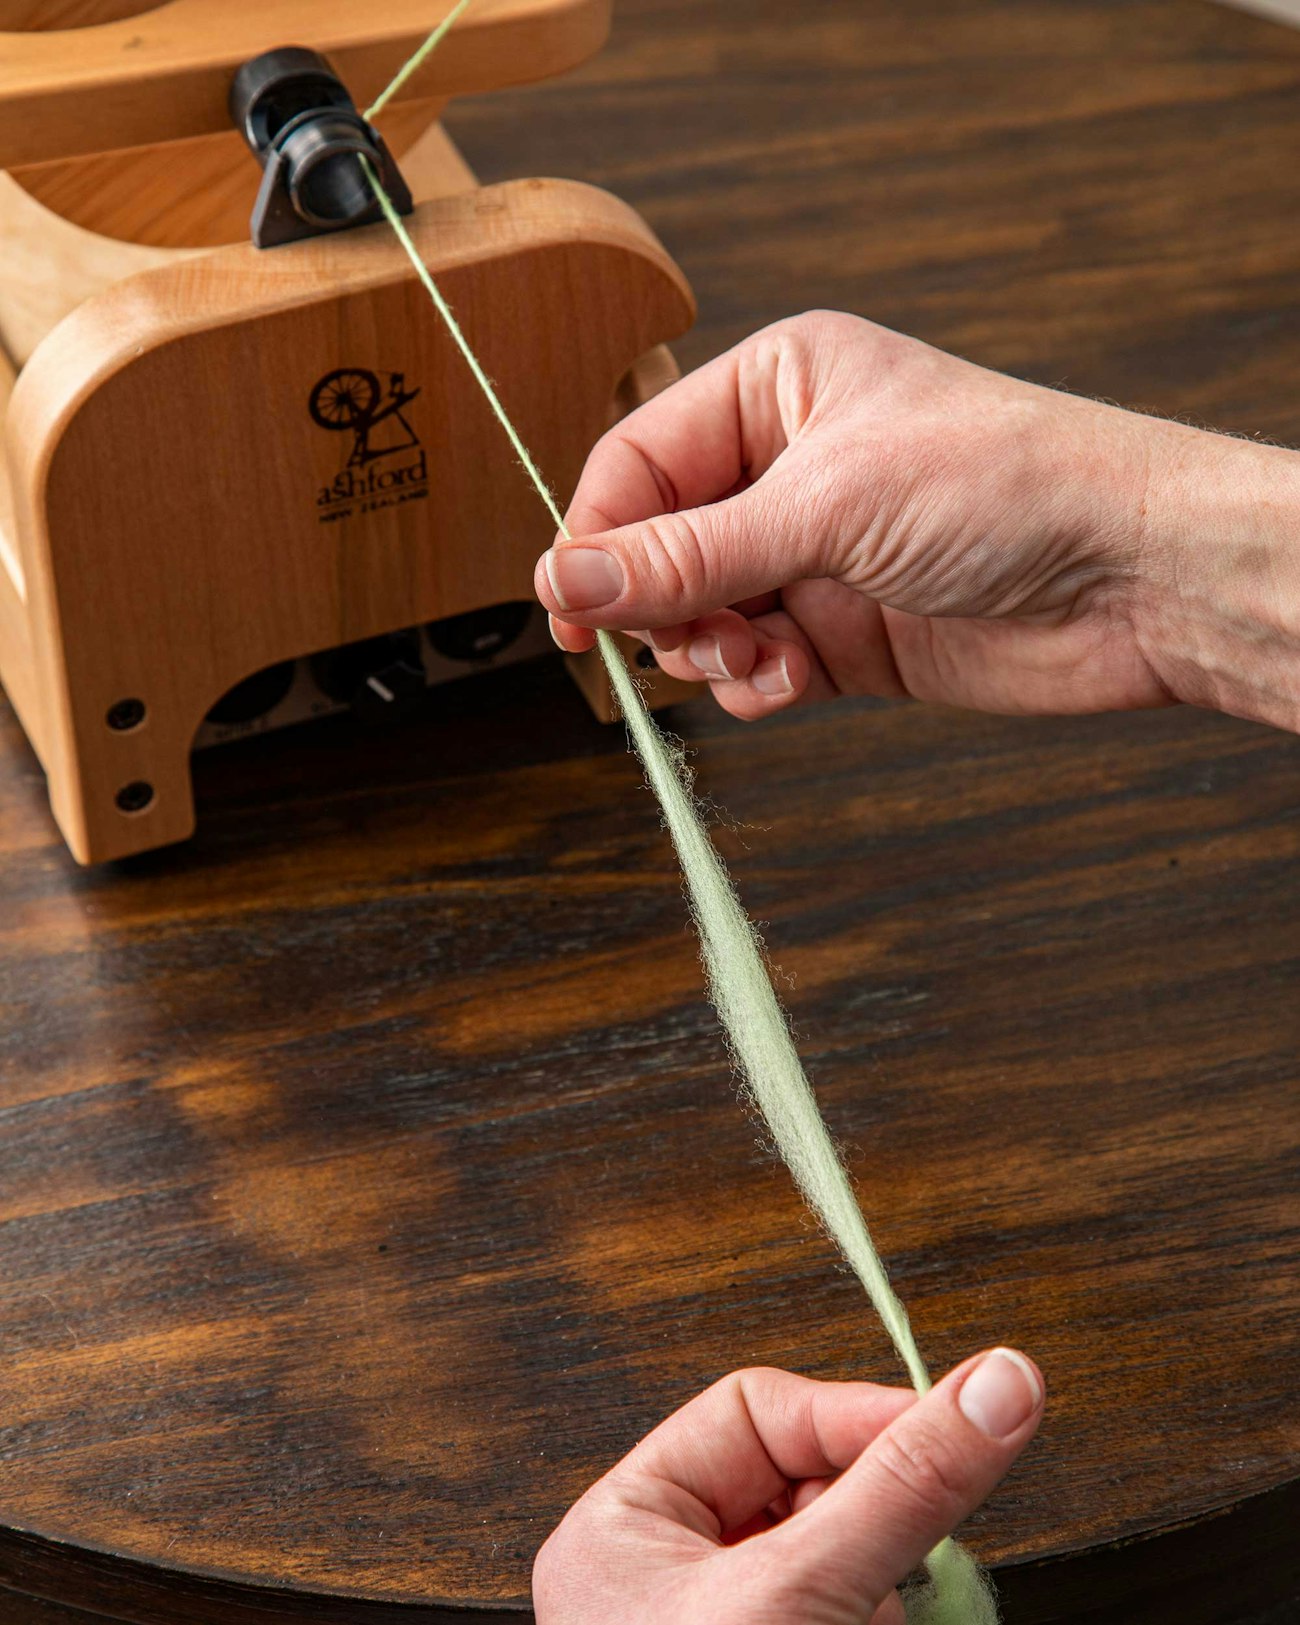
Step Three Continue attenuating/drafting until the fiber thins behind the slub between your hands. You still have not allowed twist into the drafting zone. How much the fiber thins is up to you. If there is only a small amount of fiber connecting the slub and fiber supply, a dramatic thick/thin yarn will result. Less thinning will produce a more stable but less textured yarn.
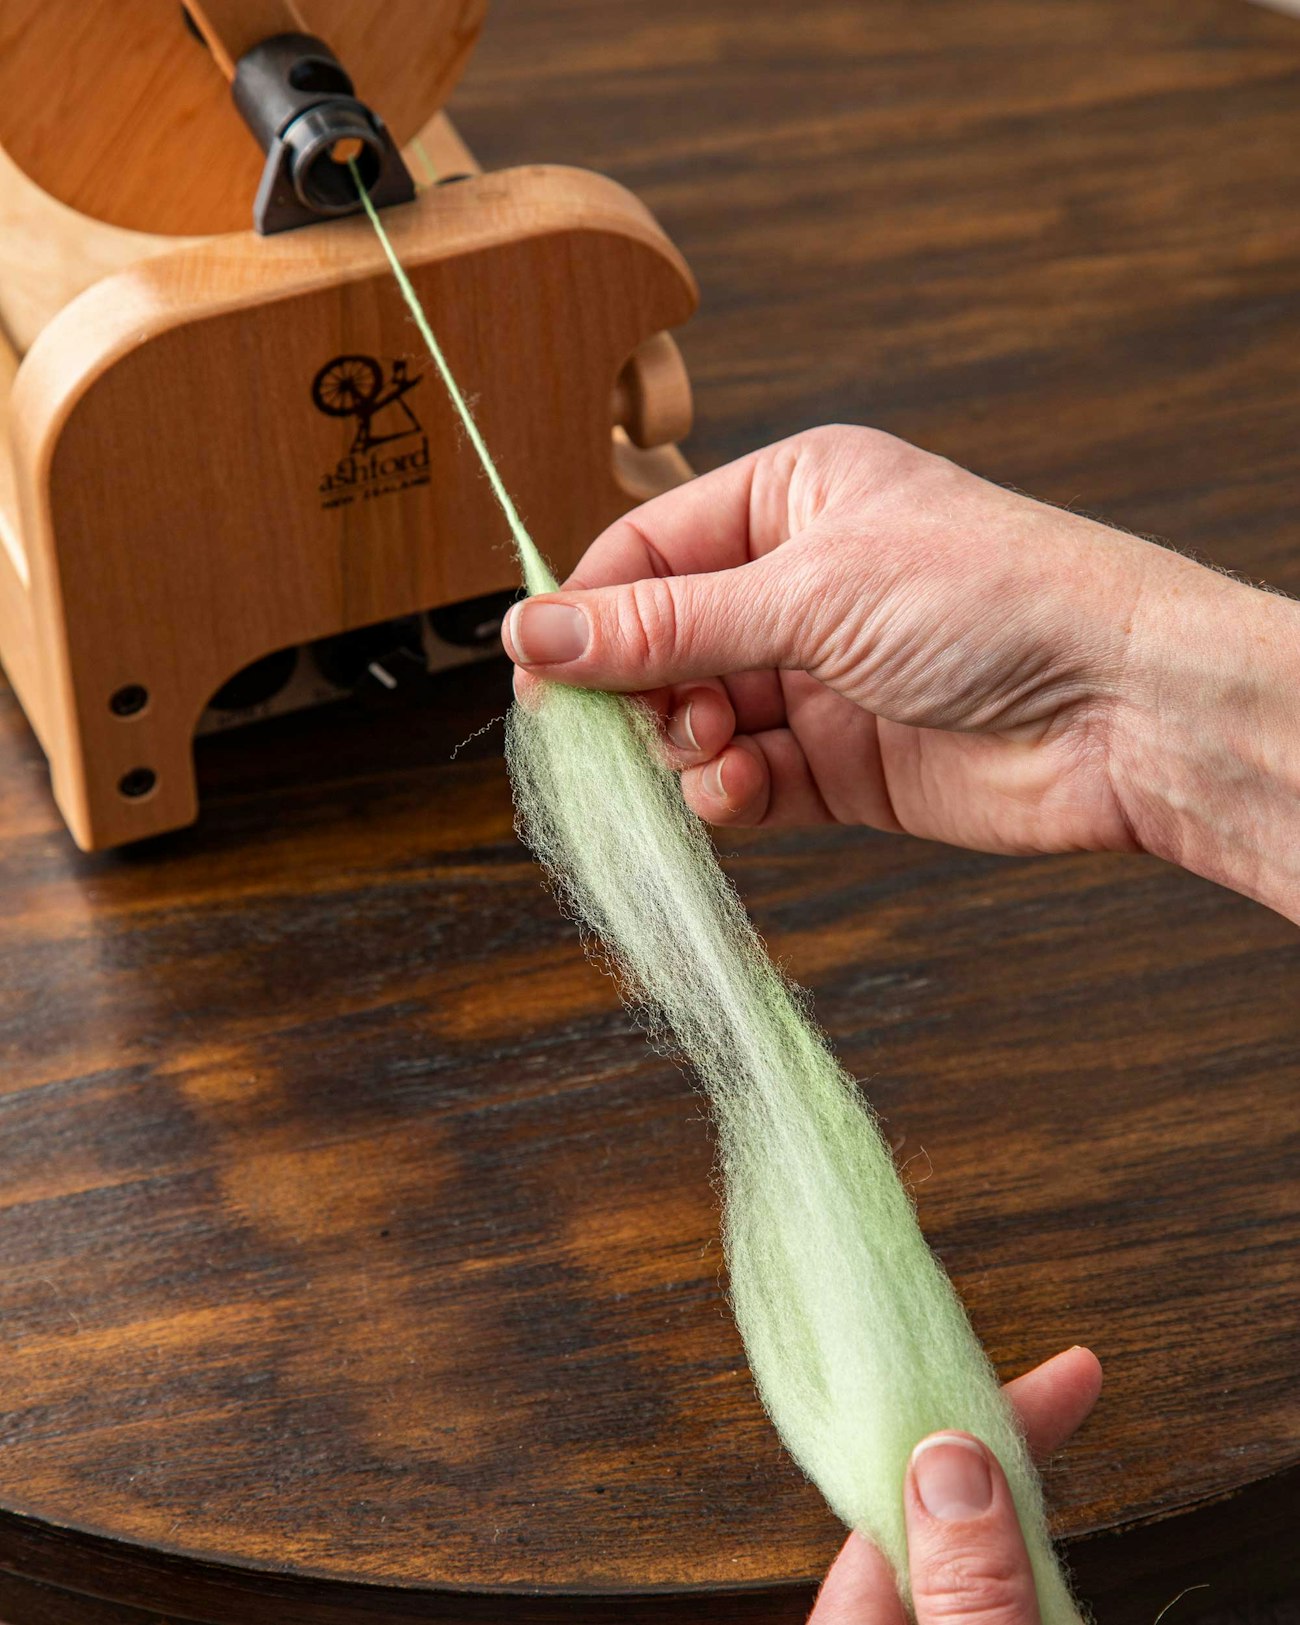 Step three of making a slub.
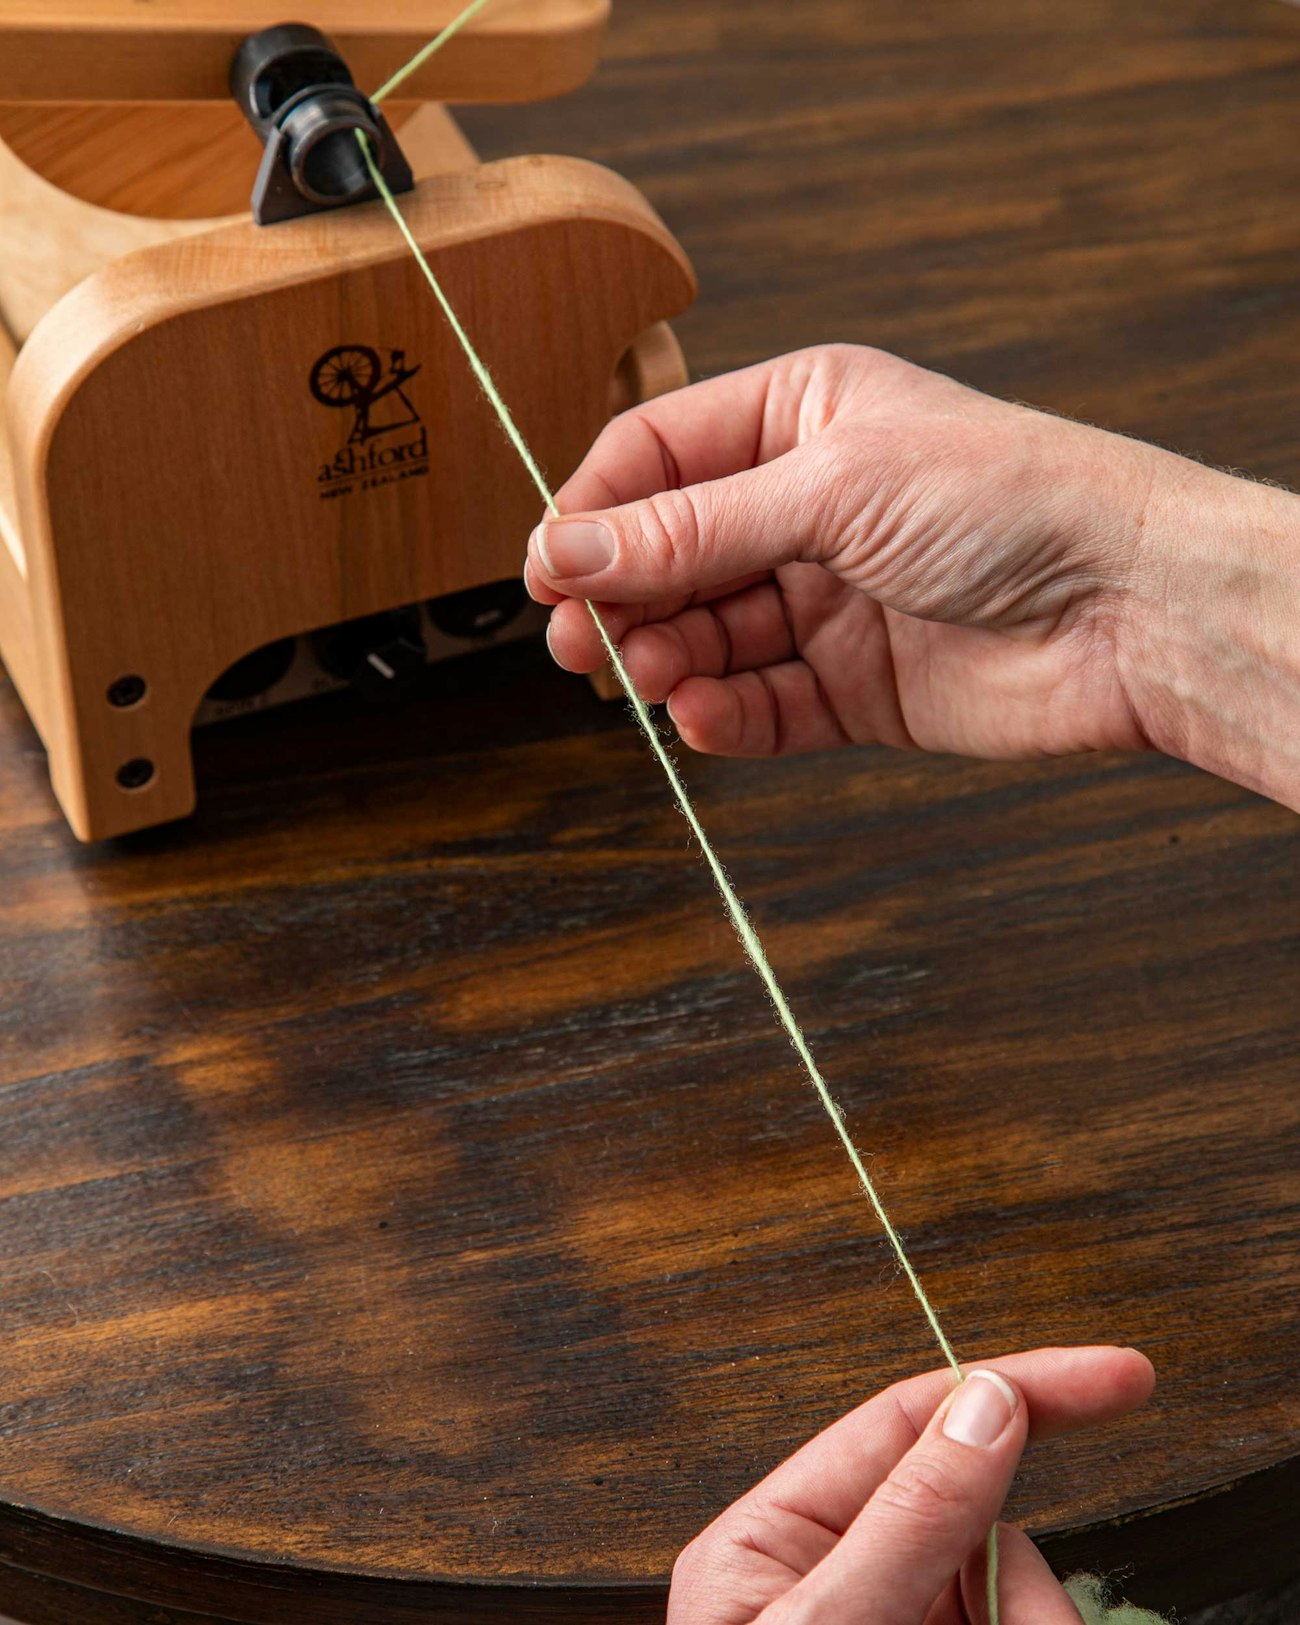
Step Four Reduce the pressure of your pinching forward fingers and begin moving your fingers over the slub. I like to roll the slub in the same direction of the twist. When I reach the end of the slub, I pinch and twist with my fingers in the direction of the twist to secure the end of the new slub.
 Step four of making a slub.
Removing Slubs
Unwanted slubs are associated with “beginner yarns,” but even experienced spinners occasionally have slubs. When you understand how they happen, they are easy to remove. Perhaps the spinner’s forward hand moved too far into the fiber supply when spinning with a worsted draw, or if spinning with a long draw, it might have been a stubborn spot that didn’t draft as smoothly as its neighbor fibers. Either way, try removing the slub by releasing the twist at either end. Going back to Sarah Anderson’s analogy of a candy wrapper, you need to loosen the twist at each end of the wrapper.
Step One When you have created an unwanted slub, stop treadling and drafting.
 Step one of removing a slub.
Step Two Reposition your hands so the forward hand is pinching the yarn between the orifice and slub and the back hand is pinching between the slub and the fiber supply.
 Step two of removing a slub.
Step Three Begin twisting each on side of the slub in opposite directions to remove the twist from the slub section. The forward hand twists in the opposite direction the flyer was moving, and the back hand twists in the same direction the flyer was moving. Begin attenuating/drafting this section.
 Step three of removing a slub.
Step Four When the fiber is thinned a bit in the slub section, allow the twist to reenter the yarn. If you still have a slub, repeat this maneuver. You can always reduce the size of a slub, but you can’t make it bigger again. If you overthin the section, you’ll need to break the yarn and rejoin.
 Step four of removing a slub.
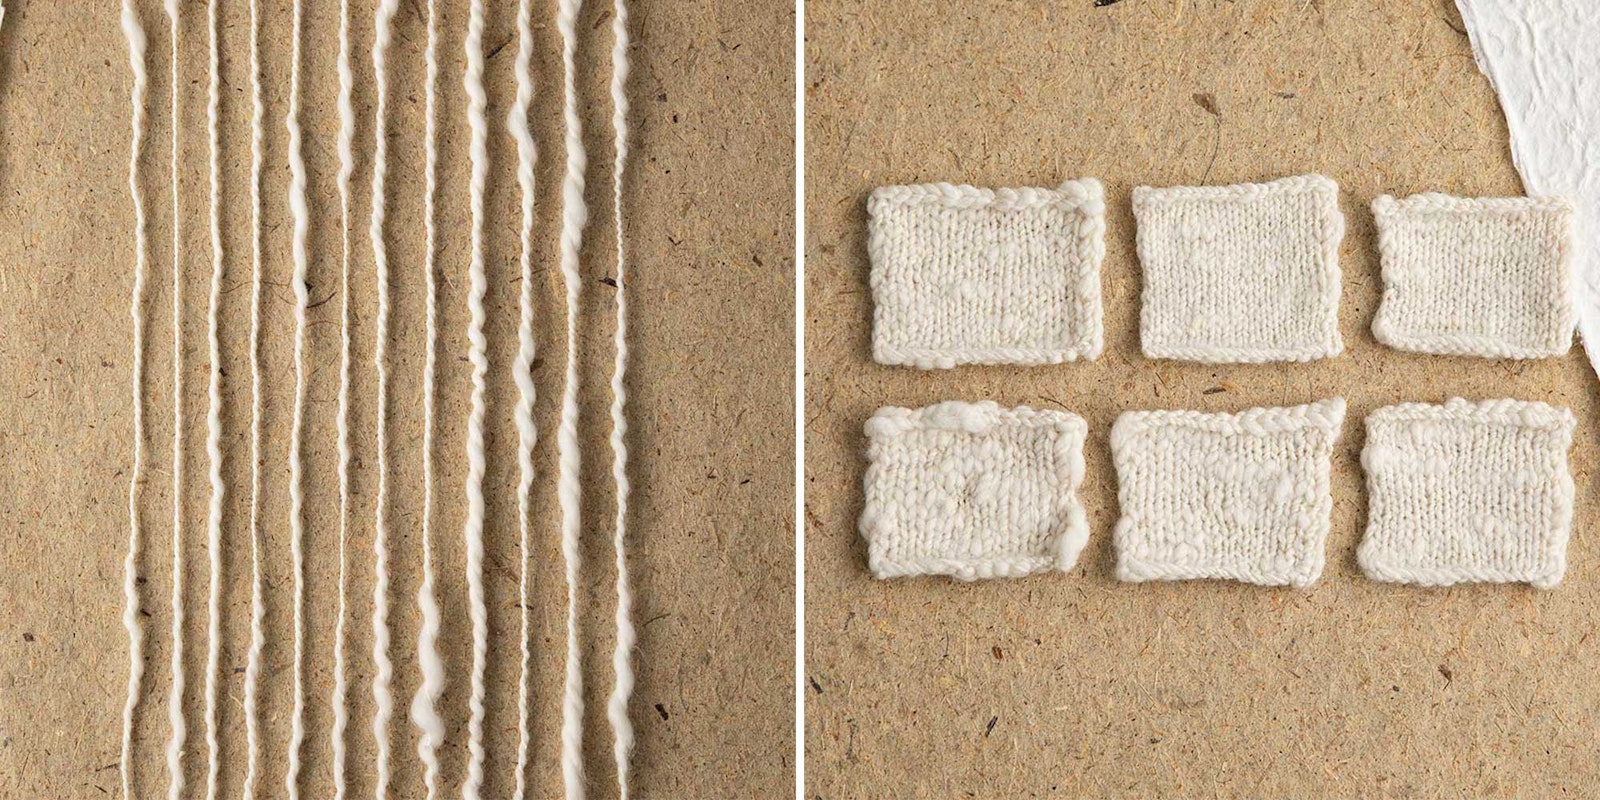
Read about Riley’s deep dive into slub size, frequency, and plying options on page in the Summer 2022 issue of Spin Off. See what happens when these bumpy yarns are knitted or woven!
Resources
- Anderson, Sarah. Building Blocks of Spinning.
- ———. The Spinner’s Book of Yarn Designs: Techniques for Creating 80 Yarns. North Adams, MA: Storey Publishing, 2012.
- Merrow, Anne. “What Are Woolen and Worsted?”
Riley Kleve is a nonbinary handspinner, artist, and educator based in Minneapolis, Minnesota. Their work draws from craft traditions to imagine new queer futures for textile art. You can find them on Instagram at @betterdaysyarnco, or at rileykleve.com.
Portions of this article originally appeared in the Summer 2022 issue of Spin Off.