
So you just bought your first drumcarder . . . What next? Drumcarders are an investment, generally ranking second only to spinning wheels in cost. It pays to maintain this awesome tool! In Spin Off Spring 2017, Deb Menz answers your burning drumcarder maintenance questions and offers eight tips for keeping your drumcarder like new. (Hint: get a mechanical pencil.)
A drumcarder is not a complicated piece of equipment, but let’s be clear about what it can and is meant to do. The purpose of a drumcarder is to open up and generally align fibers to make spinning easier and more controllable. It can also be a great tool for color and fiber blending.
Does the carder need a break-in period? I don’t believe so. There are very few moving parts, and none of them should change with use. The moving parts are the two drums, the small (licker-in) drum and the large drum where the batt is formed. The teeth on both carding drums should not change over time, so I see no need to treat the carder differently when new.
With loving care, you can make a drumcarder stay “new” by taking good care and maintaining it regularly. What is good maintenance? There are only a few points to keep in mind.
Do not use greasy fleece on your carder unless that is all you plan to card on it. Once grease is deposited on the teeth, it is difficult to remove. The grease on the teeth attracts dirt, which gets deposited on each batt carded.
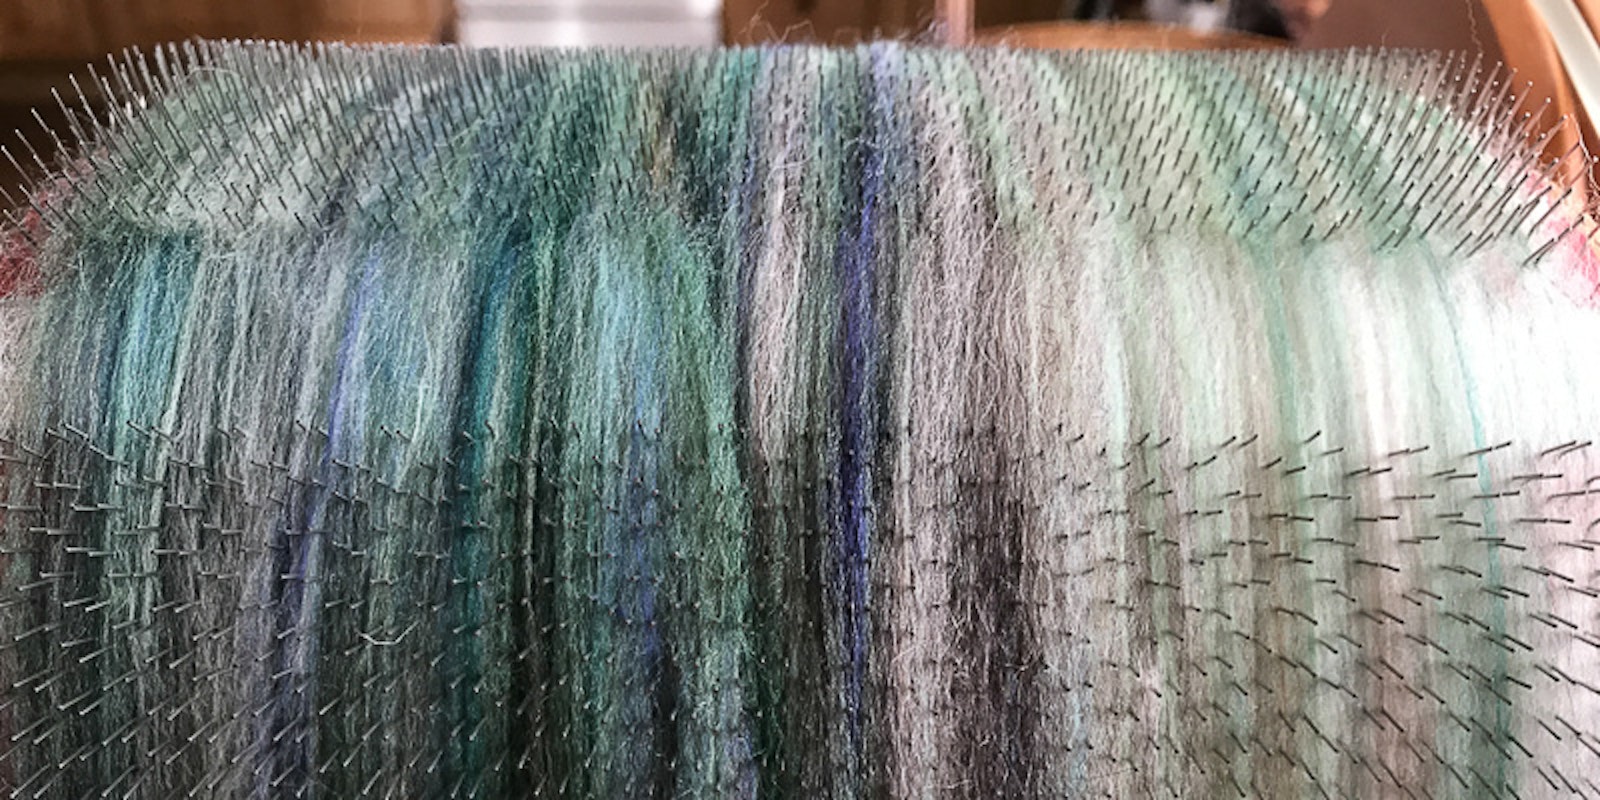
The rate at which fibers are fed into the carder affects both the quality of the batt and the integrity of the carding cloth. When too many fibers are fed on at a time, it becomes very hard to crank the drum (or, if it is motorized, the motor heats up). Even if the drum can be turned, no effective carding takes place. The fiber is “gulped” onto the large drum without sufficient carding, and it wreaks havoc on the integrity of the carding teeth, bending them. It is more efficient to feed small amounts at a time. You will ultimately get the same amount of fiber in the batt, but the quality of the batt improves and it needs fewer passes through the carder. As a rule of thumb, you should be able to see the infeed tray through the layer of fiber. If it becomes difficult to crank, take off some fiber, feed in less fiber at a time, and crank a little slower.

This is the appropriate amount of fiber to feed onto the drum at a time. Photo by George Zens.
When placing fibers in the infeed tray, avoid pressing down on them or holding them back. They will only wrap around the licker-in and will not be carded.
Bent teeth can cause fibers to catch when you are removing a batt, and they can also cause irregular thick and thin spots. Teeth can be bent by using a knitting needle, large crochet hook, or large doffer stick to pick out fibers left on the drum. Using something like tweezers, a fetling brush, or fine dog brush (affiliate link) to remove those fibers will keep your carding cloth in brand-new condition.
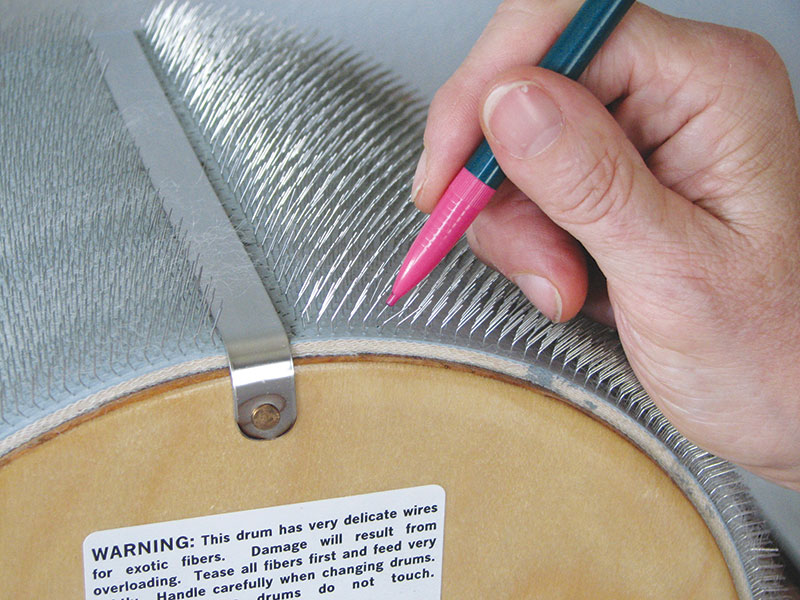
To repair a bent tooth, place a mechanical pencil over a bent carding tooth to bend it back into its original position. Photo by George Zens.
If you find bent teeth, there is a way to repair them and return them to their original position in the carding cloth. Take the lead out of a mechanical pencil. Place the leadless pencil onto the first portion of the bent tooth and bend the tooth back to the original angle and position in the carding cloth. It takes time and patience to do this, but it is certainly cheaper than buying new carding cloth.
Do not feed nonteased fibers into the drumcarder. Teasing fibers is very important to the health of the carding teeth. When fibers that have been too compacted are fed onto the drumcarder, the carding teeth are stressed. If the teeth are stressed often, they can loosen in the carding cloth, at which point the carding cloth needs to be replaced. If treated well, carding cloth will last a lifetime.

The fiber on the right is a clean fleece that has not been teased. The fiber on the left shows adequately teased fiber ready to card. Photo by George Zens.
It is a good thing to regularly check for stray fibers that have gotten caught over the sides of the drum. Those fibers can end up getting wrapped around the shafts of the drums. Eventually, the fibers accumulate and affect the ease of cranking. I had a student who was experiencing difficulty turning the handle; when we took the carder apart, we found almost an ounce of fiber wrapped around the shafts of both drums. Cranking was easy when the carder was oiled and reassembled. If you only have a few fibers trapped, use tweezers to pull them out. If you suspect that there are a lot of fibers trapped, you might consider taking your carder apart to remove the fibers. While you are at it, you can oil the shaft before reassembly.
If you have a motorized carder, read any directions for maintaining the motor. Usually there is little, if anything, for you to do. Make sure not to overload the motor’s capabilities by feeding too much fiber on at a time or by manually slowing the drums down.
—Deb Menz
DEB MENZ has made fibers and textiles for the last forty years. Deb has authored two books, Color in Spinning and Color Works, and has created several videos, all from Interweave. She shows her mixed-media work around the country. Deb lives with her partner and patron, Buzz.