
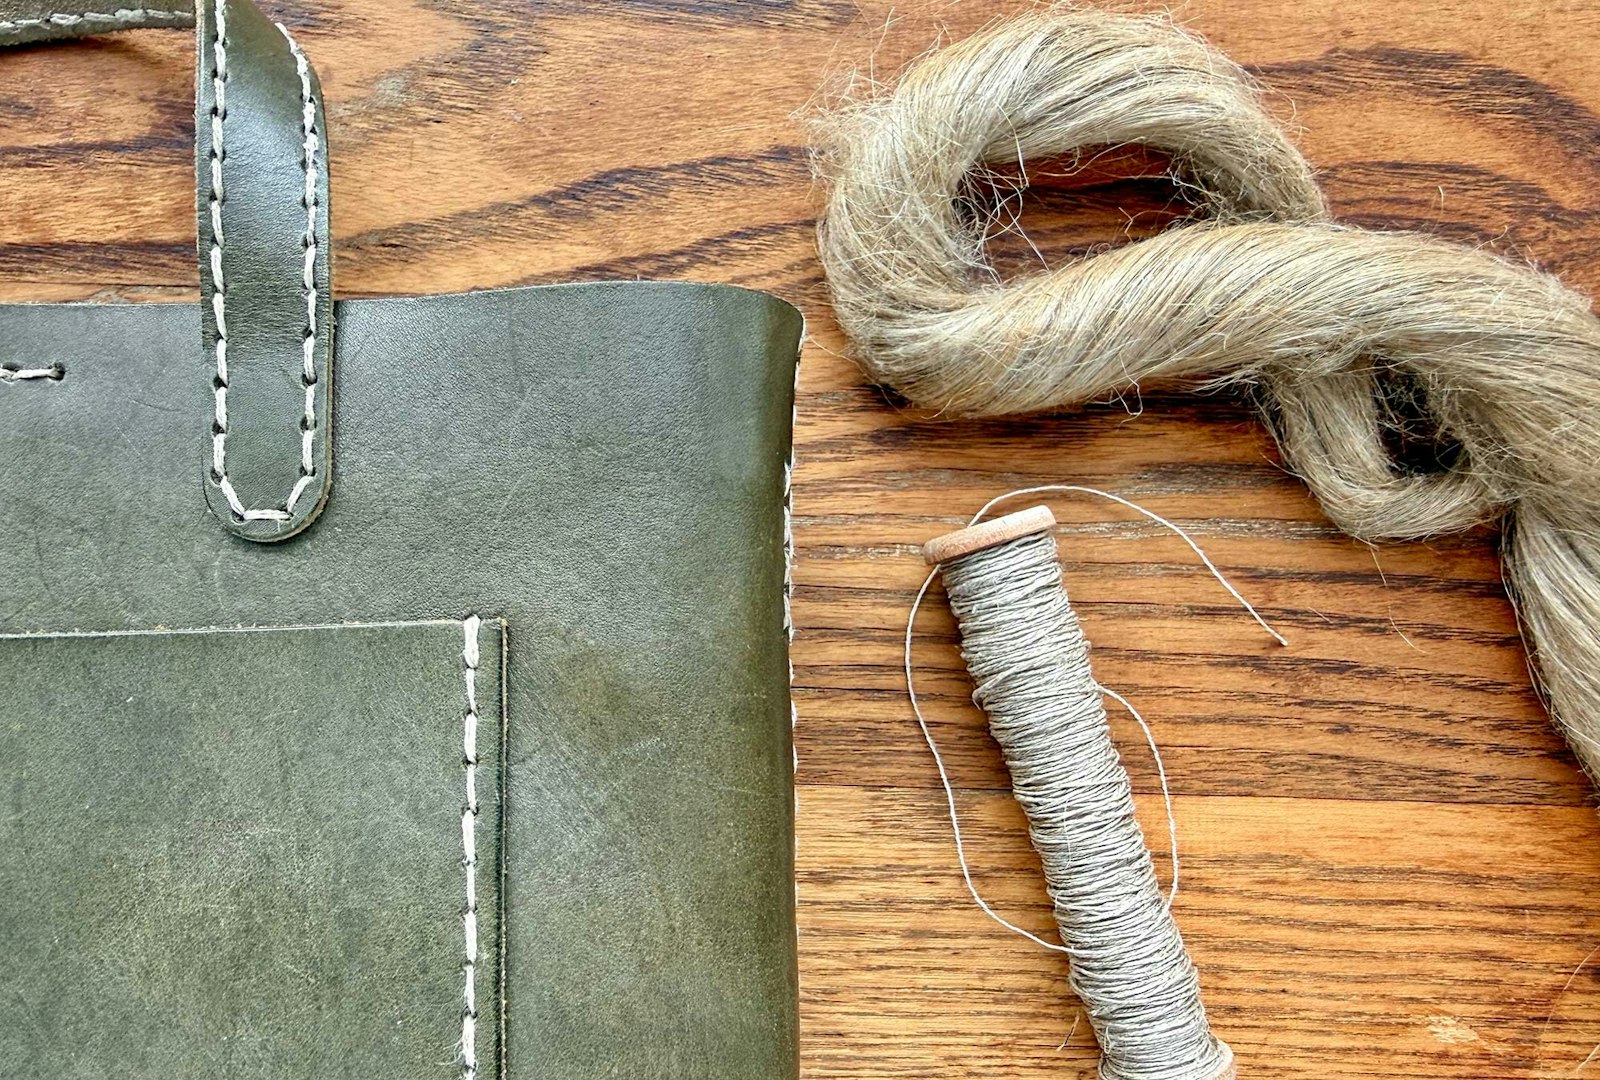
As an obsessive handspinner, I manage to make most things in life about yarn. I sew my clothes with charkha-spun cotton, I tie up my garden tomatoes with chunky-spun coarse-wool leftovers, and—now—I am out about town with a leather tote I stitched together with my own handspun linen. I’m still so delighted with the outcome that I wanted to share it with you here!
How It Started: A Beginner Tote Bag Kit
One of my favorite YouTube sewing channels, Seamwork, reviewed a DIY leather bag kit as a fun, sewing-adjacent project. I’ve never done this kind of work, but I was both in need of a new purse and enamored by dipping my toe into something new and useful. And who doesn’t love a kit that is designed to welcome intrepid makers to a new craft? I purchased the DIY Mini Tote Bag Kit (see Resources) in an olive green, and it came with a waxed poly thread, which is amazingly strong and durable. But I also know we humans have been stitching leather and other materials together for eons; what if I used natural fibers to create a fully biodegradable bag? I had been experimenting with handspun sewing thread using flax stricks I purchased through Berta’s Flax, so I decided to try creating a stronger, thicker thread for my bag.
Now, I must warn you that what follows is a joyful exploration into making. All the resources I mention are linked below. I hope this serves as tip-of-the-iceberg inspiration for you to dig deeper into this or any other fibery adventure you choose! Do you have more resources? Send them our way!
 Kate’s bag on the cover of the Fall 2026 issue.
How It Went
In my handsewing work, Burnley & Trowbridge in Williamsburg, Virginia, has been a great resource for working with natural materials such as linen thread. The makers at B&T recommend using beeswax to make your linen threads stronger and easier to work with. After waxing, the threads can be ironed, helping the wax to soak into the thread.
I also looked to the fascinating folks making historical footwear, and I found some great information about how shoemakers blended beeswax with turpentine and other substances. For my first foray into linen threads for leatherwork, I decided to stick with straight beeswax and heat. So, I pulled out some heavier handspun singles out of my stash and created two-ply yarns with a high twist. Then, I cut several 4-foot (120-cm) lengths to pull over a piece of beeswax several times.
 Kate pulled lengths of two-ply linen thread over a block of beeswax.
After waxing, I applied heat using a hairdryer rather than an iron. The threads were noticeably darker once the wax melted and soaked into the fibers. Because my threads were fine, I held two of the two-ply threads together during stitching. The tote bag kit has clear instructions for assembling the bag by working saddle stitch into prepunched holes. Learning this stitch was the most challenging part of the project, and it’s easy when you get the hang of it.
How to Work Saddle Stitch
Note: In this tutorial, the thread is not doubled, making it easier to see what is happening. Shown here is the bag's long shoulder strap that clips onto D rings sewn inside the bag.
 Tutorial photos by Matt Graves
Step 1 Begin with a length of thread that has a needle on each end. Insert the needles from the right side (RS) so they pass through two different holes to the wrong side (WS).
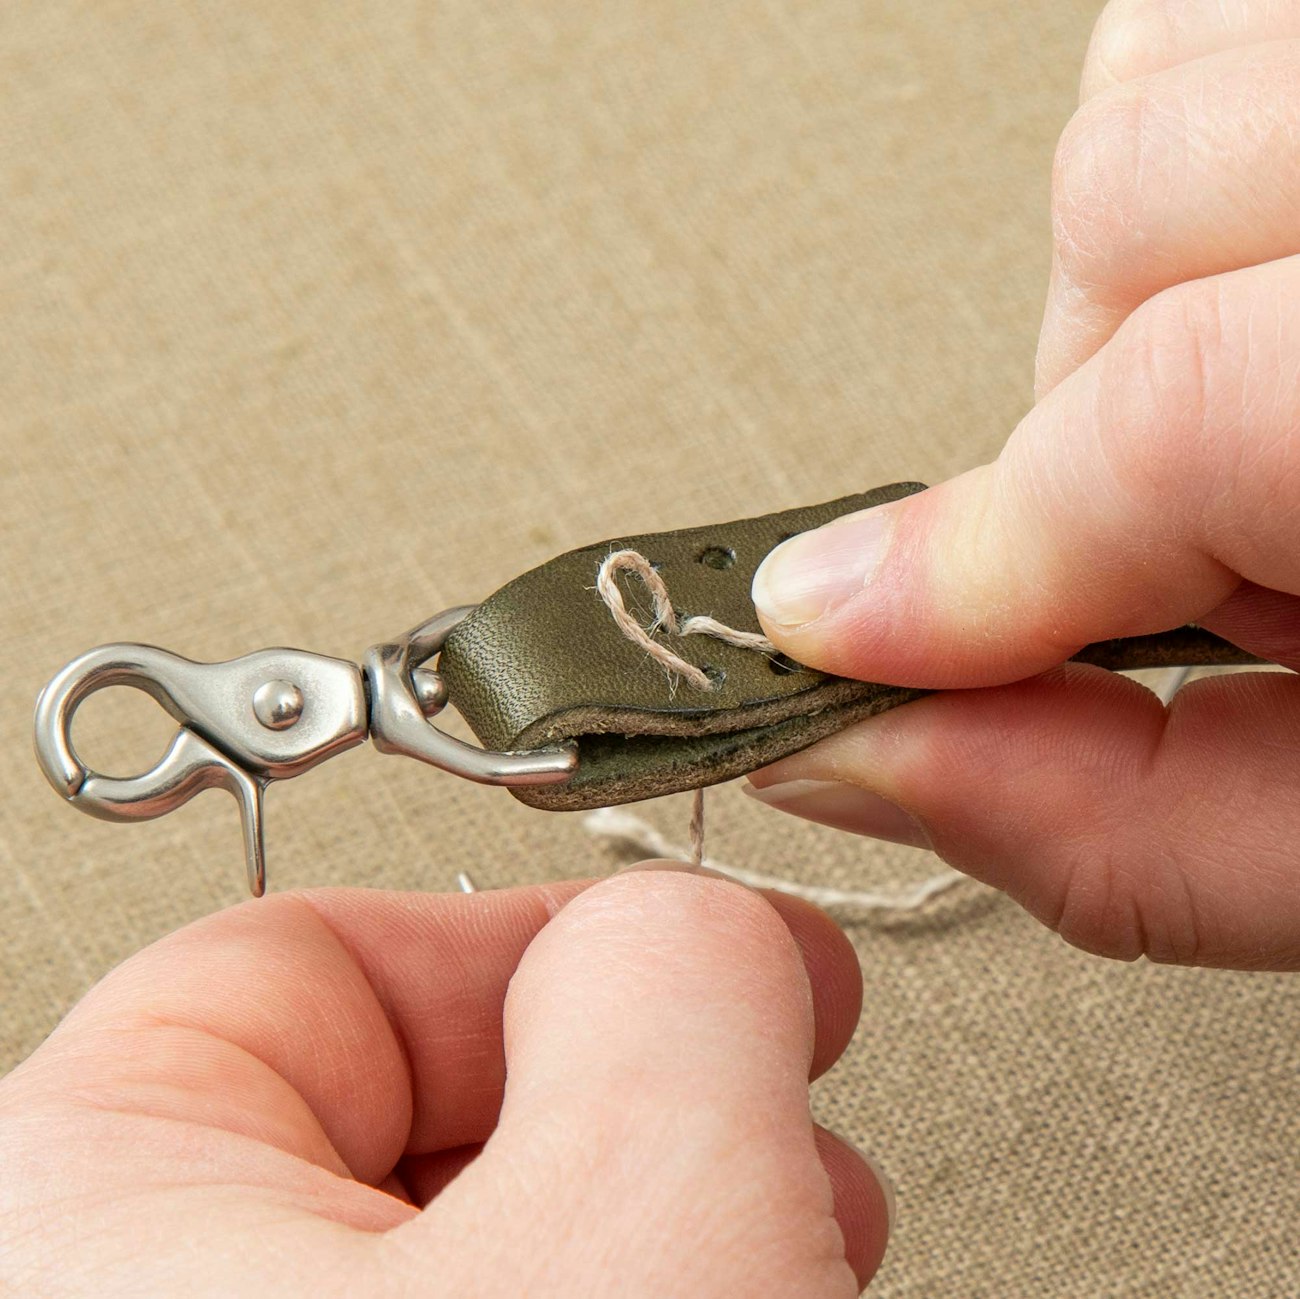
Step 2 Here, we flipped the work over, so that both needles are now easy to see on the RS. Hold the thread in the upper hole out of the way as the needle connected to the lower hole passes through the hole above it, past the other thread, moving from RS to WS. Both threads are in one hole but facing opposite directions. Give both threads a firm tug.
 Step 3 Insert the same working needle that is currently on the WS into a new hole above from WS to RS.
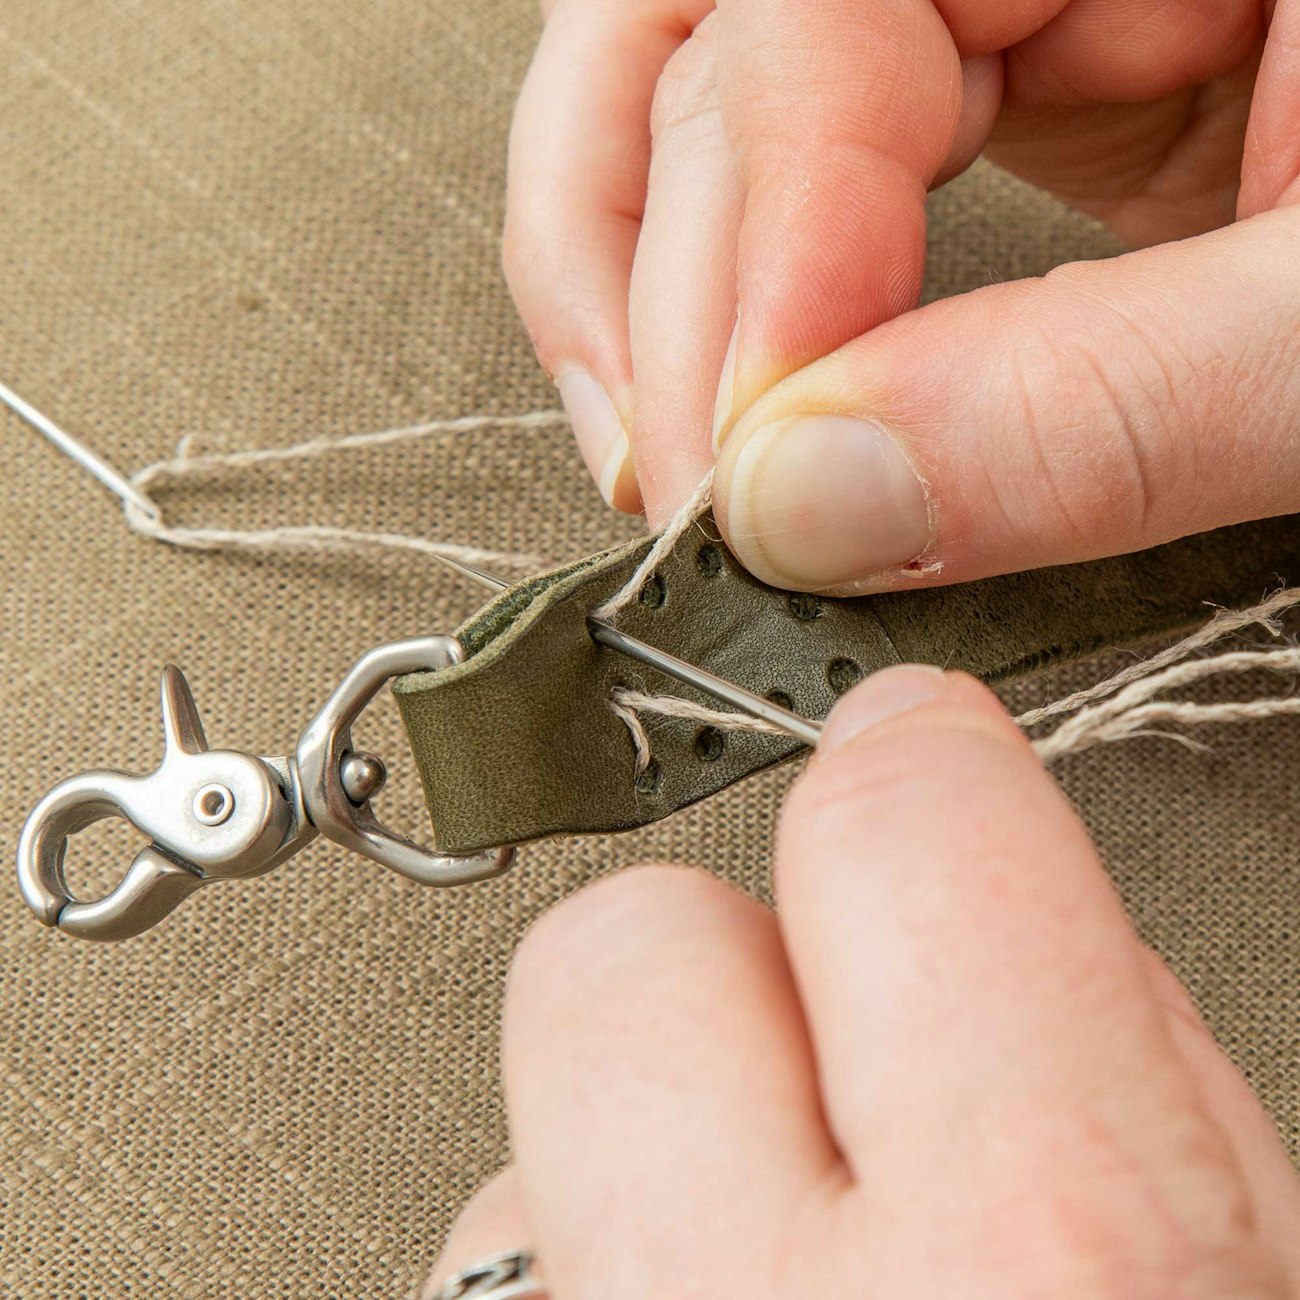
Step 4 The other needle now follows by passing through the same hole above from RS to WS so that both needles are once again passing through the same hole in opposite directions.
Continue working so that both threads pass through each hole in different directions, creating a reversable seam.
The Results
I’m smitten with this bag. I learned new skills from the thoughtfully designed kit, and I went offroad and had an exciting handspun adventure. I’ve been carrying this bag everywhere I go for months, and it is in great shape. My natural-fiber threads might need to be mended or replaced faster than the polyester braid that came with the kit, but that just means I’ll get to practice spinning, waxing, and stitching with handspun again in the distant future.
— Kate
Resources
- Berta’s Flax Guild
- Buckleguy, DIY Mini Tote Bag Leather Kit
- Burnley & Trowbridge
- Duncan McHarg, "Hand Rolled Shoemaker's Thread."
- Seamwork
Don’t miss out on all the Fall issue has to offer—get your copy today!
Originally published August 21, 2026; updated August 31, 2026.