

I can’t wait for you to see what’s coming in the Spring 2026 issue. There’s so many fun ways to play with color, texture, knitting, weaving, and yes crochet. This tutorial will help you get started with one of the patterns. What is it? The Spin Off Spring 2026 issue will start coming to your inboxes in early March, so be sure to subscribe so you don’t miss out!
What is the Magic Ring?
A crocheted magic ring, also called a magic circle, is a clever way to start crocheting in the round. You’ll create your first round of stitches around a big loop that keeps things manageable while you’re getting started. Once you've created as many stitches as you need, you simply pull the loop closed, leaving a nice, tight start with no hole. Magic!
How to Make a Magic Ring

Click on any image in this tutorial to see it full-size.
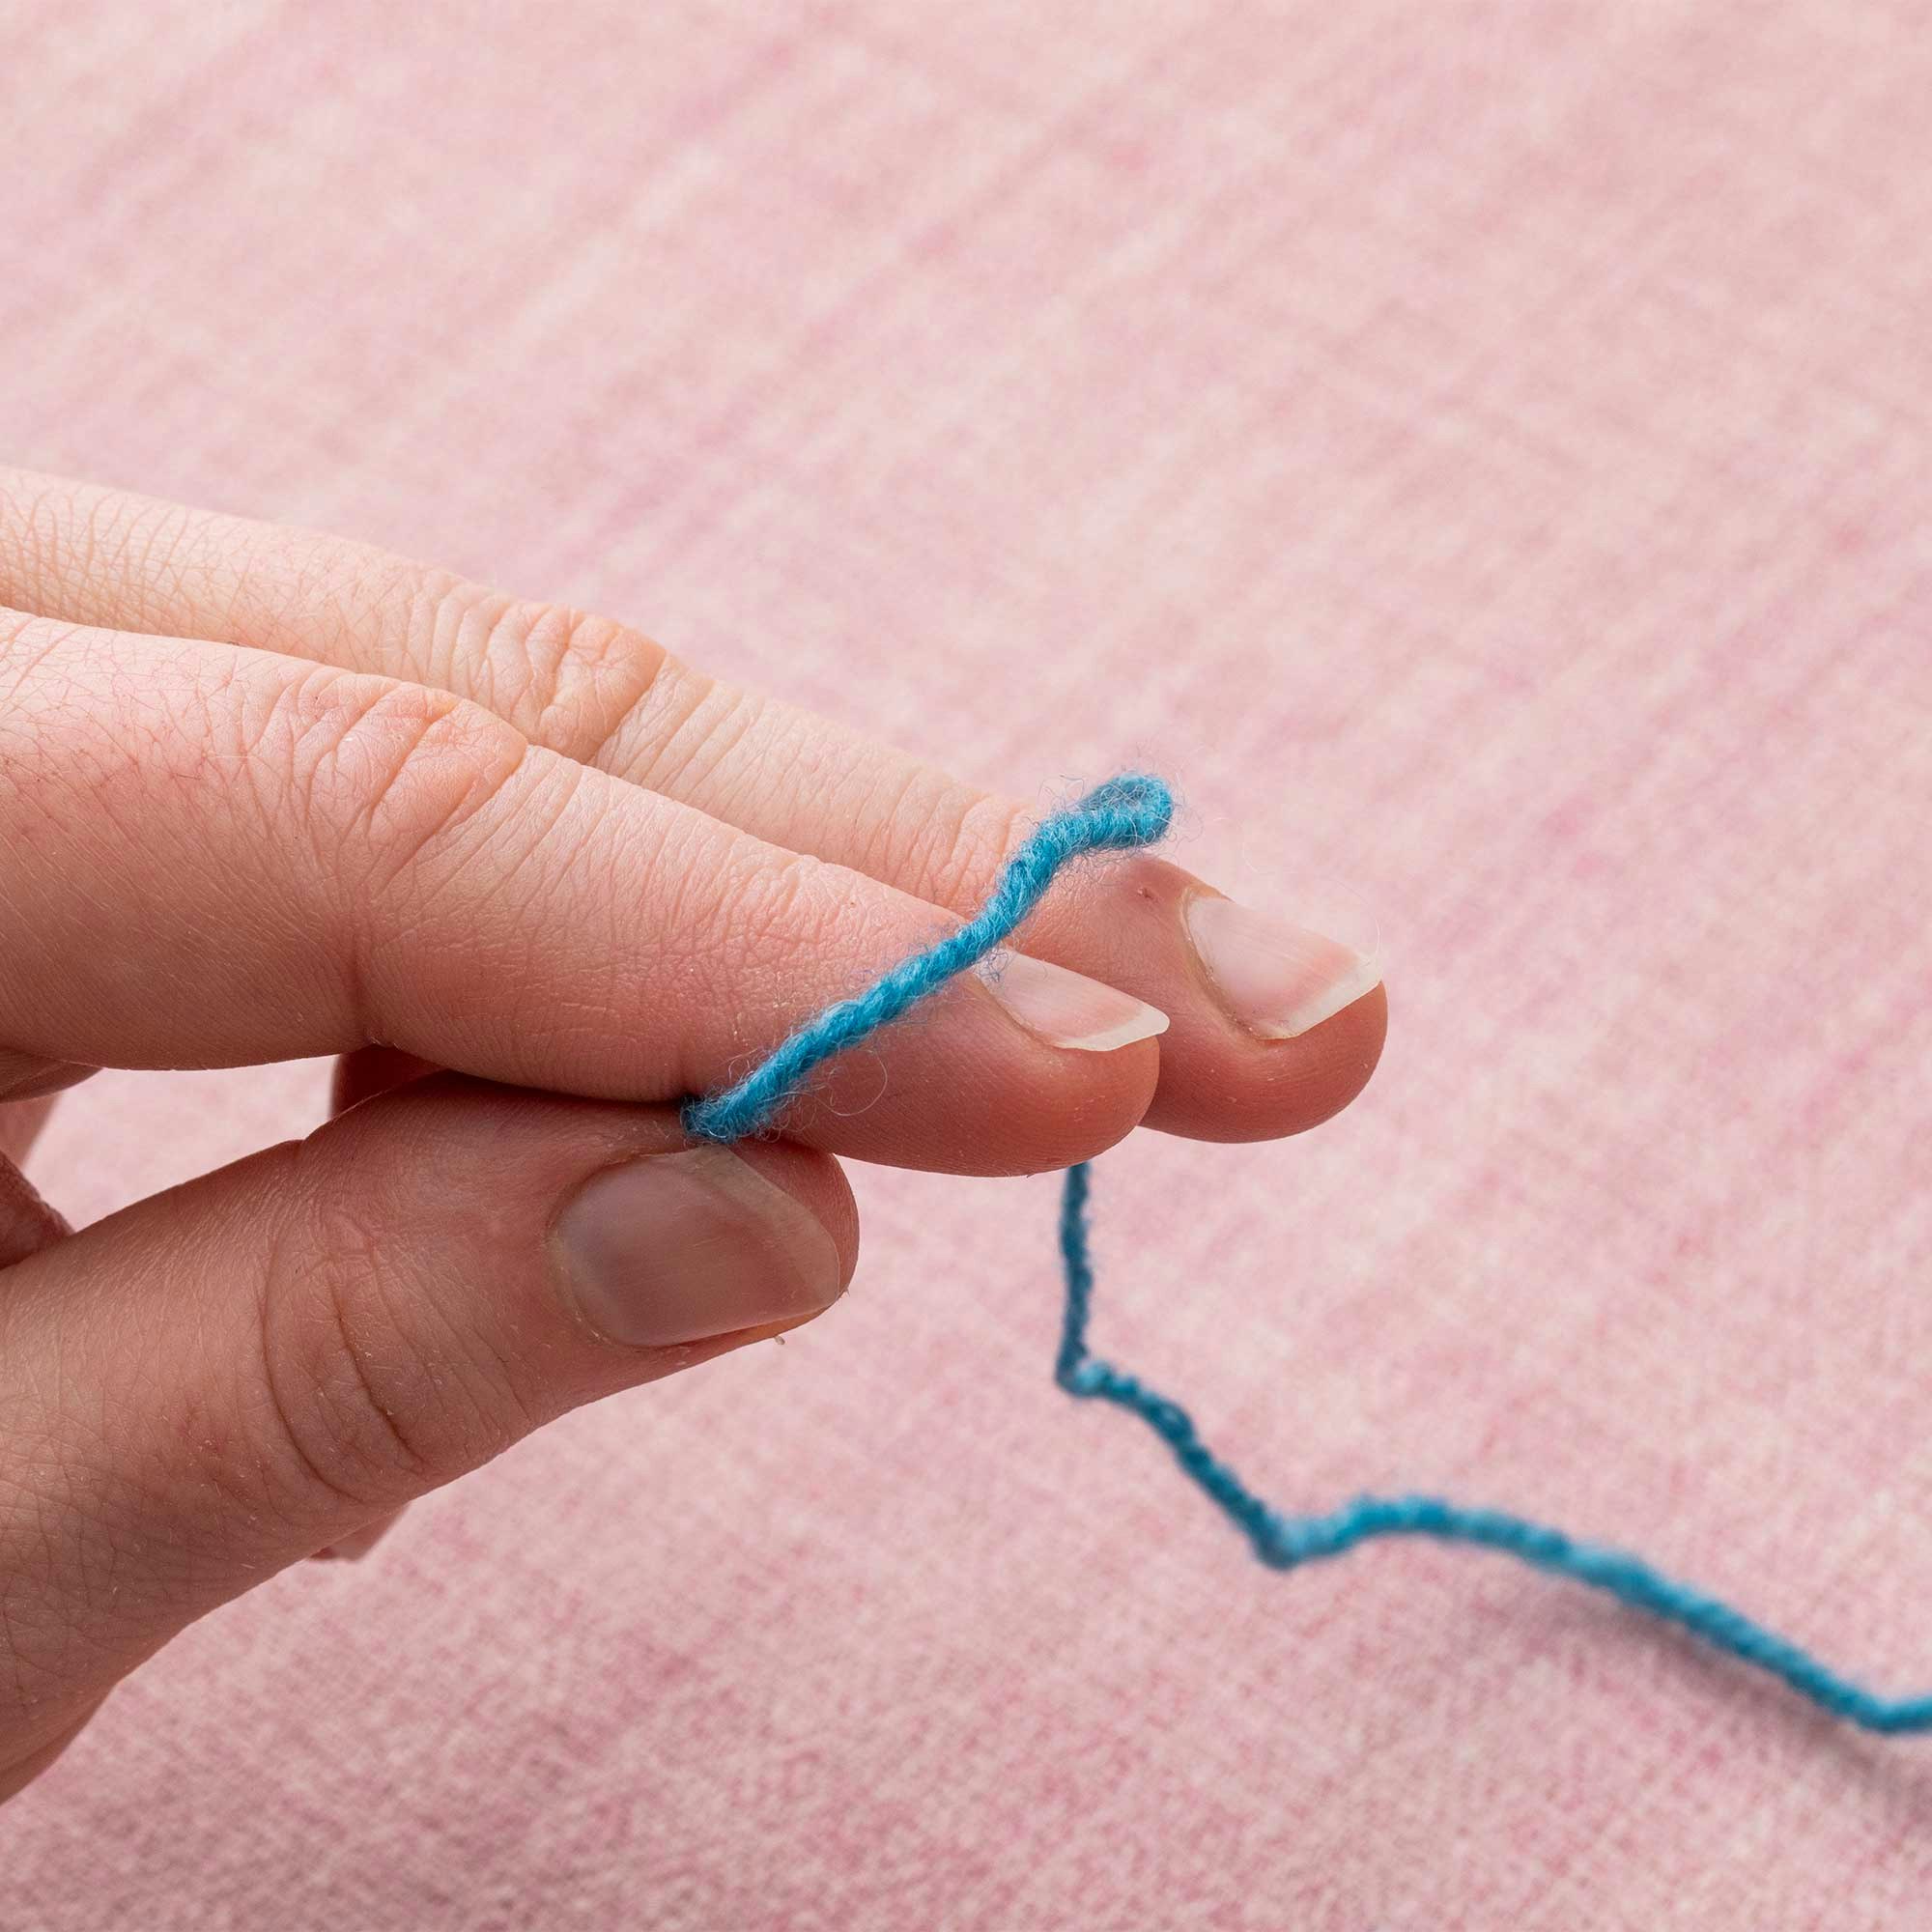
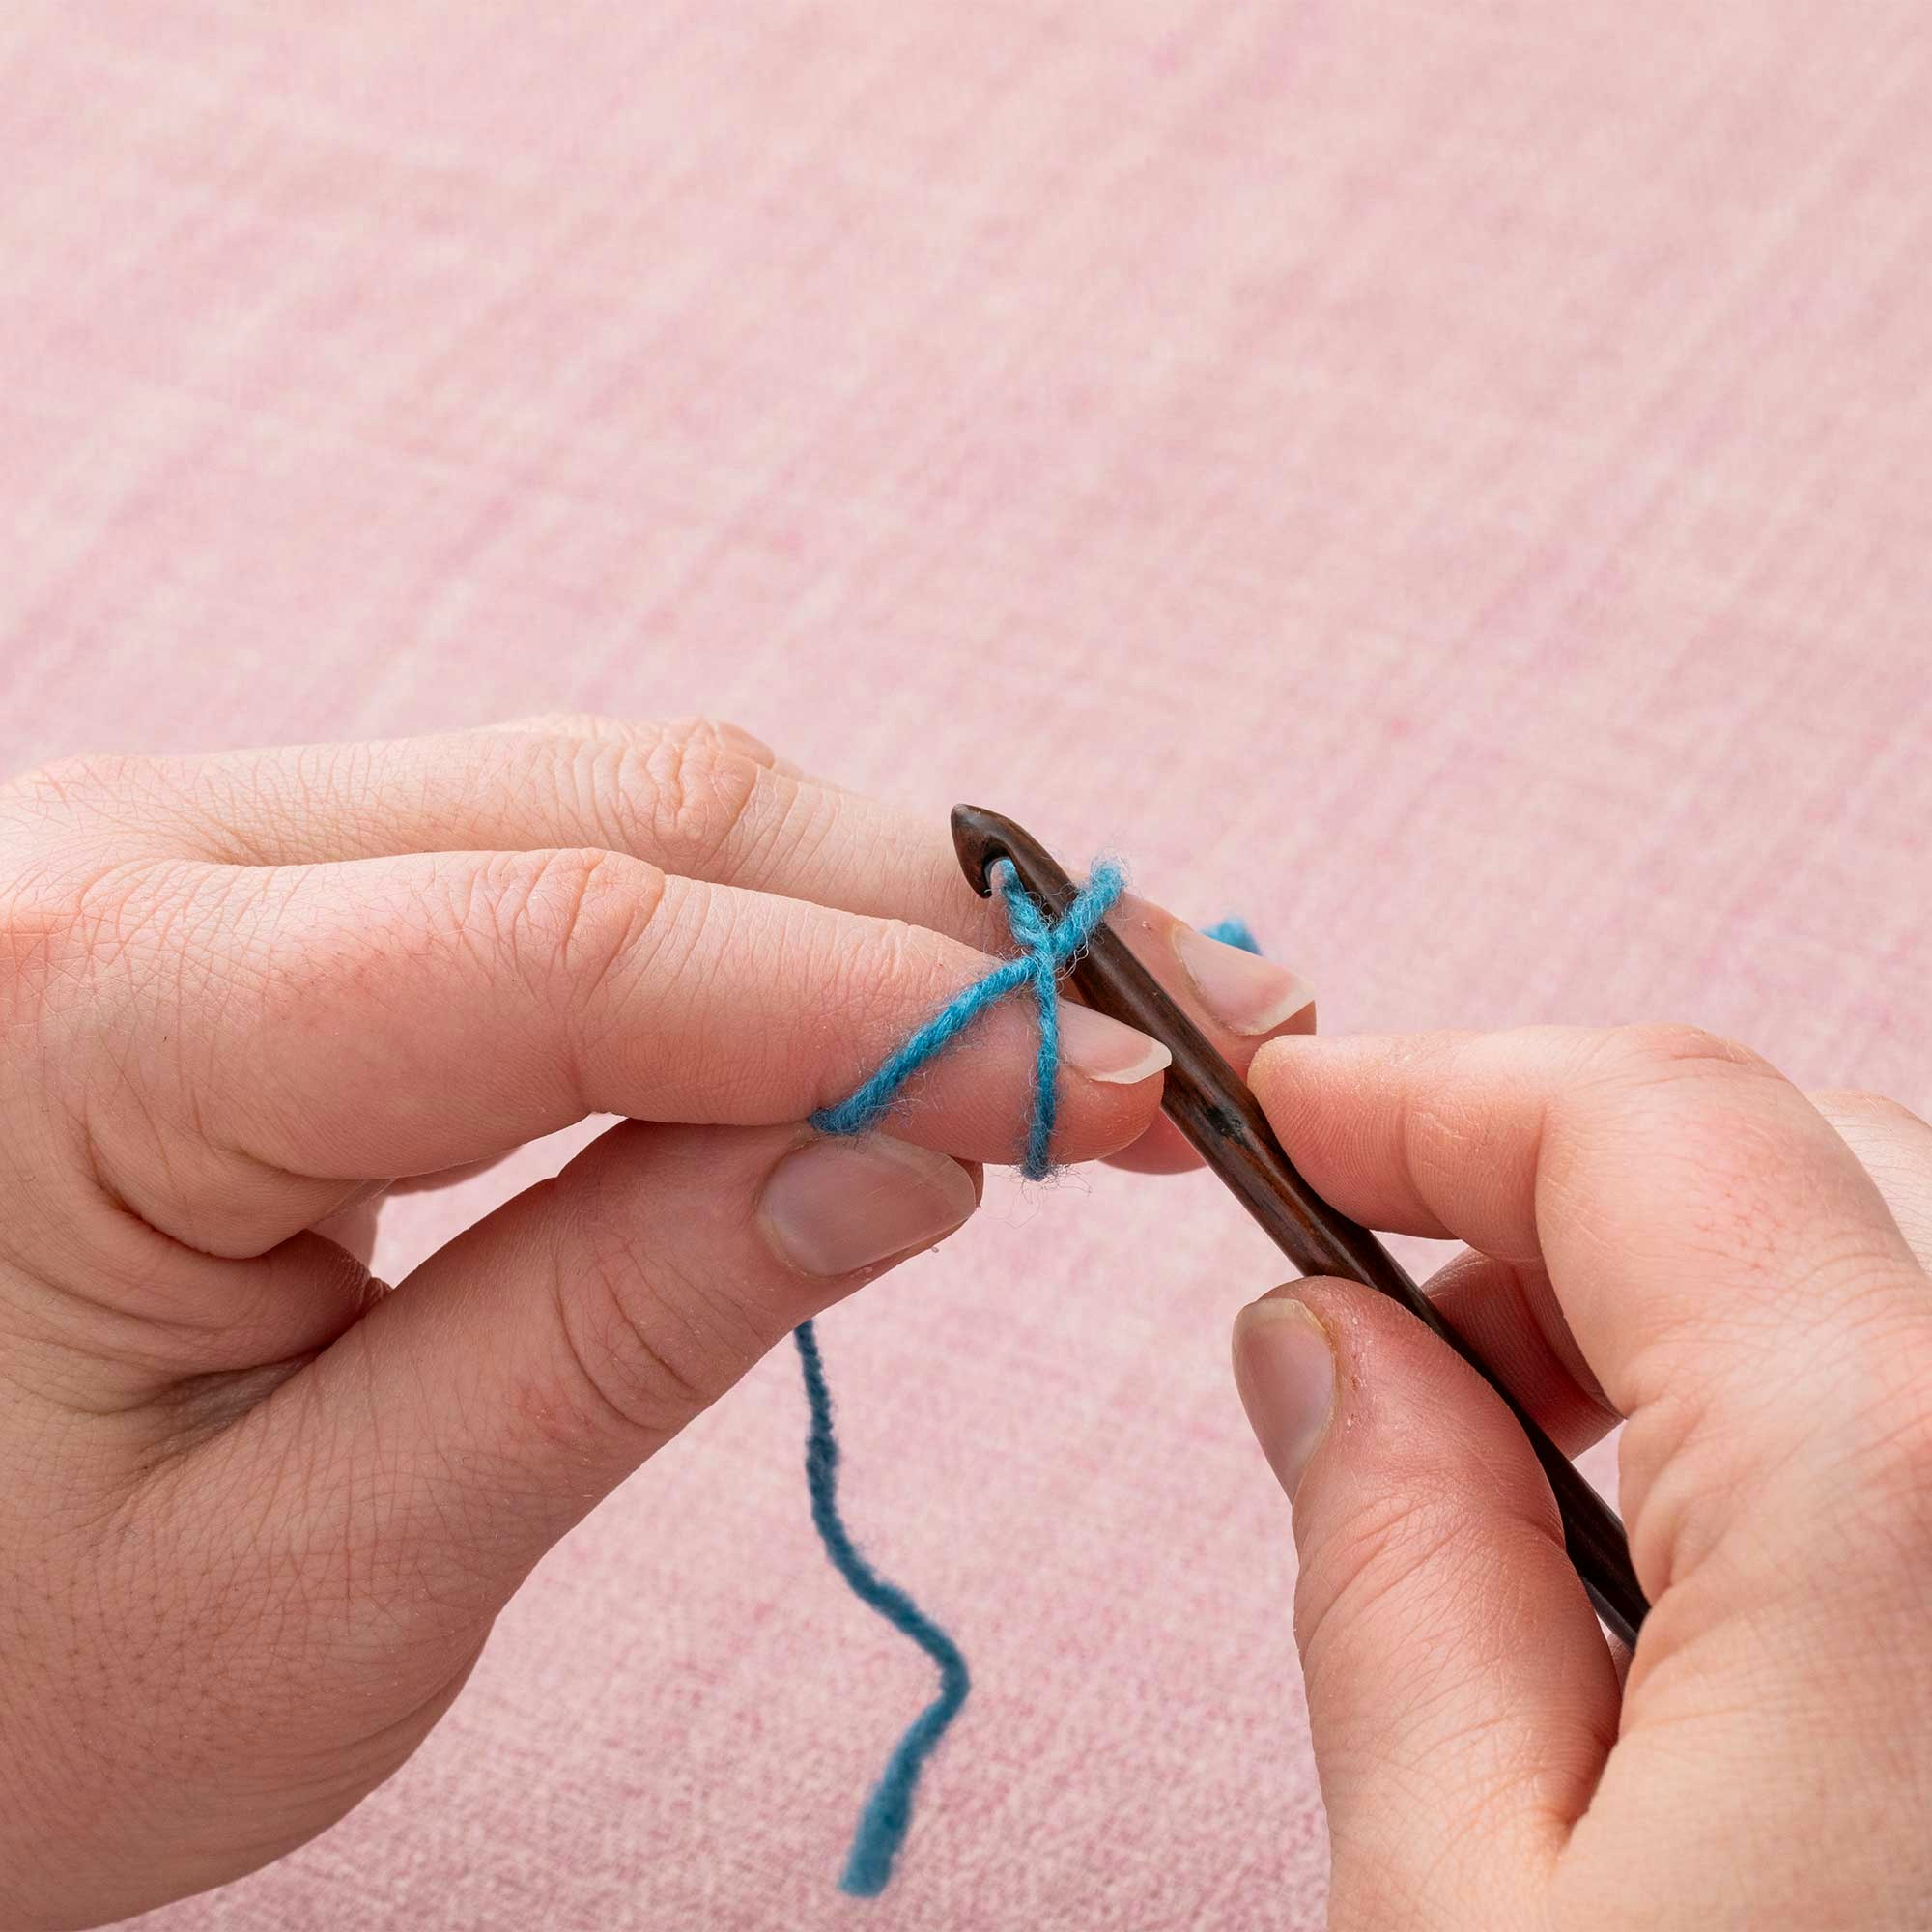
Hold the end of your yarn between thumb and forefinger. Let the long end of the tail drape over your middle finger and away from you. Wrap the long end of the tail around these two fingers one more time so it creates an X shape going over the first loop. Insert your crochet hook under the top right arm of the X and grab the top left arm of the X with the hook.
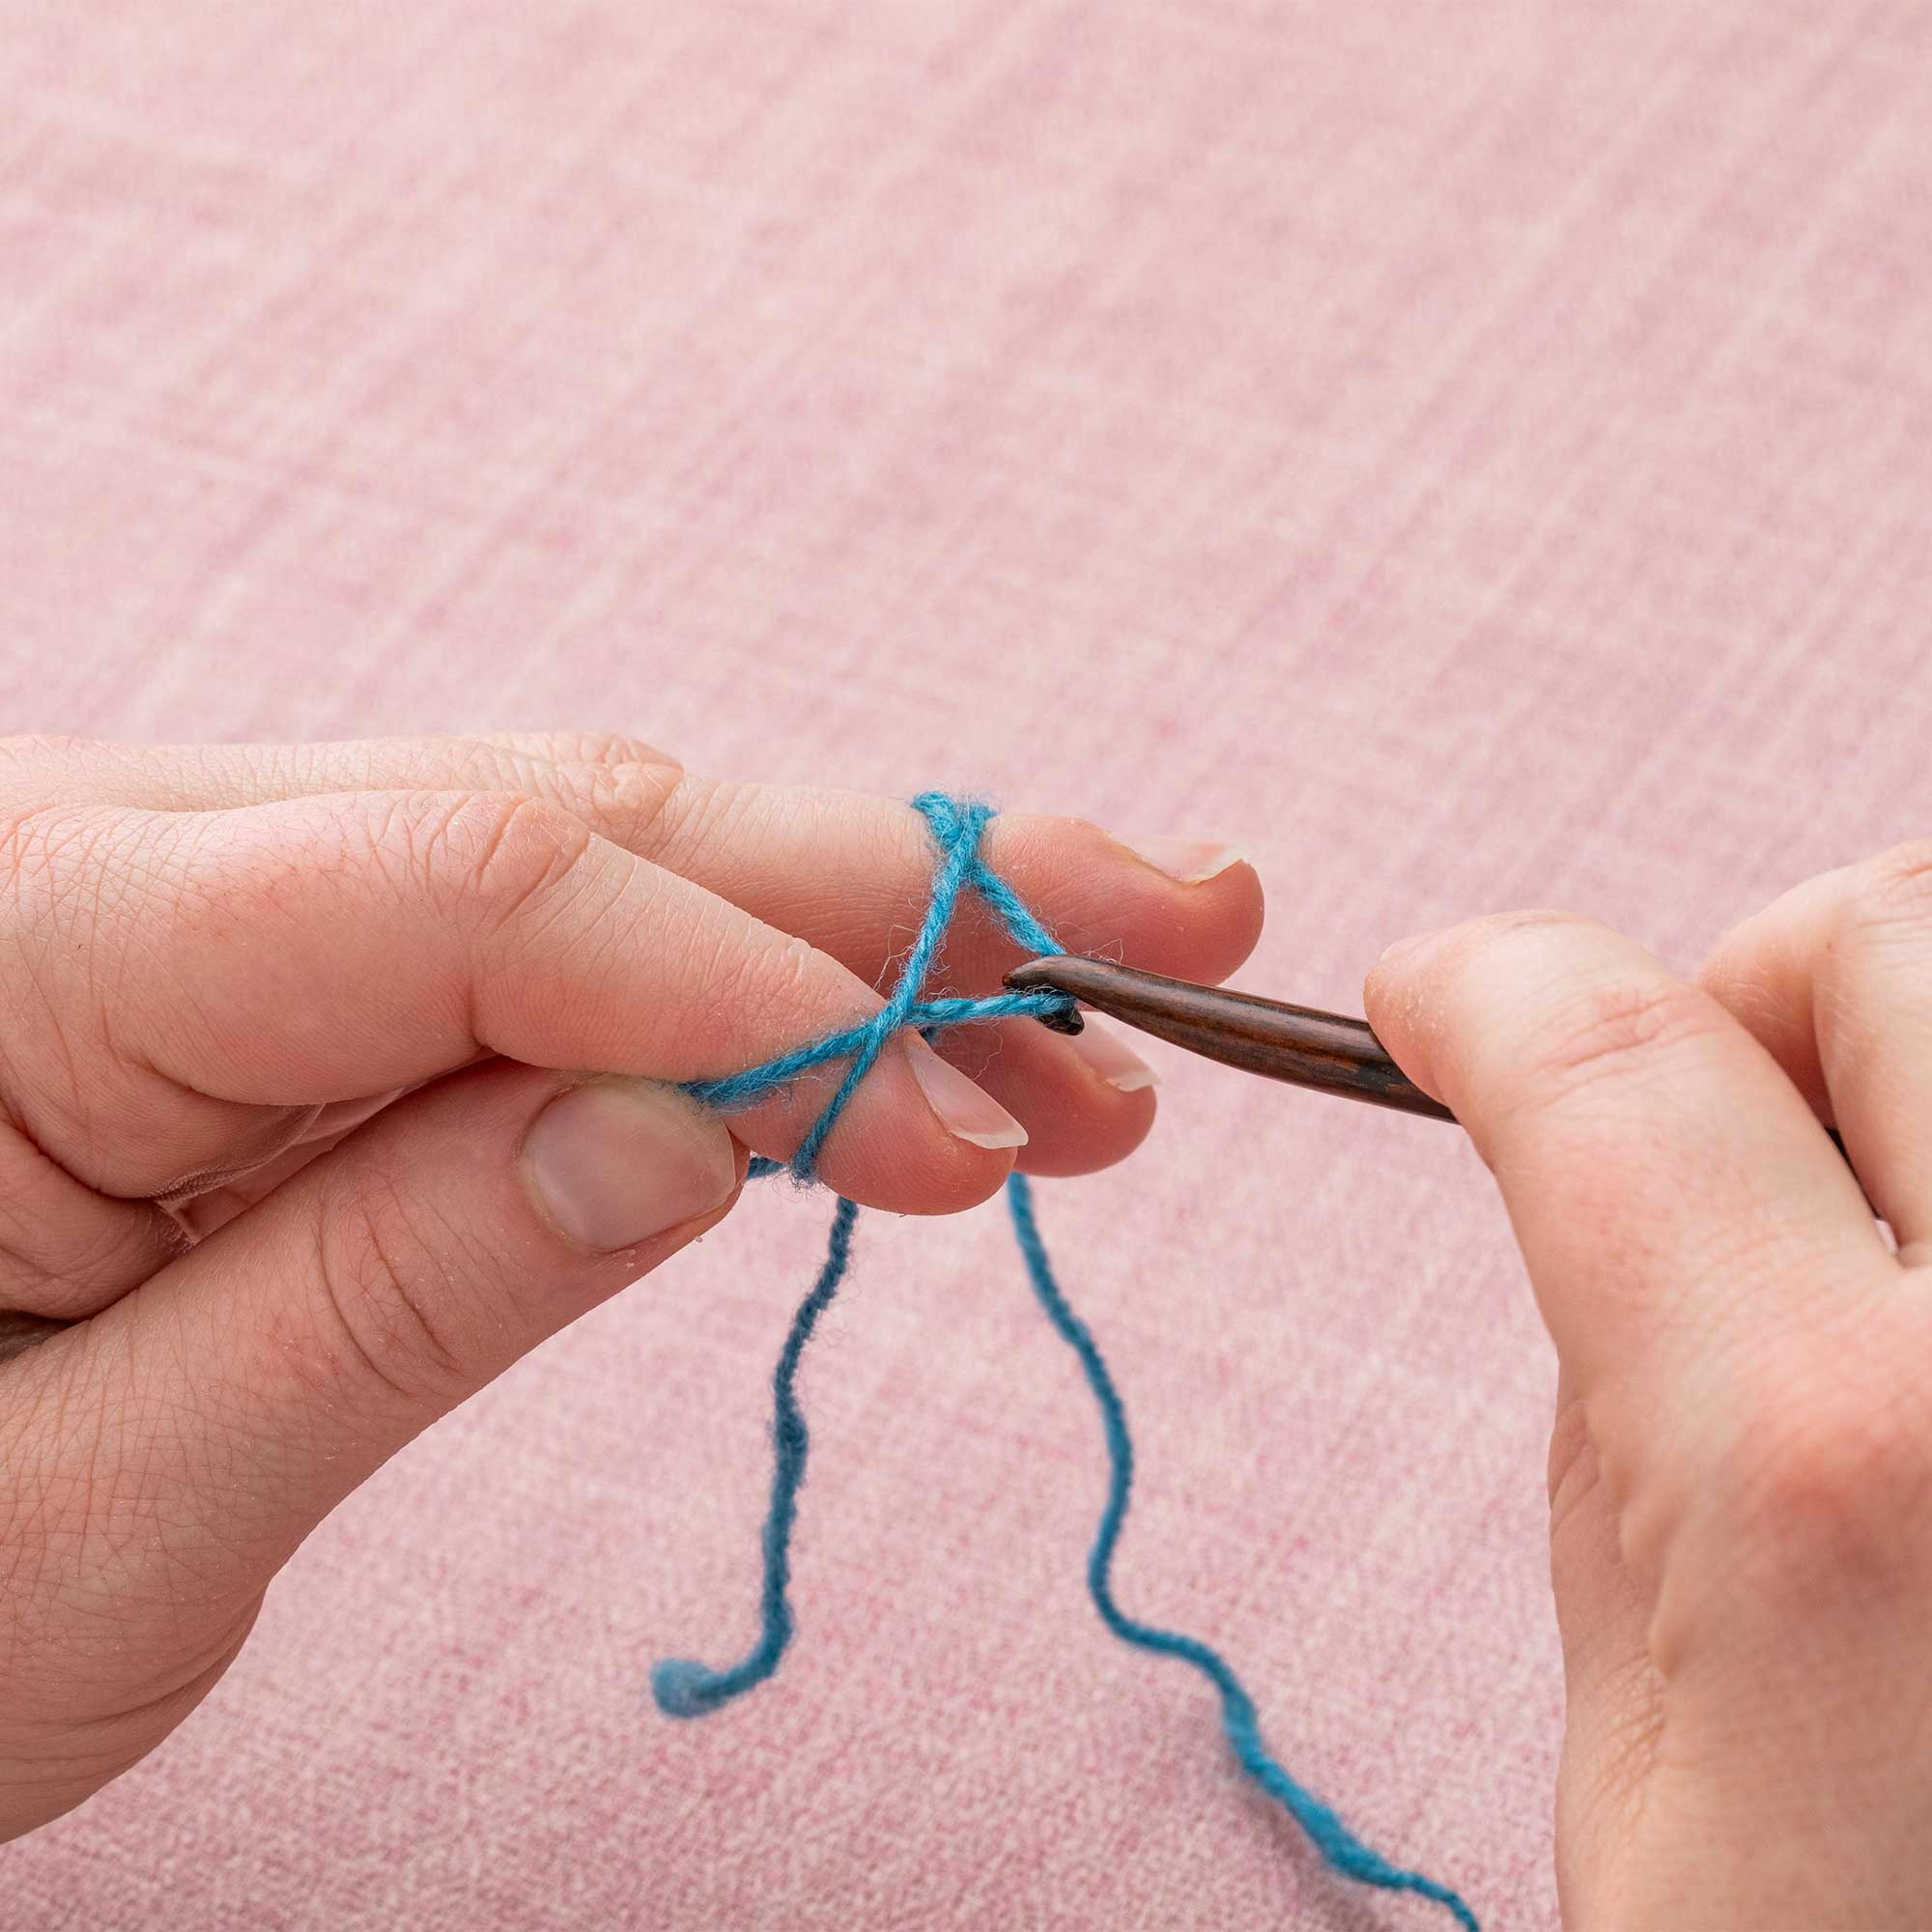
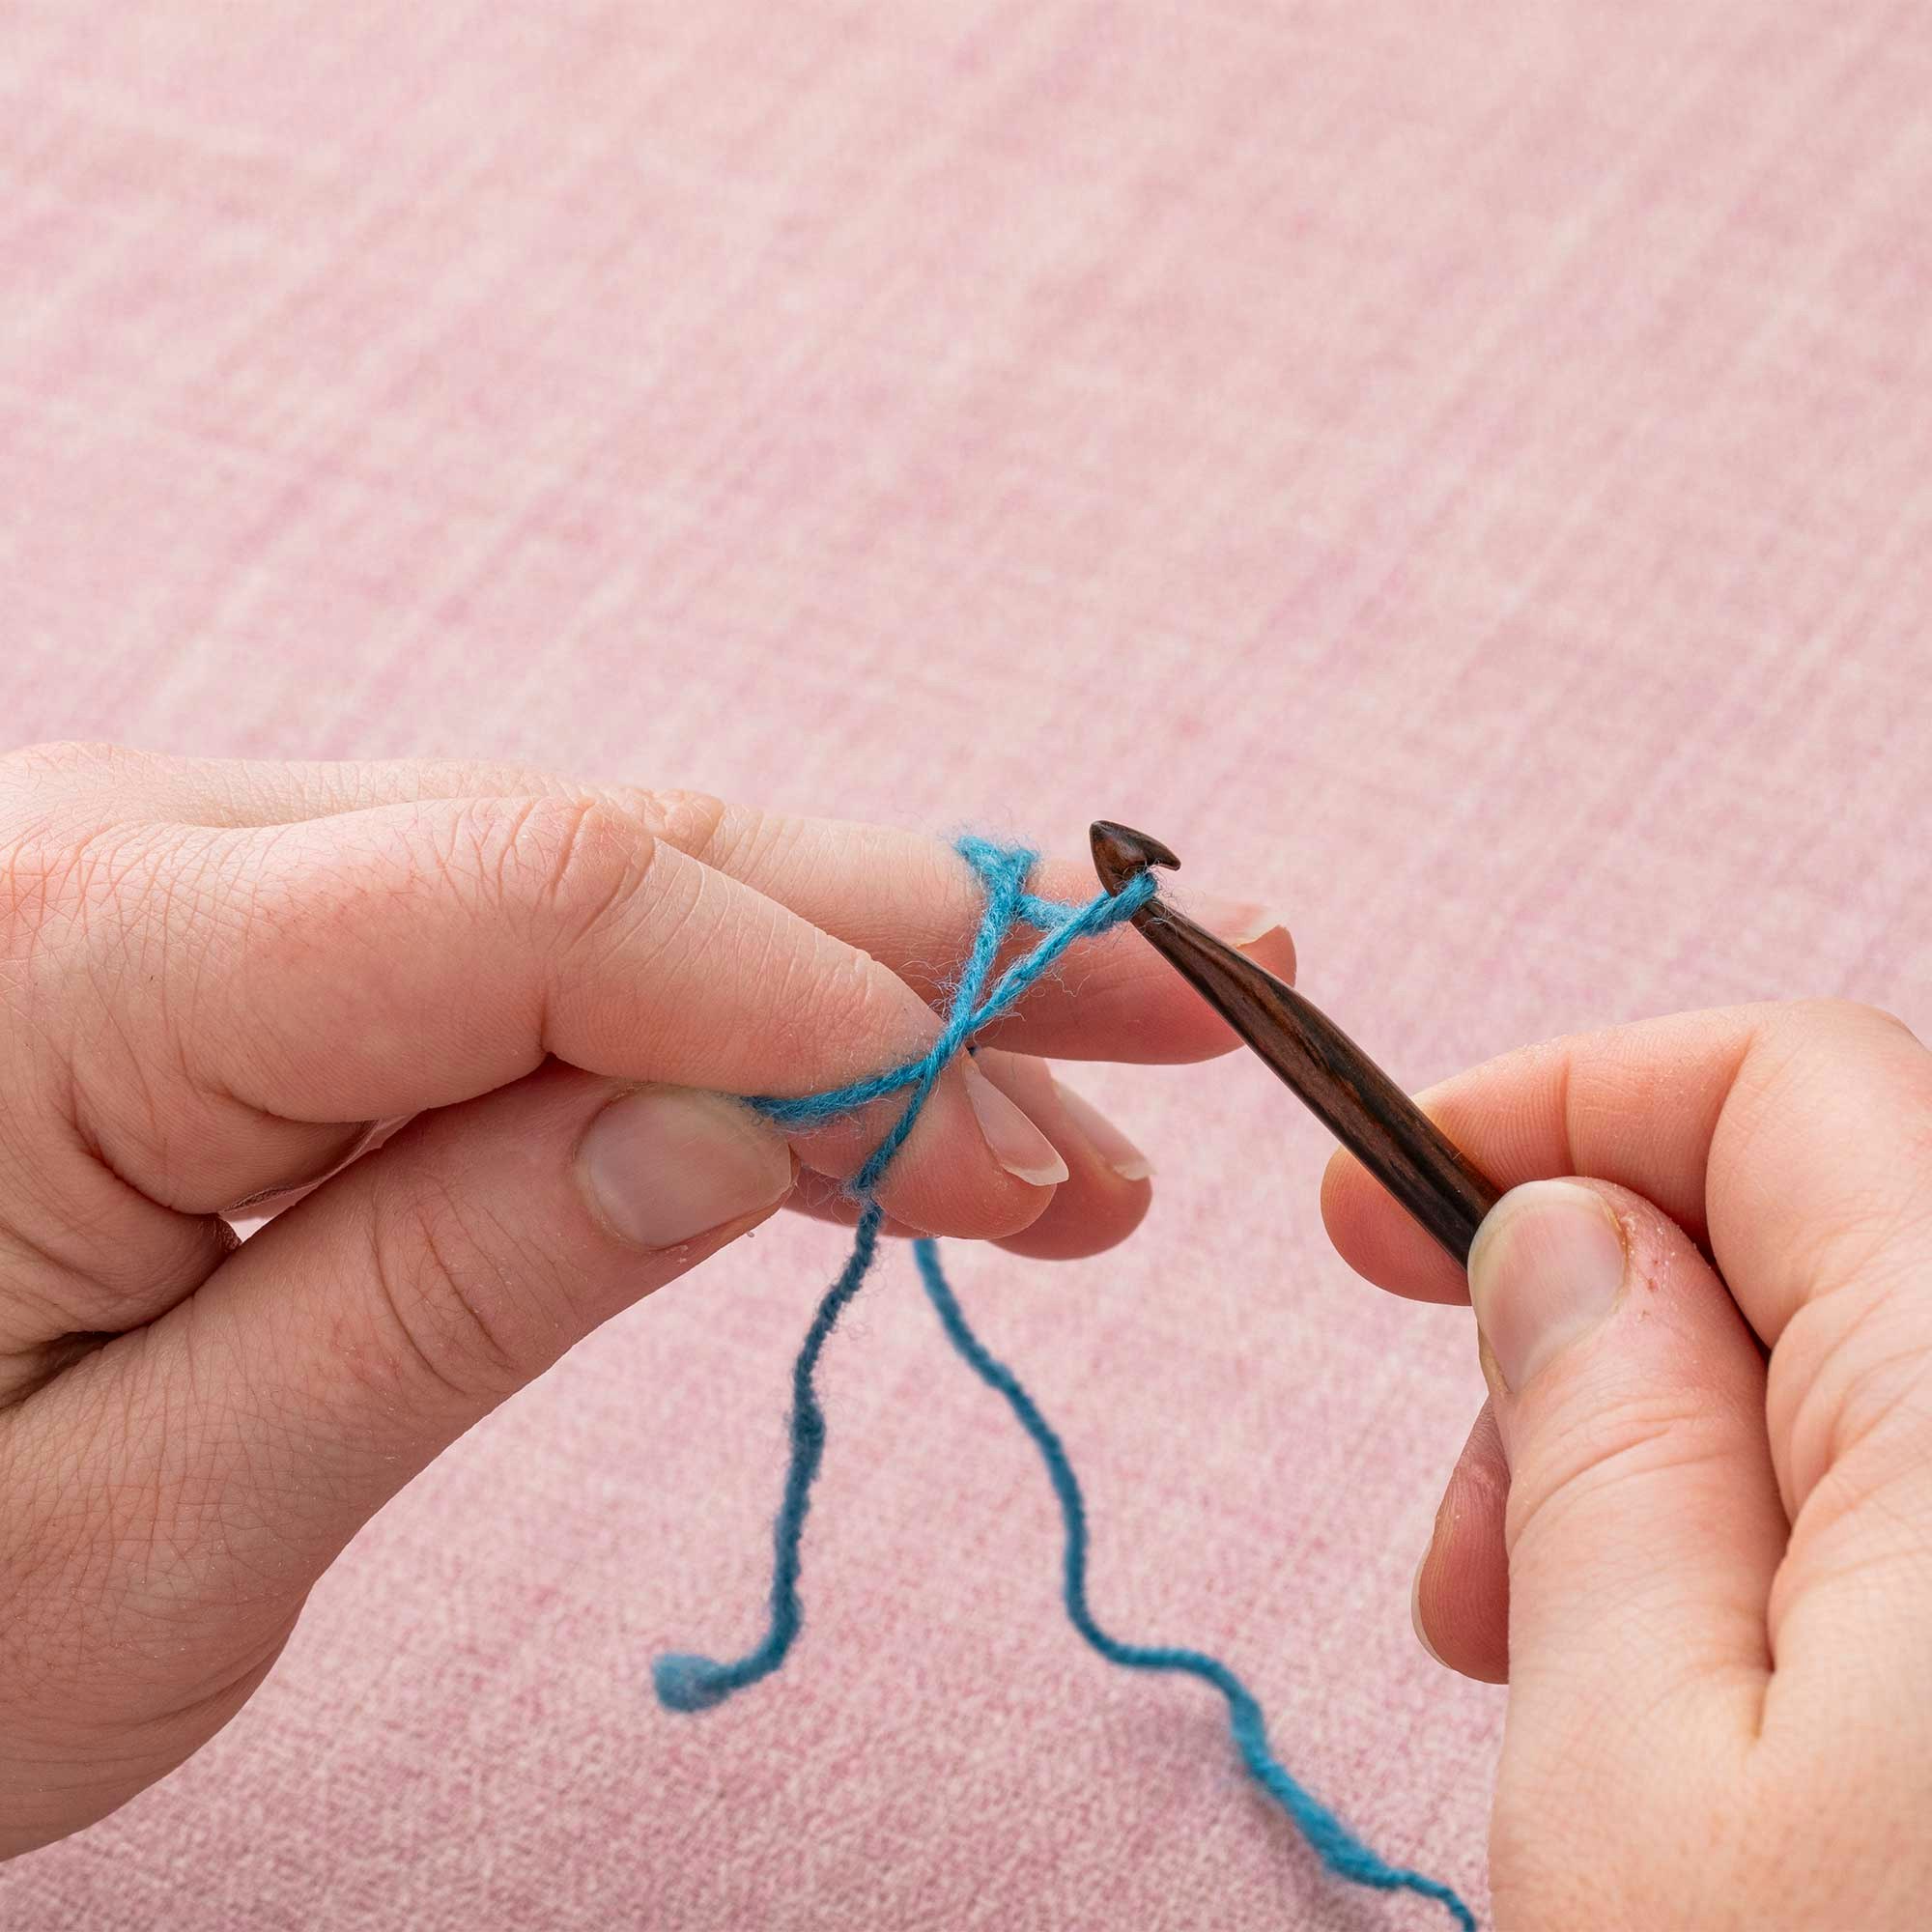
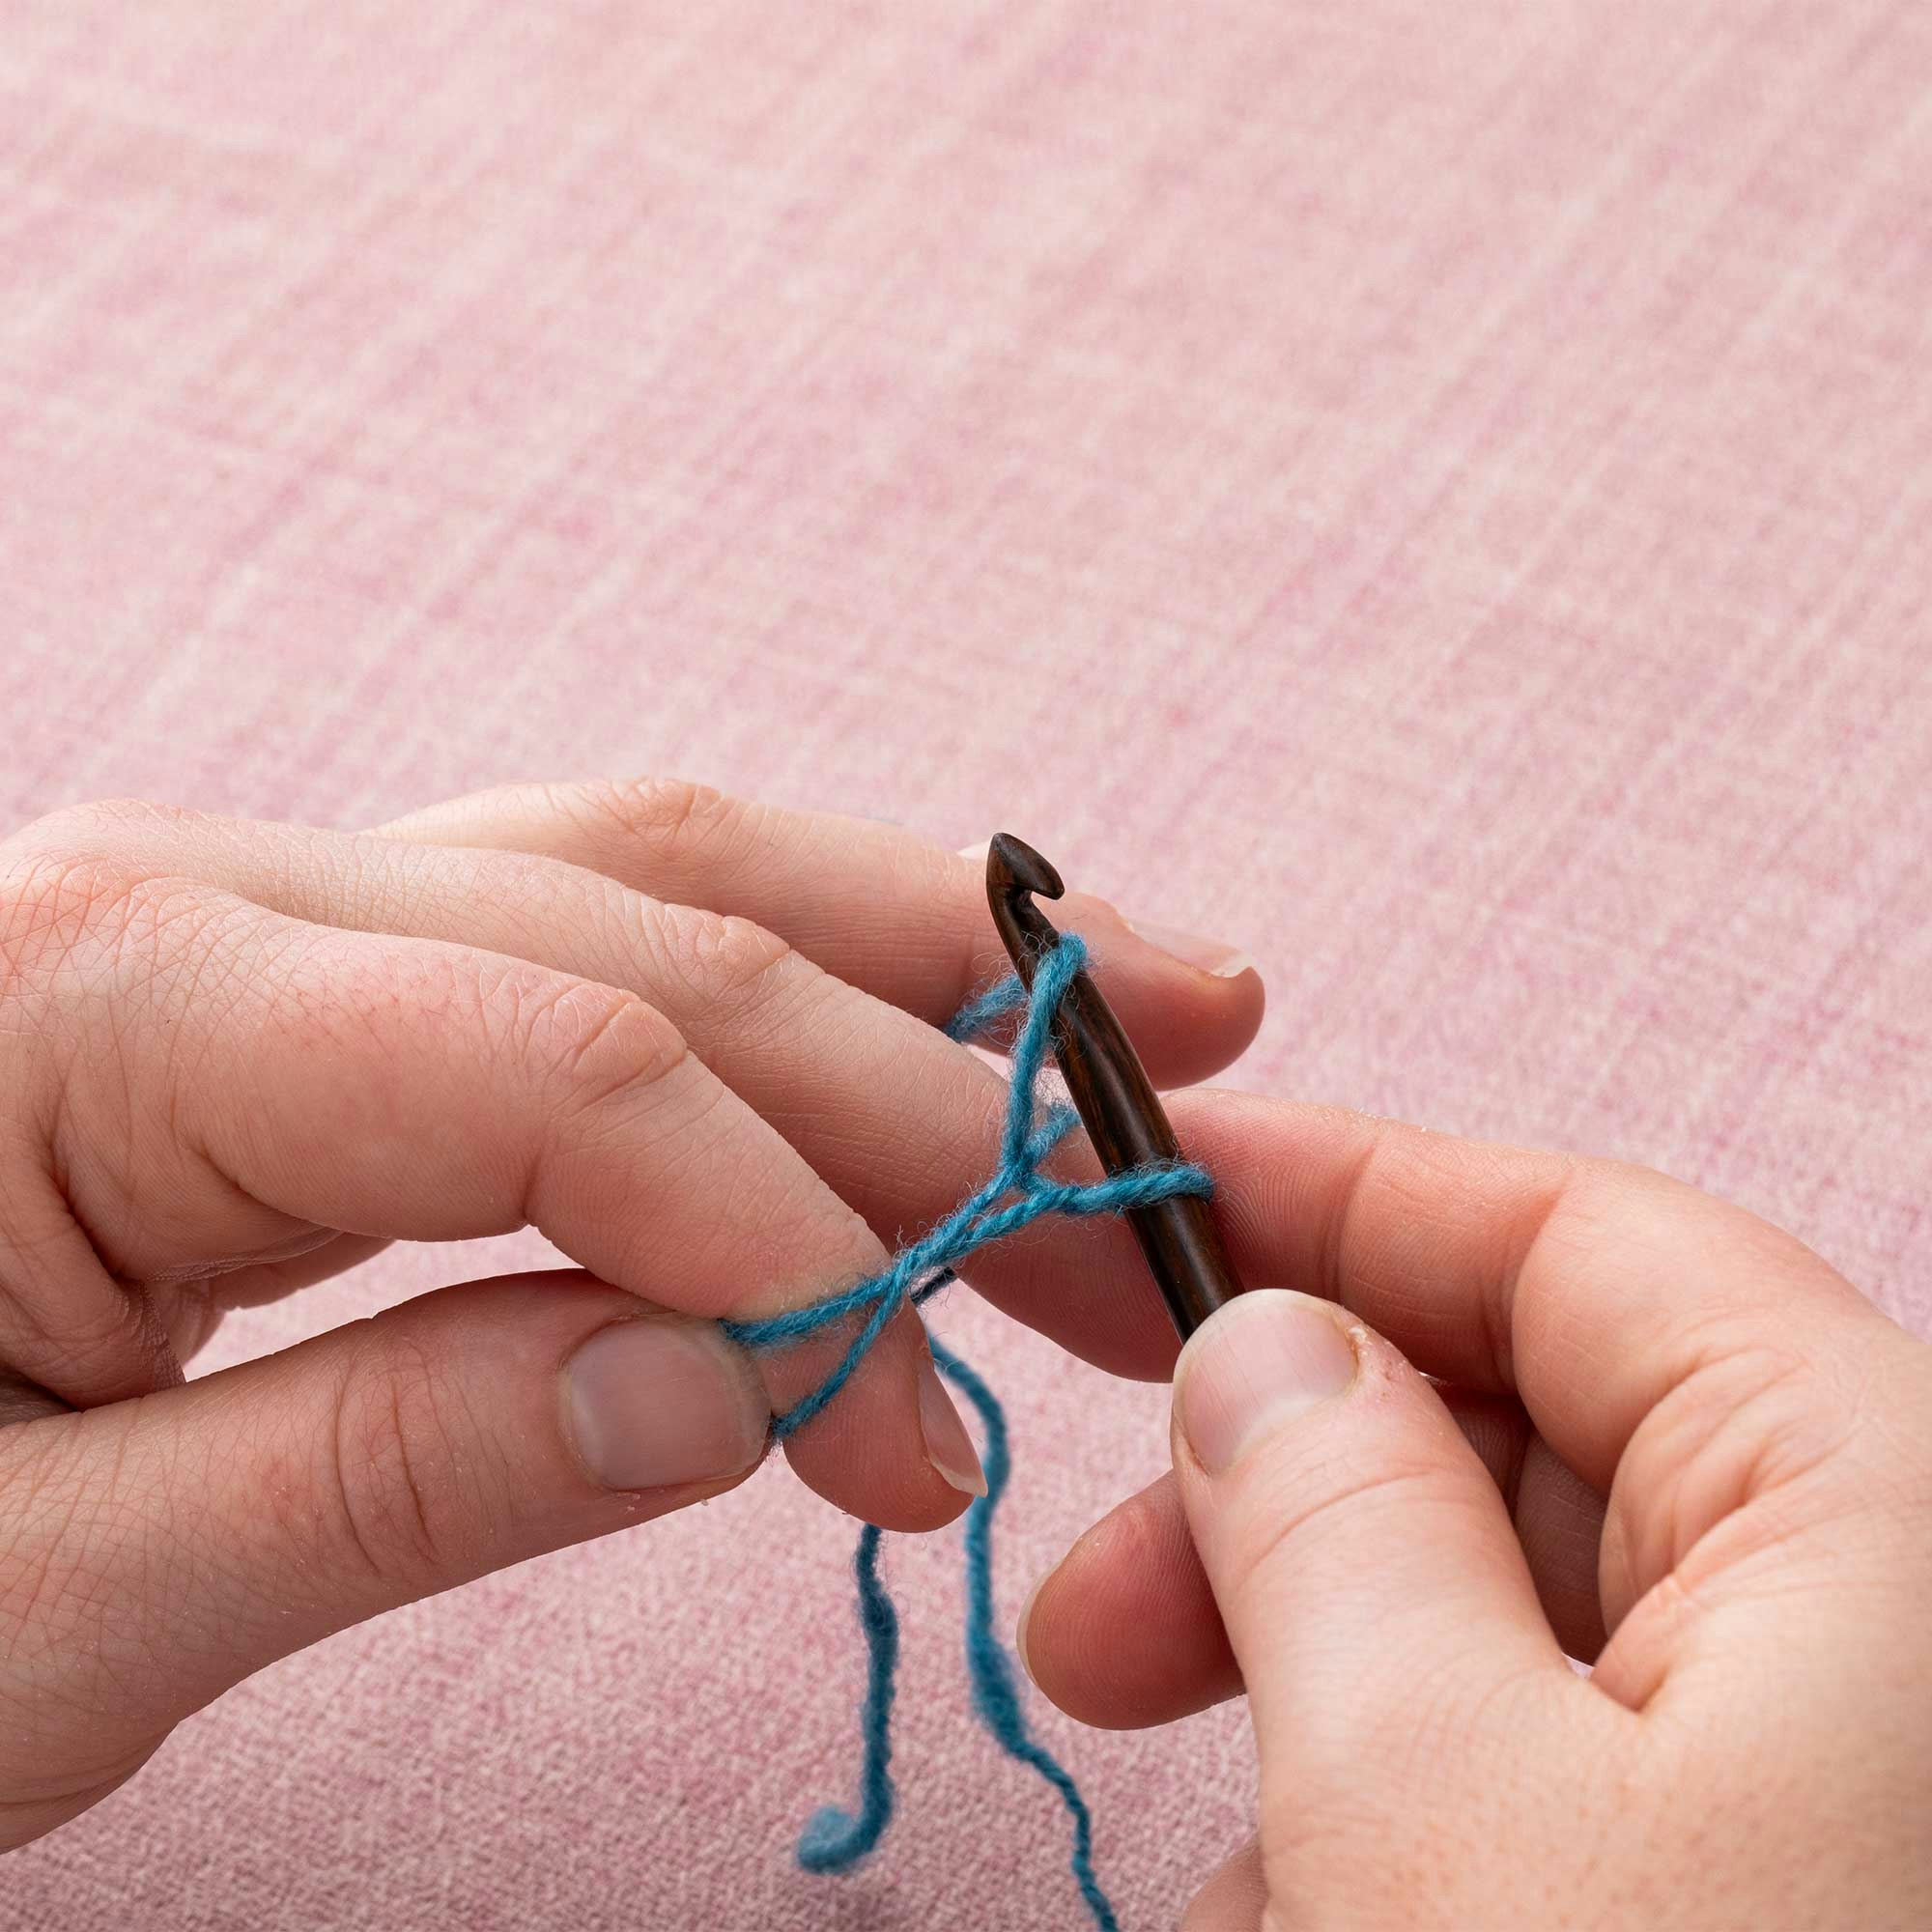
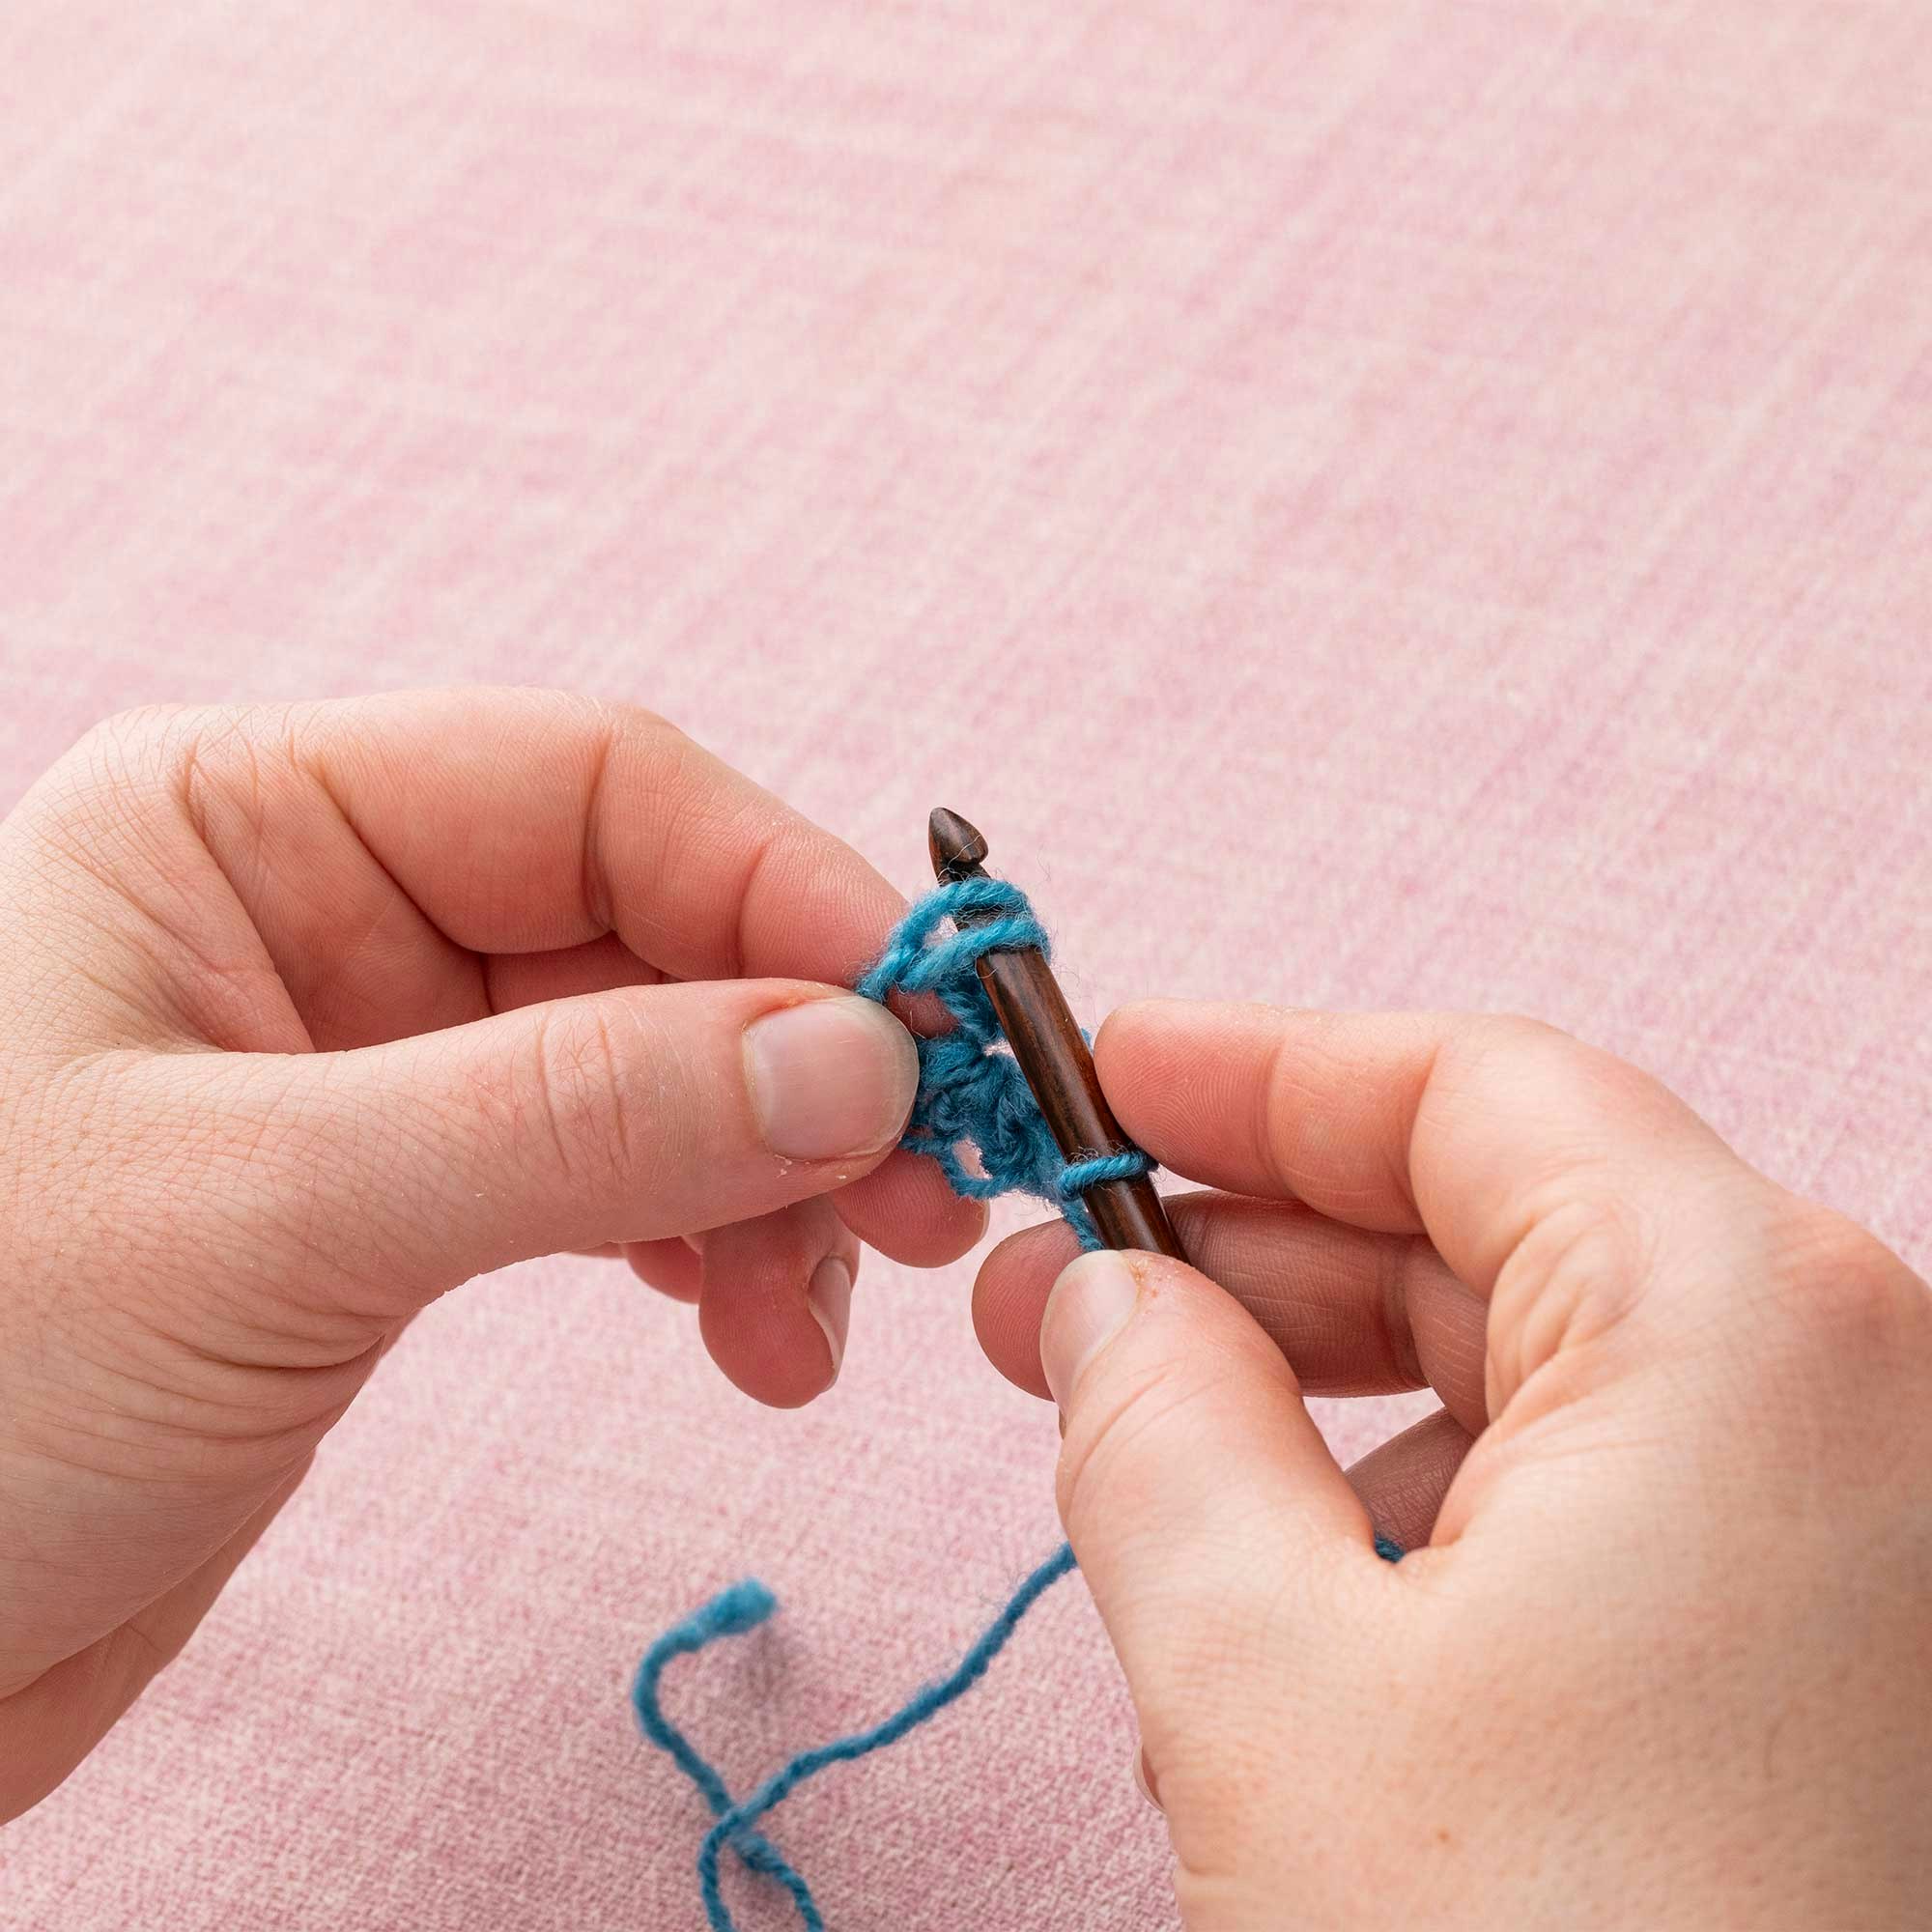
Keeping working yarn tensioned with your ring finger on the hand holding the magic ring, pull the loop towards your hand holding the hook. Turn the hook a quarter turn to secure it on the hook. Make a yarnover with the long tail.

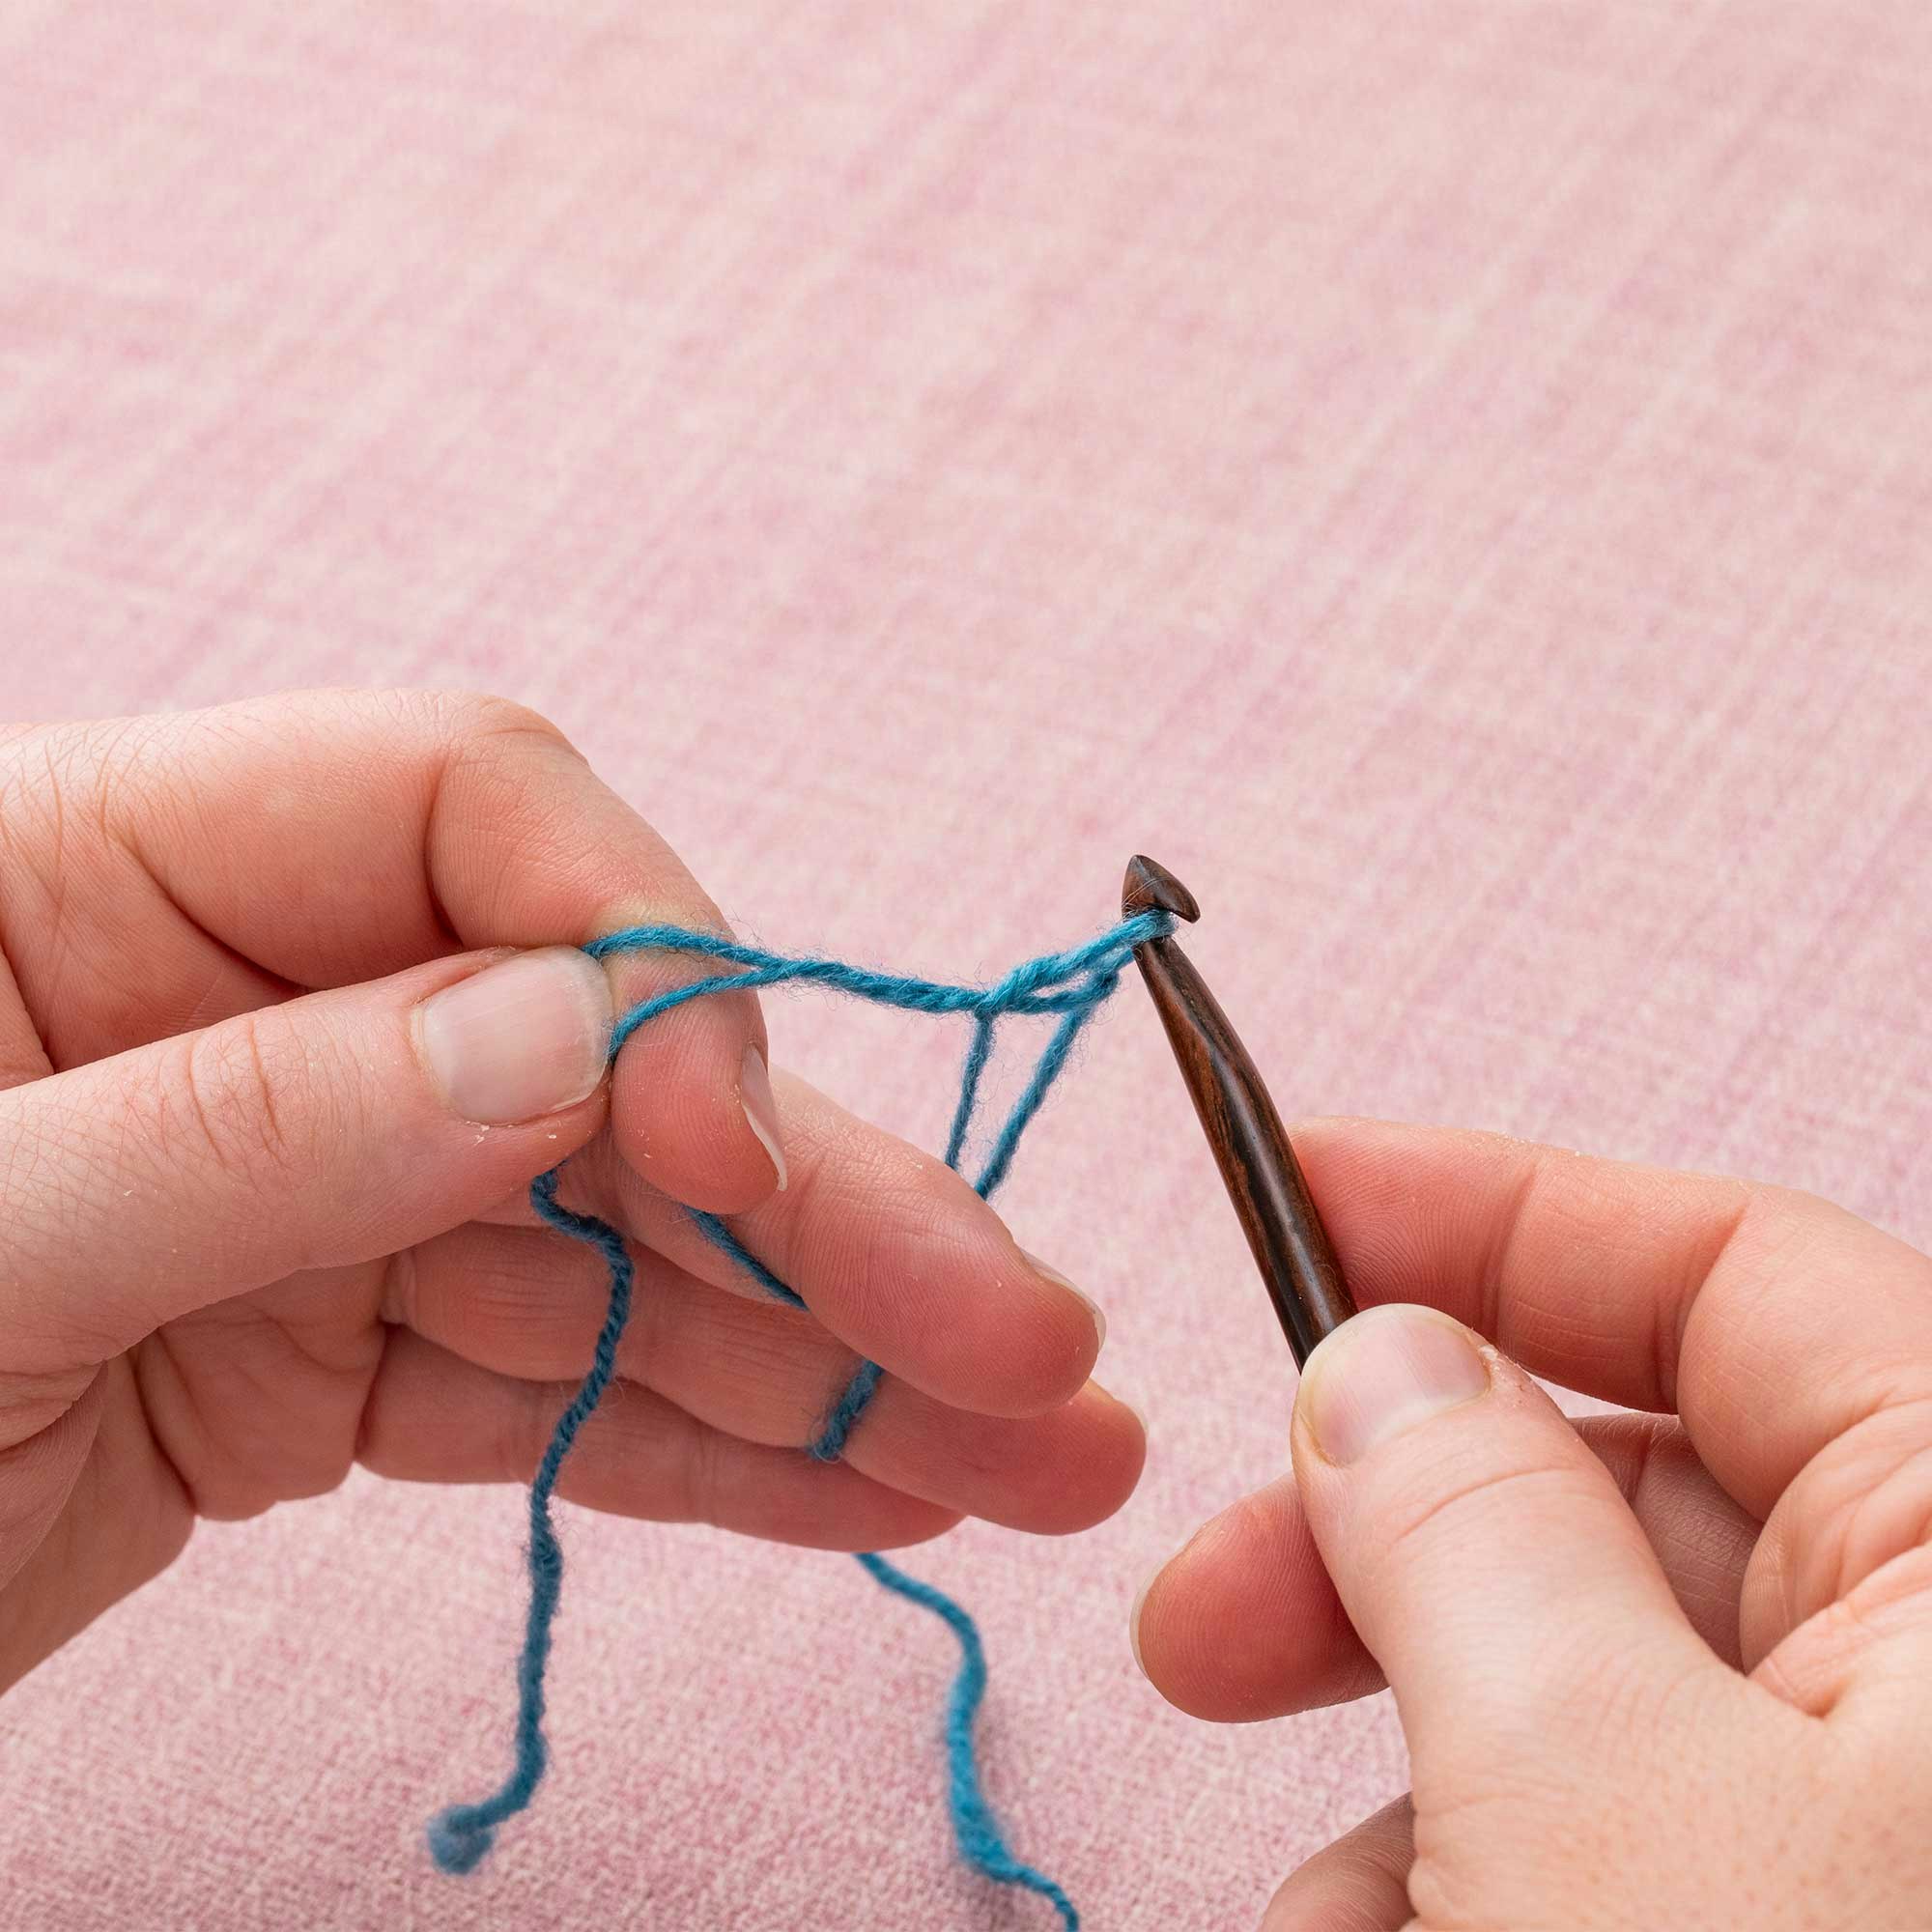
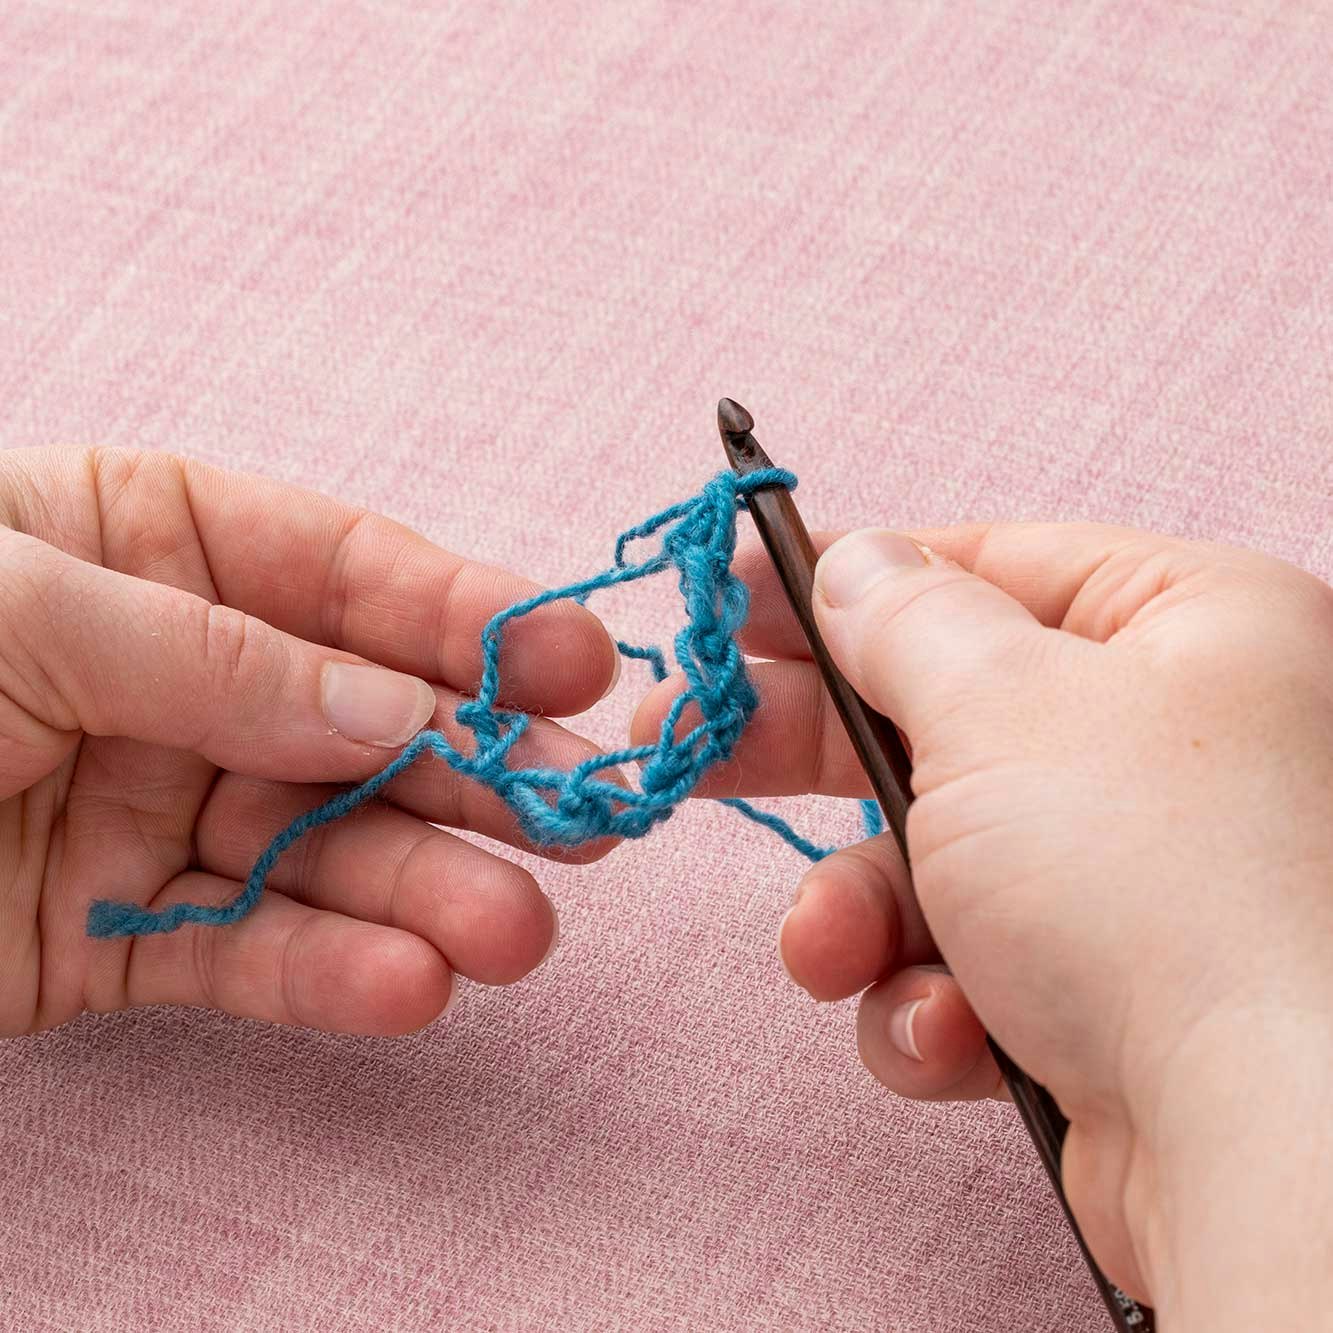
Pull the yarnover through the loop already on your hook. You’ve made your first stitch! At this point, you will continue these steps for as many stitches as you need.
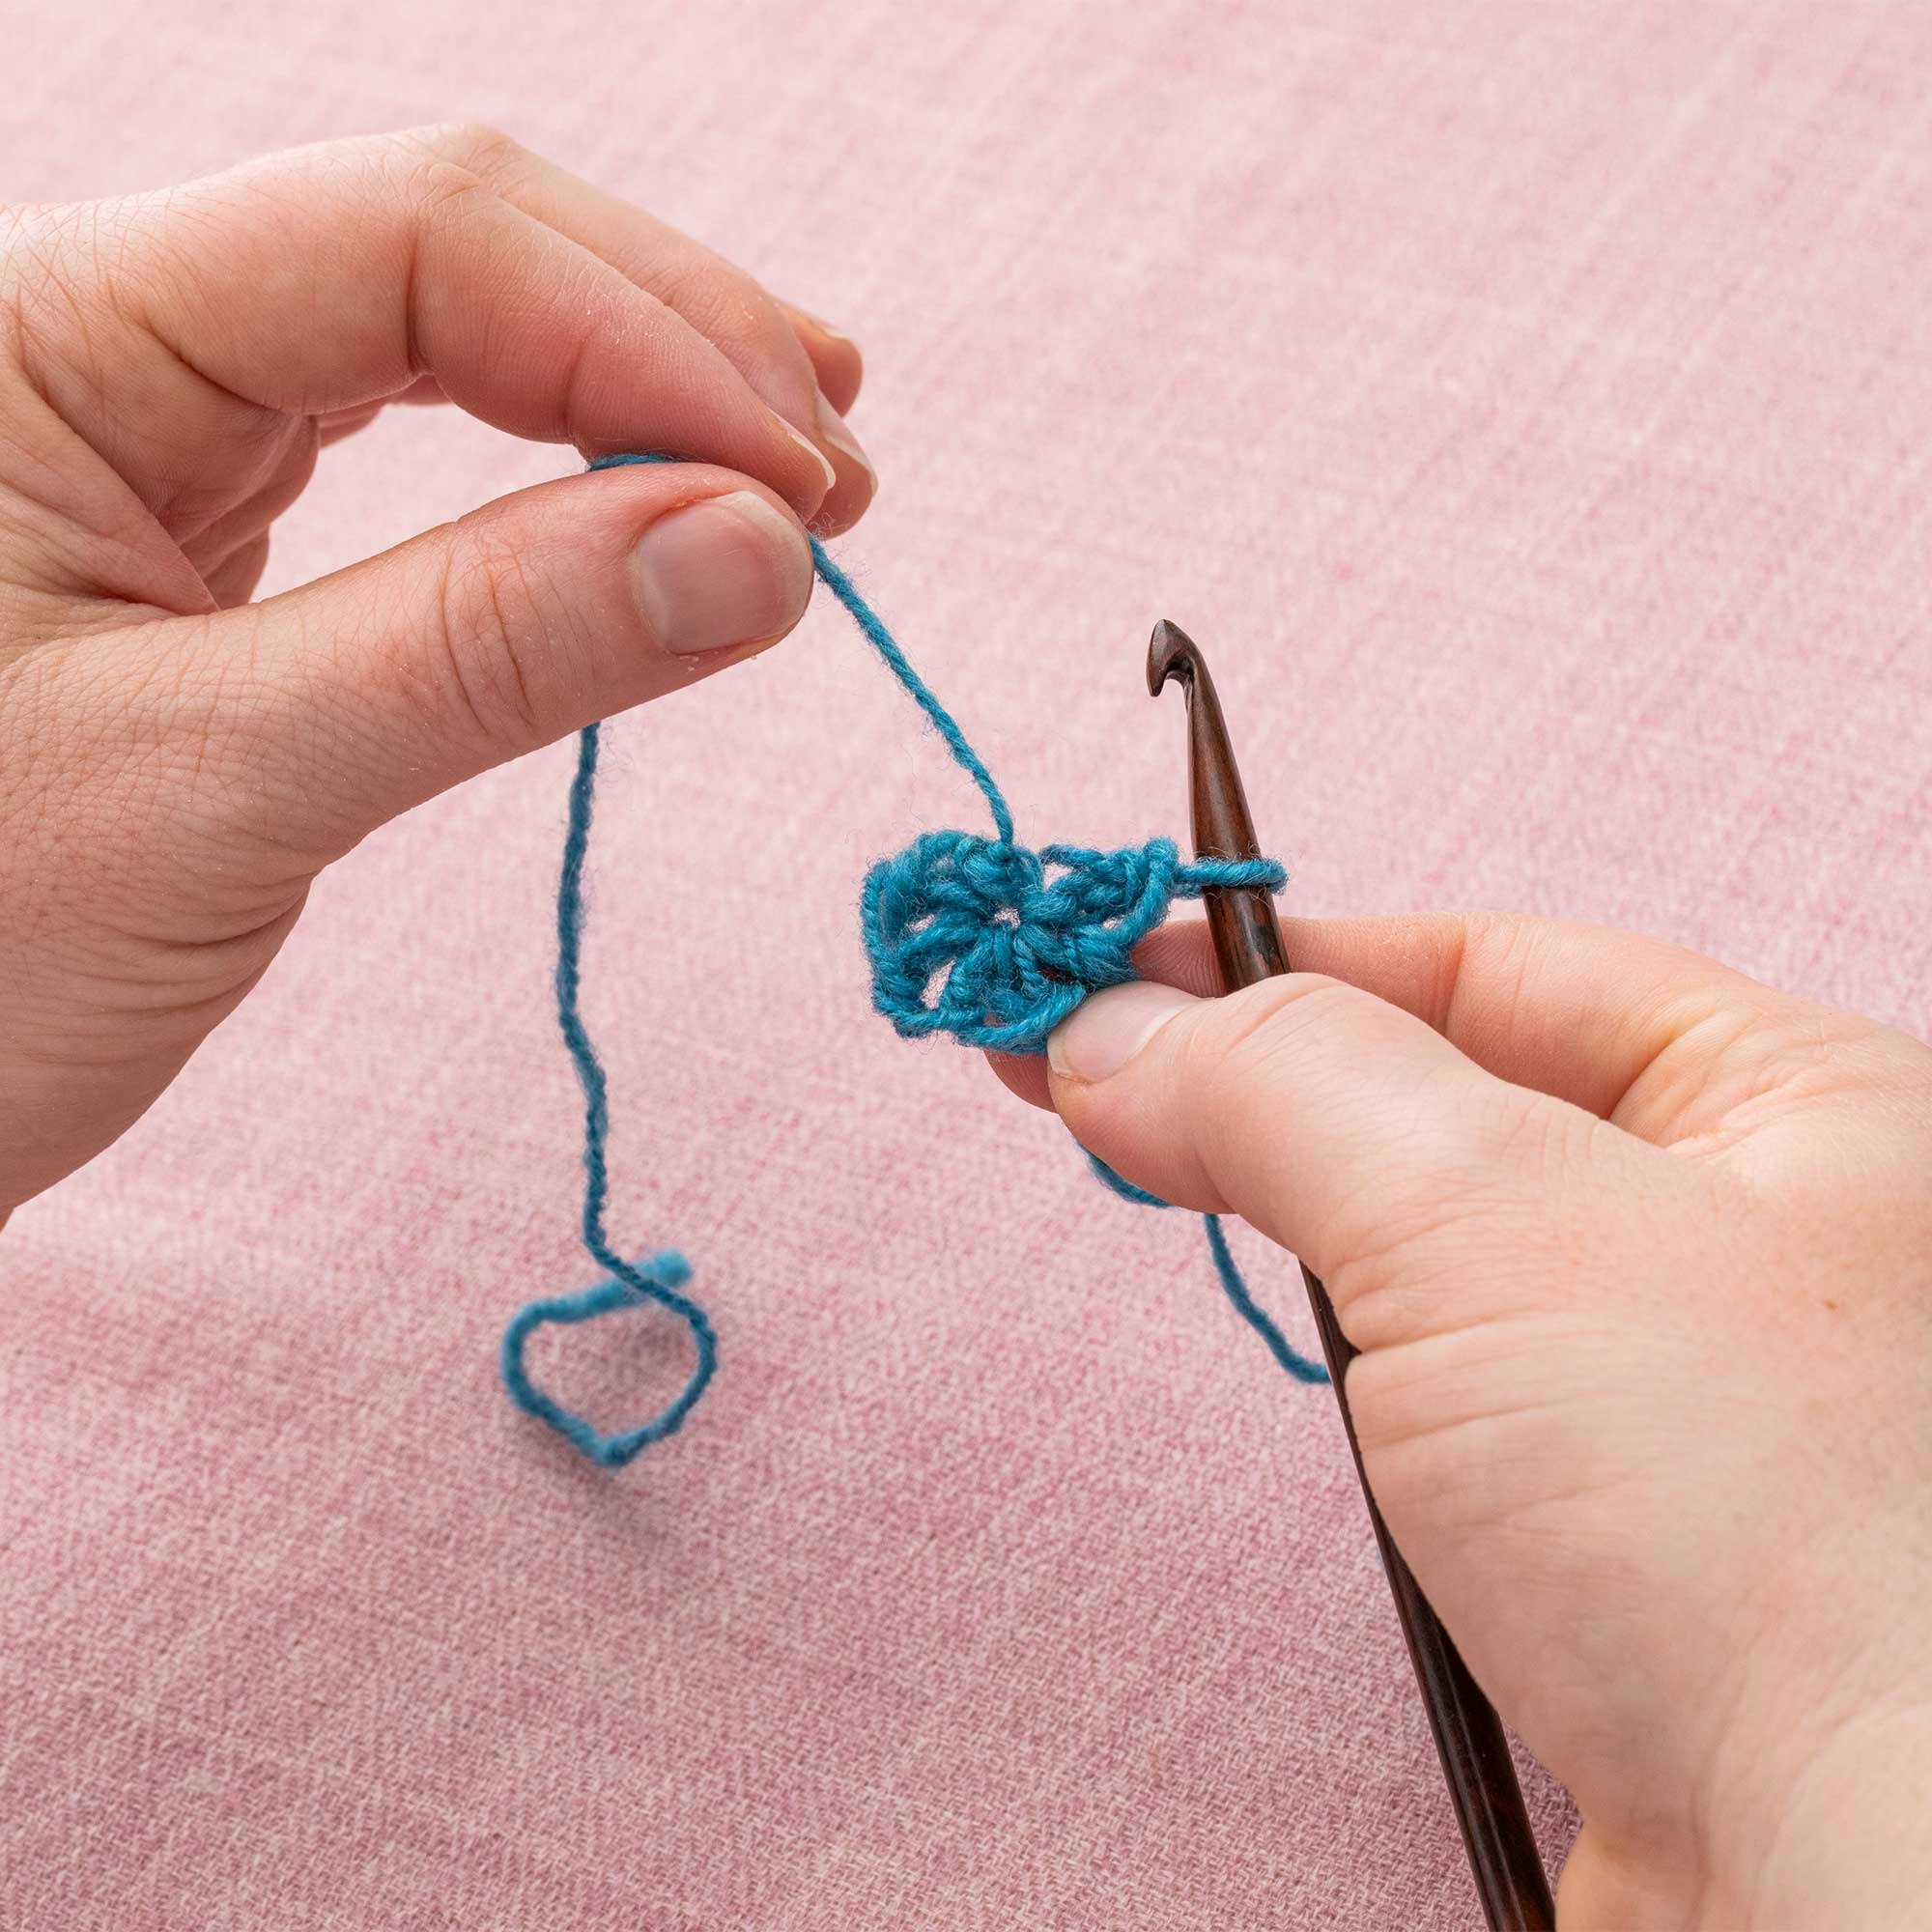
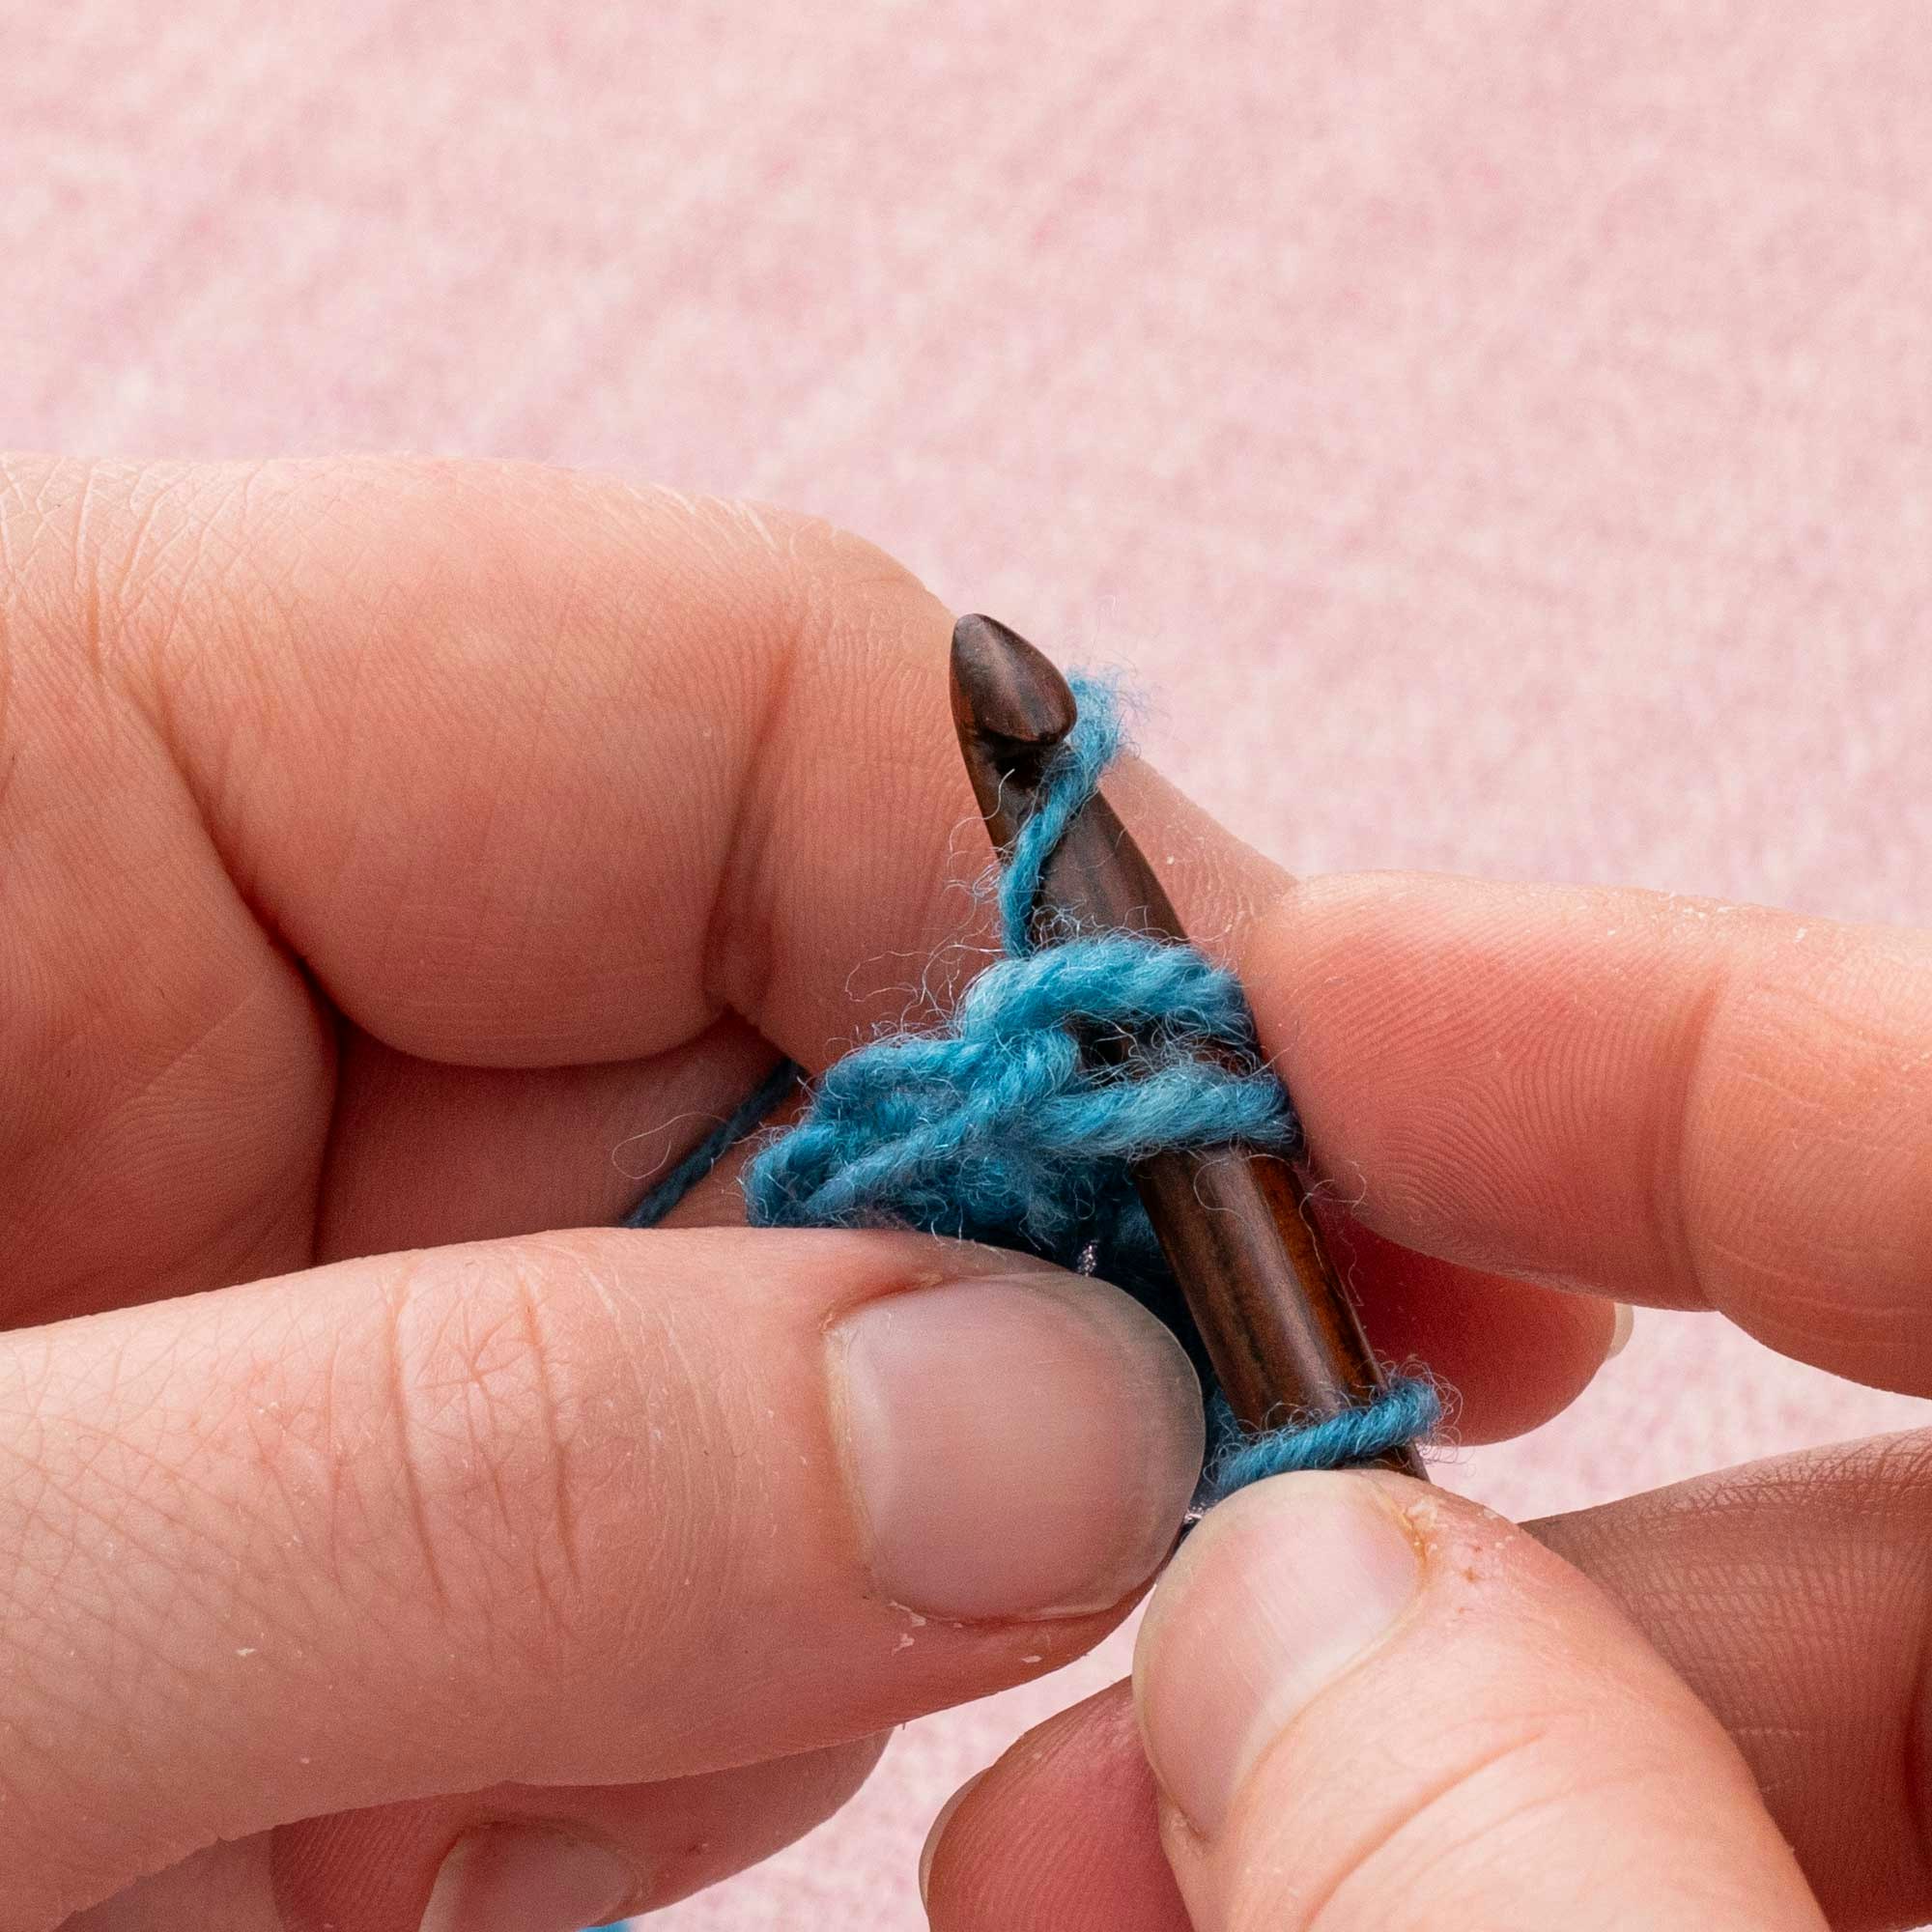
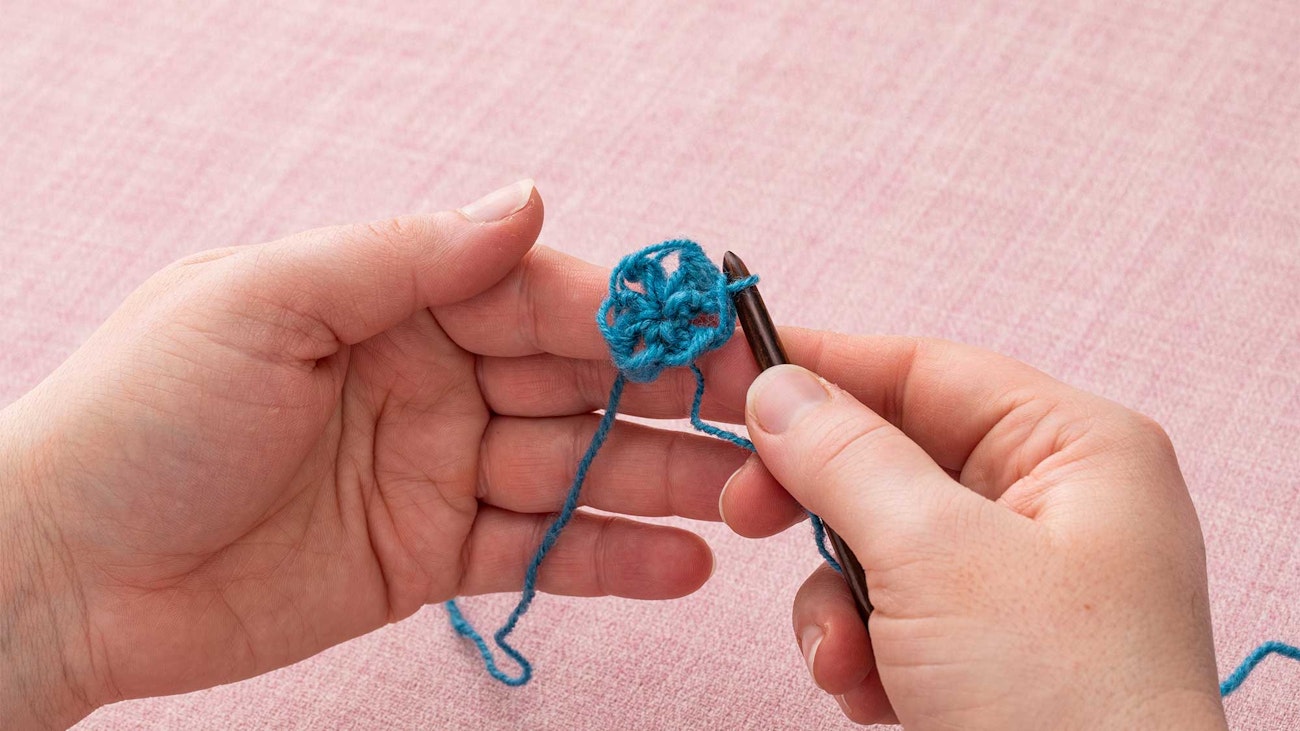
Once you have made as many stitches as you need for your pattern, pull the short tail tight to close up your magic ring. Pick up the two legs of the first stitch with your hook. Make a yarnover, then pull it through to secure. You’ve completed the magic ring!
Make sure you’re subscribed so you don’t miss out on all the great patterns and articles coming in Spin Off Spring 2026!