
I recently wrote a troubleshooting guide called “Balance Basics” for Spin Off Summer 2025 to help spinners diagnose and fix some of the most common issues we spinners encounter.
In nearly every spinning workshop I teach around the country, at least one spinner will pull me aside and shyly hand me a skein of sadness—something that went from looking so promising on the wheel to a tangled mess in the skein. I love helping in this way, and most of the time, I have good news—simply adding more, less, or opposite twist will quickly improve the outcome.
However, there is one common issue I see out in the community that is harder to fix: One of the singles was accidentally spun in the wrong direction. Let’s first look at yarn and diagnose the problem, and then I’ll show you one way to go about fixing this.
Get a closer look! Click any image in the gallery below to open it in full-screen mode.
Start Here: Test the Twist
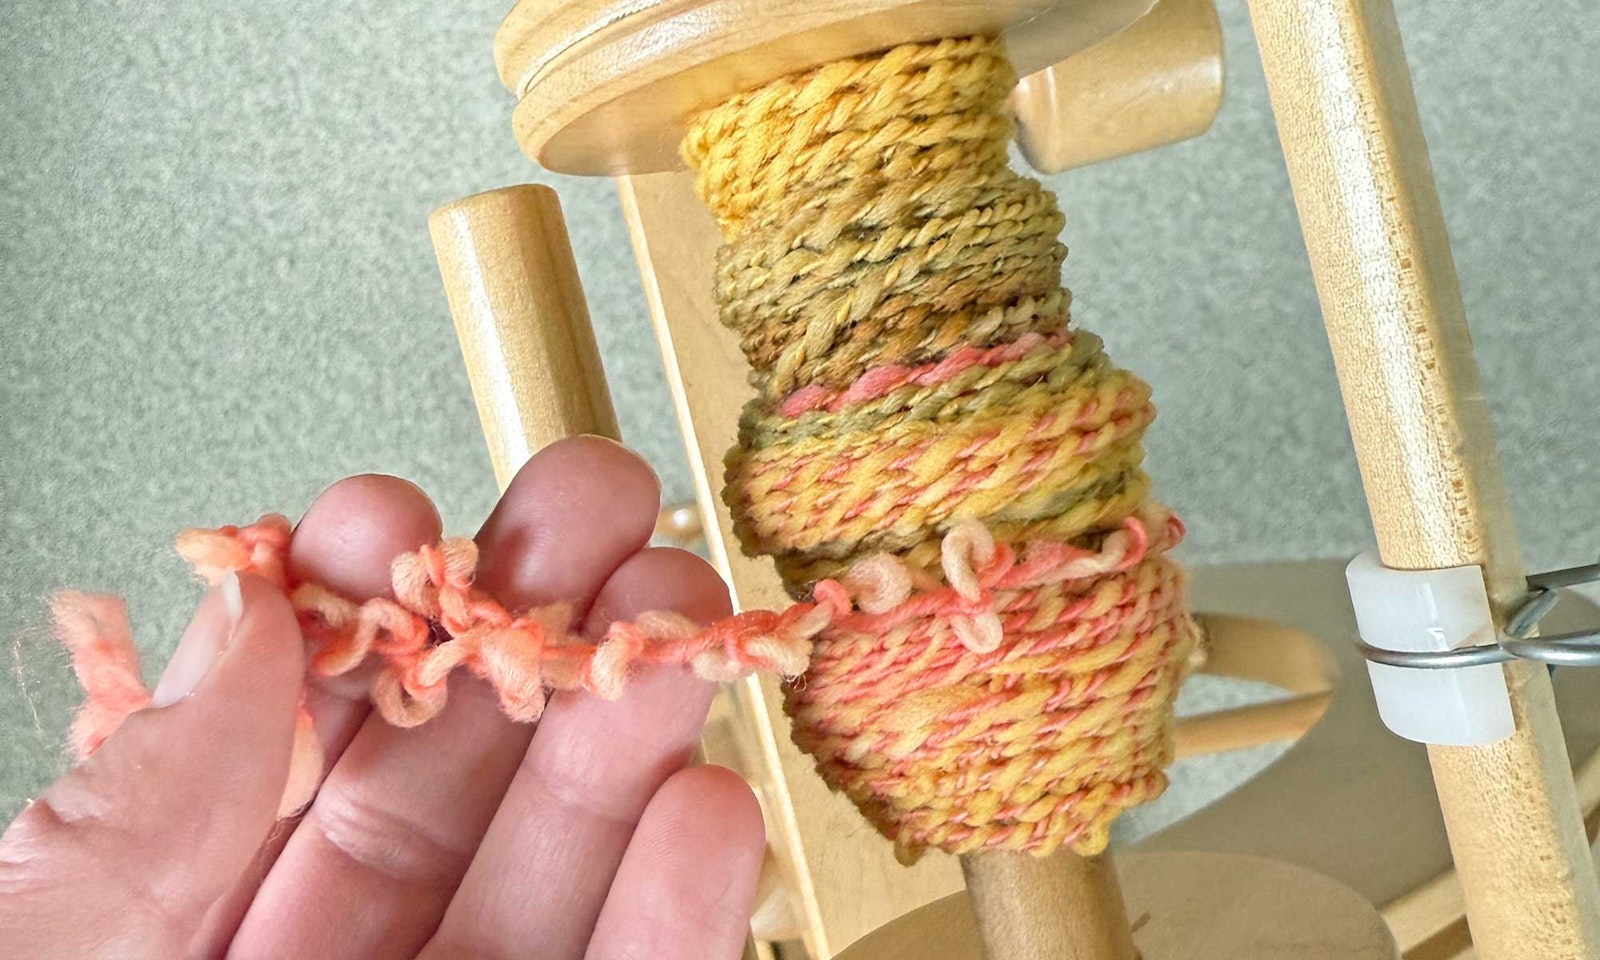
Here is what I do when looking at any yarn with a twist issue: After you have wet-finished your yarn or small sample, lay the skein on a table. With both hands, pinch above and below a short section of yarn. Roll the thumb farthest from you to the left and then to the right. For example, if your yarn improves when rolling to the left, then you need to add more twist by turning the wheel to the left (S-twist). For most of us who ply in the S-twist direction, it means the yarn was underplied.
 By rolling the yarn with the thumb farthest away, you can determine which direction needs more twist. Rolled to the left (S-twist) simply tightens the ply twist and doesn’t improve the yarn. Rolled to the right (Z-twist) until the singles are plied the opposite direction causes the singles that was tightly twisted to loosen, and the previously loose singles to tighten—but the yarn is still springy and unbalanced!
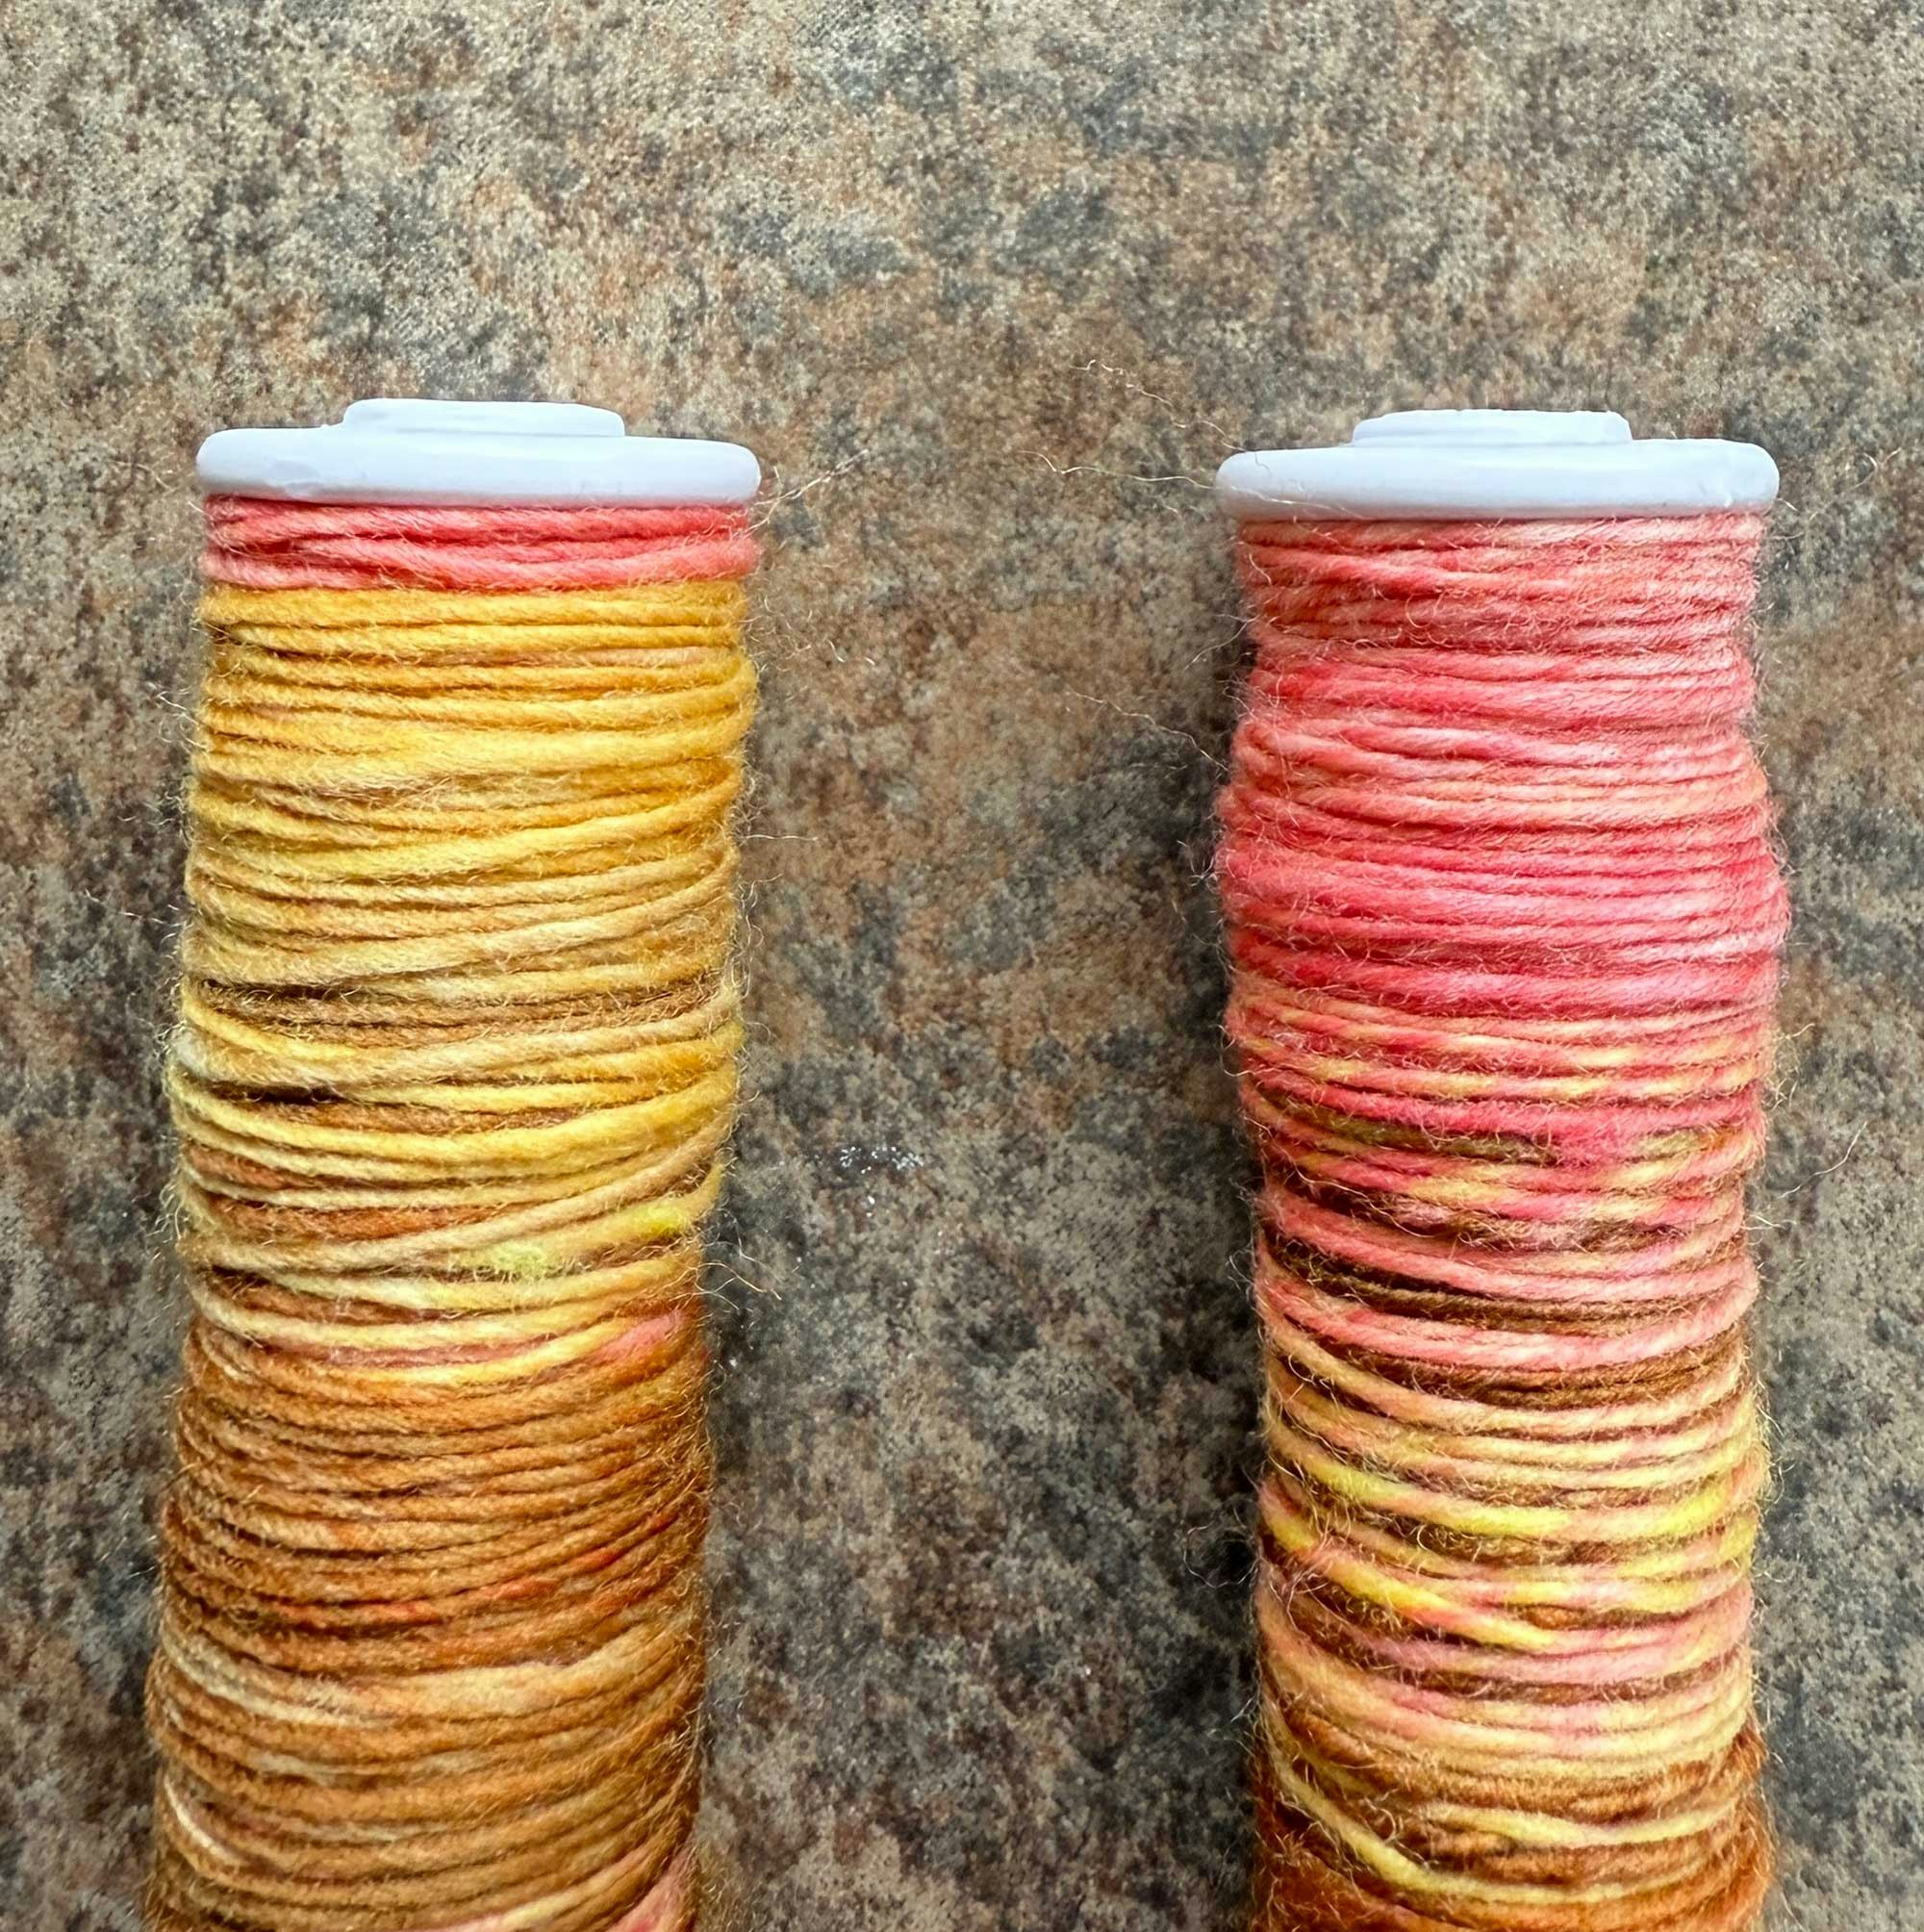
For the yarn shown here, the twist test shows that the yarn doesn’t look quite right when twisted in either direction. One of the singles is smaller and tighter than the other—an important clue here. The yarn shown was plied with S-twist. If Z-twist is added (rolling the yarn to the right), the previously tight singles loosen and the fluffy singles tightens. Oh dear.
Opposing-ply yarns are plied yarns that contain at least one ply that was spun in the opposite direction from its fellows. These can be amazing, intentionally created yarns, adding elasticity and strength. Heavenly Bresser does a deep dive into this yarn structure in her article, “Opposing Plies and the Quest for Elasticity.” But if this wasn’t intentional, and you really need this skein to finish a sweater sleeve or you just really want it to be a standard plied yarn, it might be worth the trouble to unply to salvage the skein. I’m sorry to say that I don’t have better news; this isn’t an easy fix. However, I’ll show you one way to unply the skein and what to do from there.
Unply that Skein of Sadness
Step 1: Remove the ply twist with your wheel (or espinner or spindle).
Feed the yarn back into the wheel (I’m using an e-spinner here). The goal is to remove the ply twist and allow the singles to sit together, untwisted. Get as close as you can, but it’s ok if they twist a bit. Since the singles are going back onto the bobbin (or spindle), you can adjust the twist further as needed in the next steps.
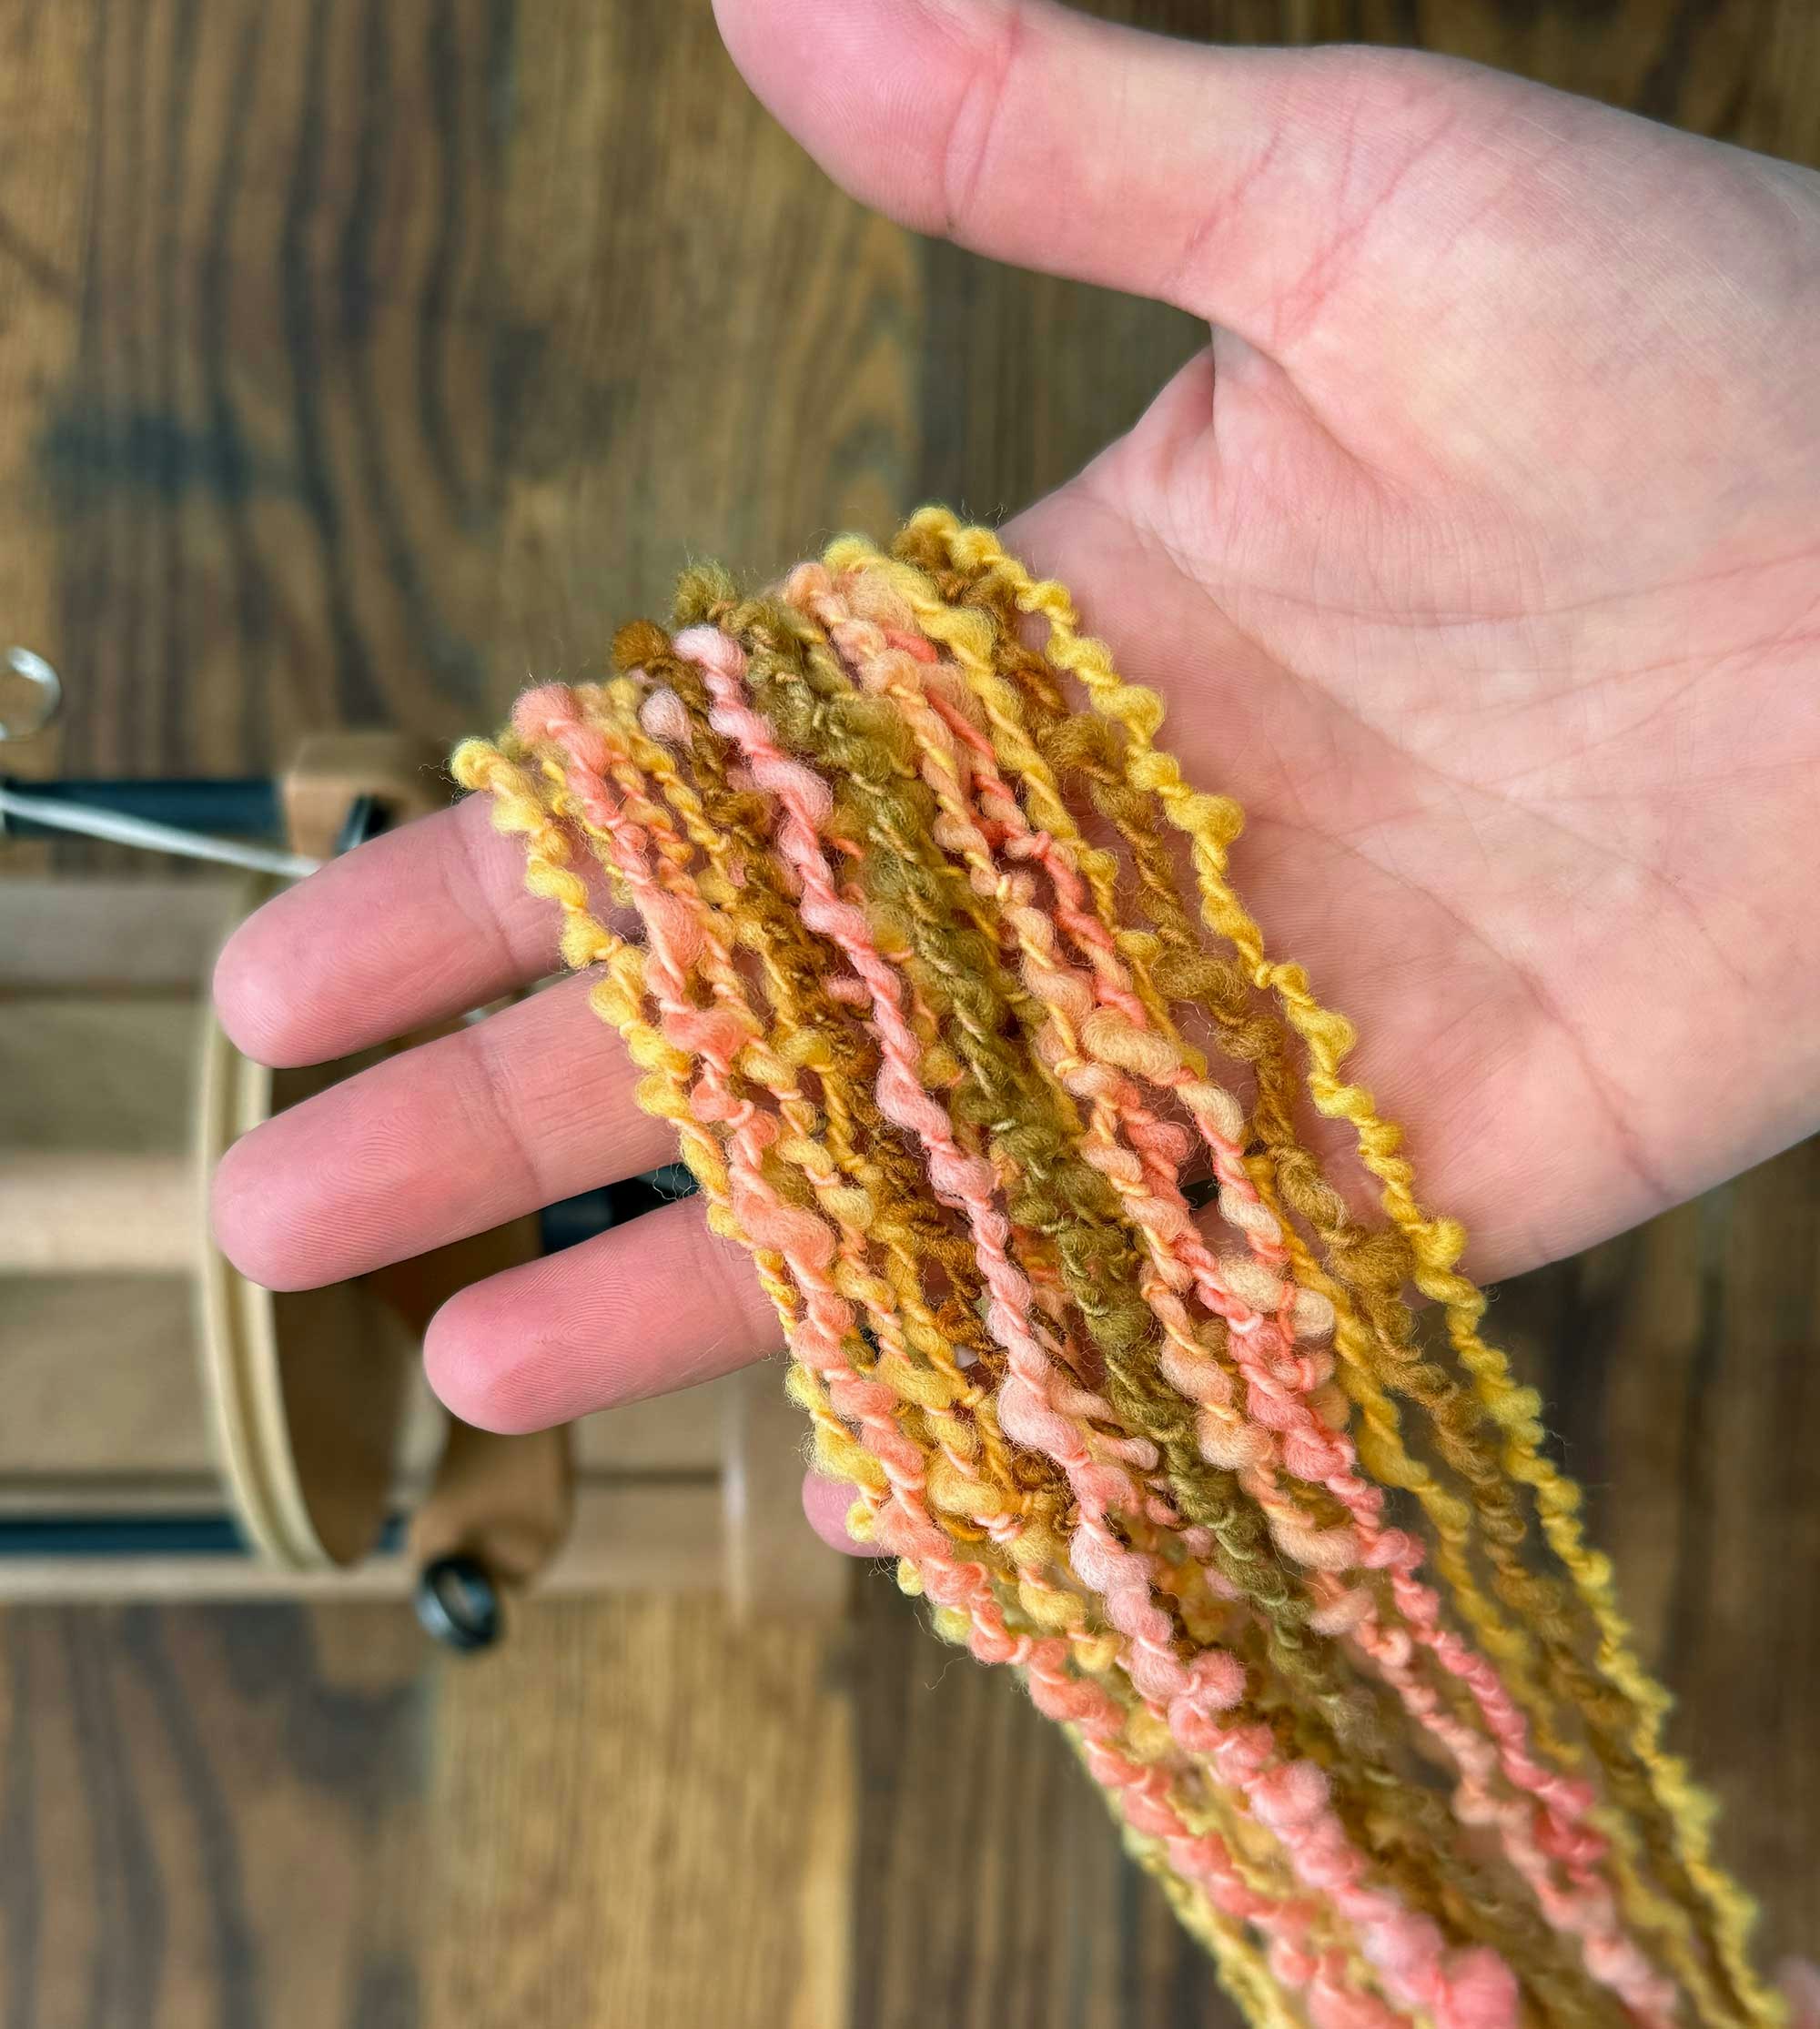
Step 2: Begin separating the singles.
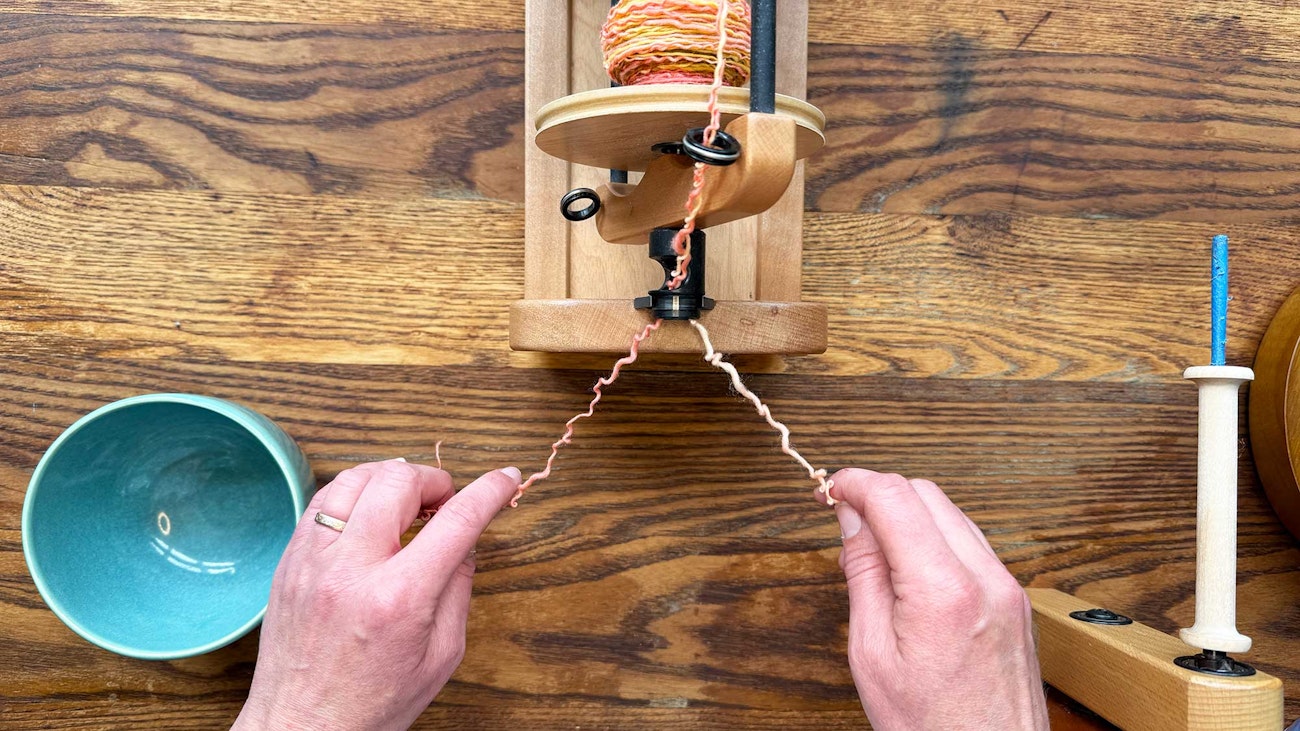
From here on, keep light tension on the yarn and singles as much of the time as possible to reduce tangling and minimize swearing. Books or coffee cups can be used to hold down the singles as you begin separating the singles.
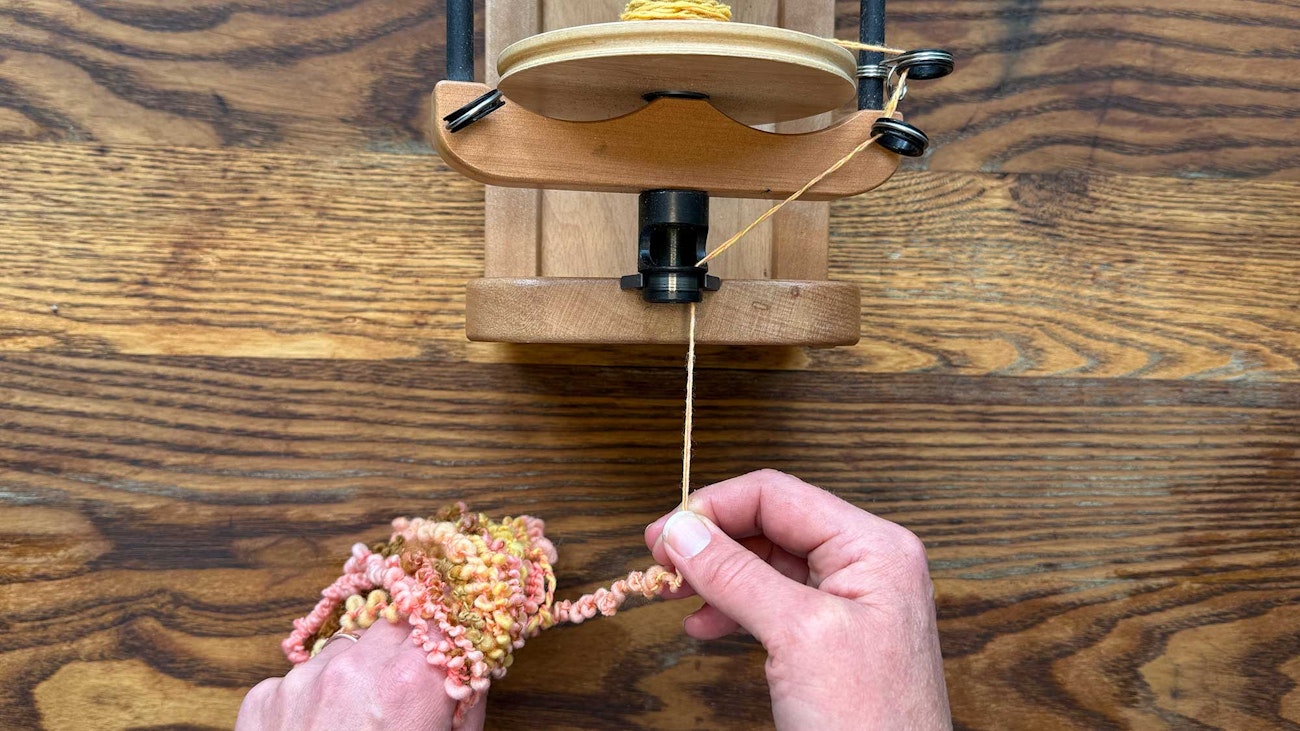
Step 3: Repackage the singles.
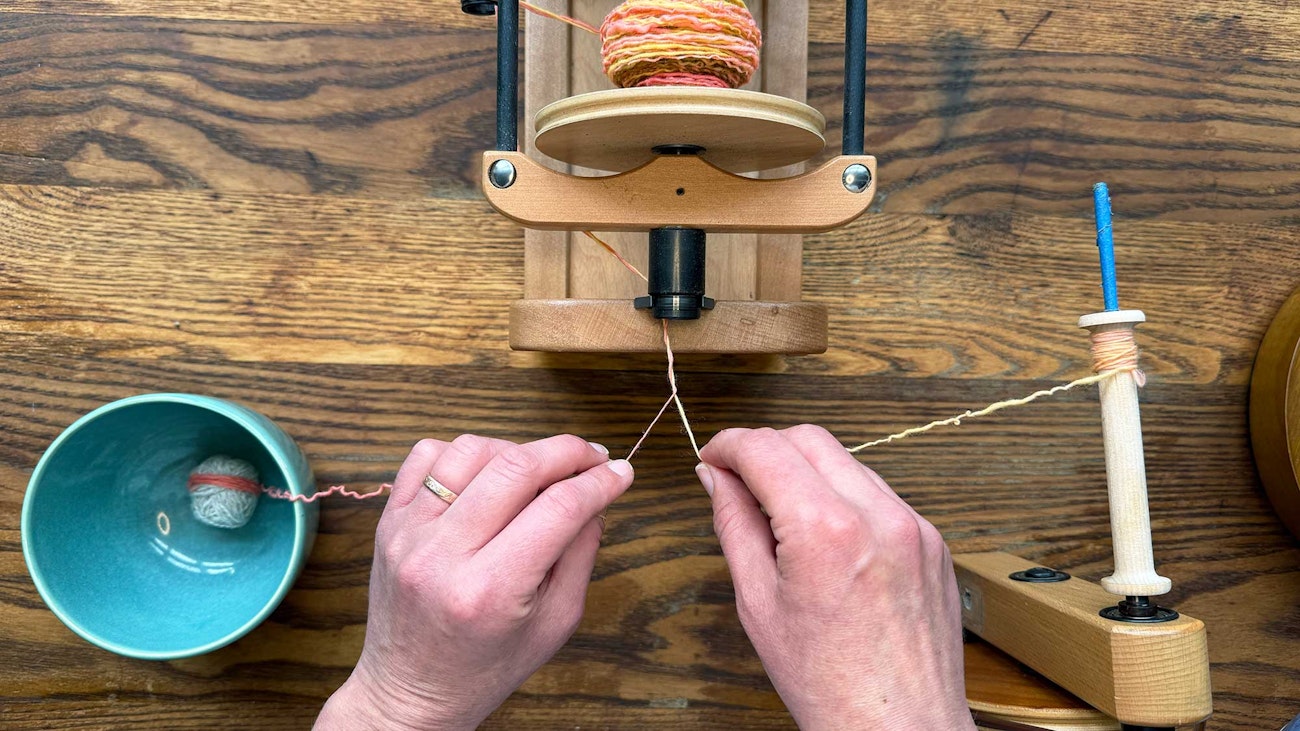
You have options here depending on what tools you have available and what you plan to do with your singles. Two easy methods, which you might combine as I did here, are a handwound ball and a bobbin winder. A ball winder also works. For a handwound ball, I like to wrap around a ball of some kind, such as leftover yarn. Placing it in a bowl is helpful.
Pull out a comfortable length of yarn from the bobbin (only a few feet). Before you let the yarn go, adjust the twist if needed so the singles are as close to unplied as possible. Separate the singles, and then wind them onto their respective bobbin/ball.
Step 4: Keep going (and going and going).
Continue repeating this, adjusting your process as needed. You might try unplying longer sections for speed, but watch for tangles that will ultimately slow you down and might damage the singles.
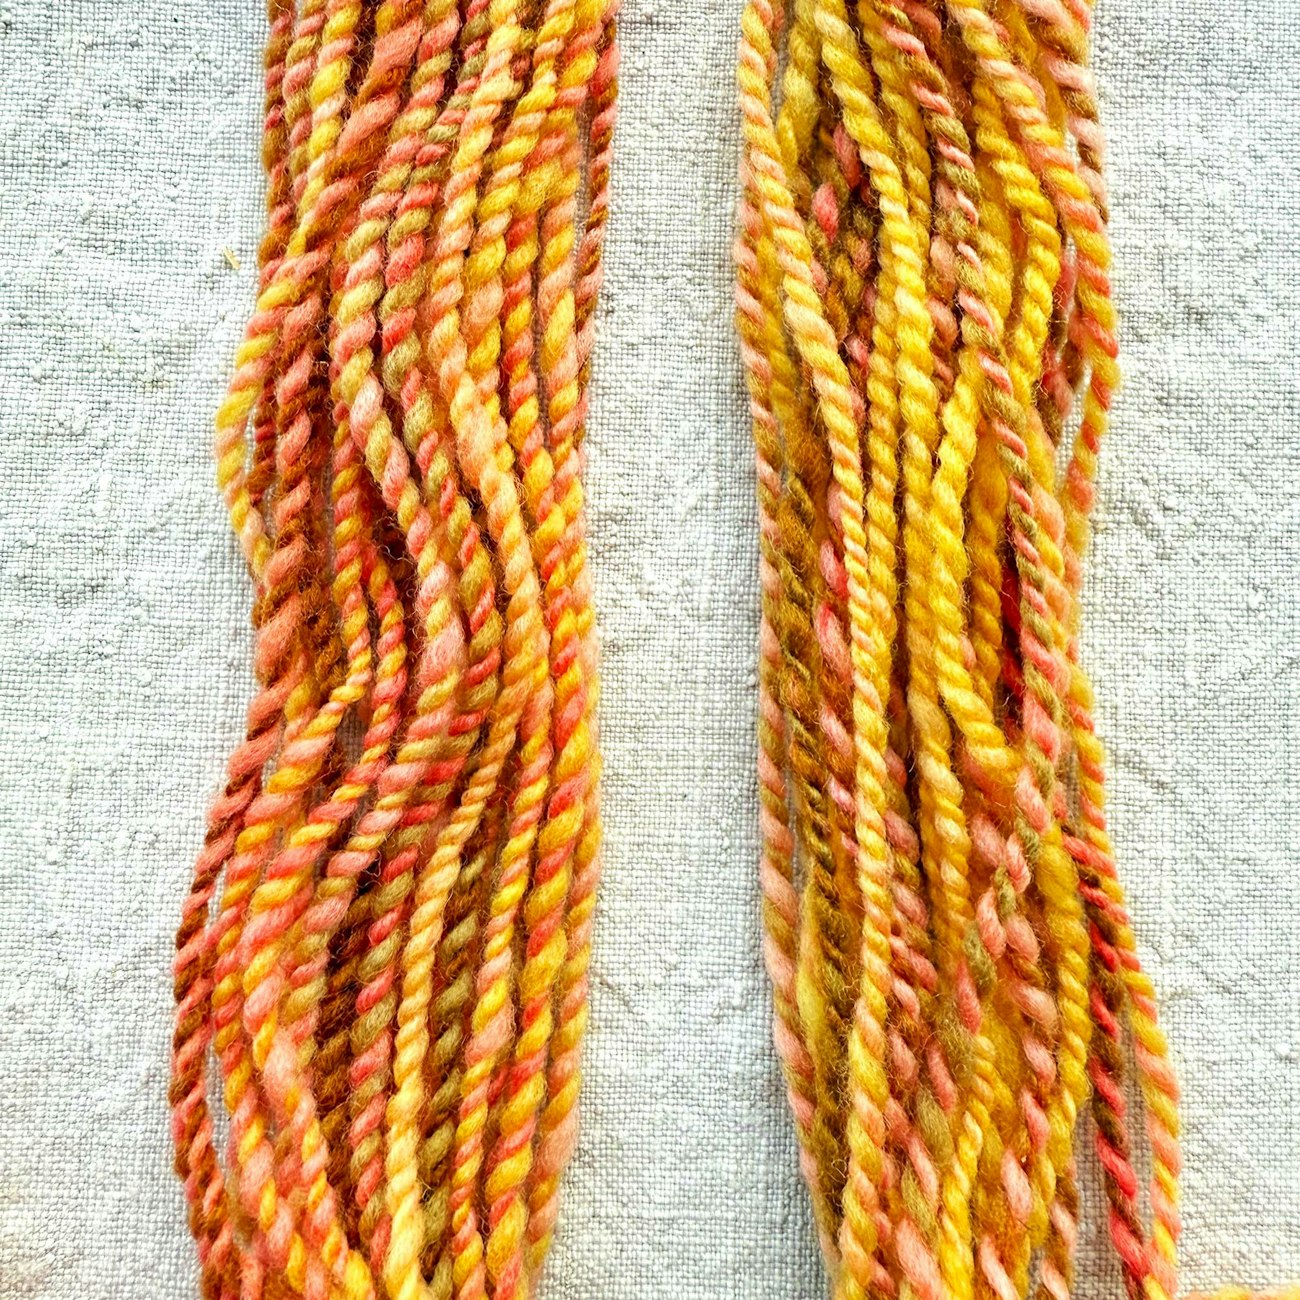 Once the singles were separated and paired with singles spun the same direction, I have balanced skeins.
What’s Next?
For the yarn you see here—a basic two-ply—I could ply each of these singles with themselves to create two final skeins that look nearly the same but are plied in opposite directions. I’d have a Z-spun, S-plied skein and an S-spun, Z-plied skein. When knitted or woven, they would look nearly the same!
If you are working with a three-ply and one of the singles was spun the opposite direction, unplying and then replacing the opposing ply with a different singles would save the skein. There are endless options depending on what you need for your project.
Best of luck!
—Kate
Kate Larson, editor of Spin Off, teaches handspinning around the country and spends as many hours as life allows in the barn with her beloved flock of Border Leicesters.