
Editor’s Note: Twined knitting, or two-end knitting, refers to a method of using two working yarns that are alternated and twisted together between each stitch to create a firm fabric. The technique is known in Sweden as tvåändsstickning, where it was rediscovered thanks to an abandoned seventeenth-century mitten. The mitten was knitted in yarn that was S-spun and Z-plied—the opposite of most handspun and millspun yarns. This Z-plied yarn has become a hallmark of Swedish-inspired twined knitting. (Oh, but wait!)
As Montana handspinner Joan Goldstein began exploring twined knitting, she encountered a twisty conundrum. As she explains in her Spin Off Winter 2026 article, there are two elements of twist here—both the twist direction in the yarn and the twist introduced during twining. Combining the two in different ways creates very different fabrics!
You can get the full story behind Joan’s journey and spinning instructions in Spin Off, but we also wanted to share more resources here. Using the instructions below, you can practice a little twined knitting to get your feet wet, and your swatch becomes a cuff that makes future twining projects easier. It also serves as a gauge swatch for Joan’s Twined Knitted Headband pattern. If you're a current subscriber, the issue will hit your inbox on November 26. Don’t miss out!
Tangle-Free Two-Color Knitting
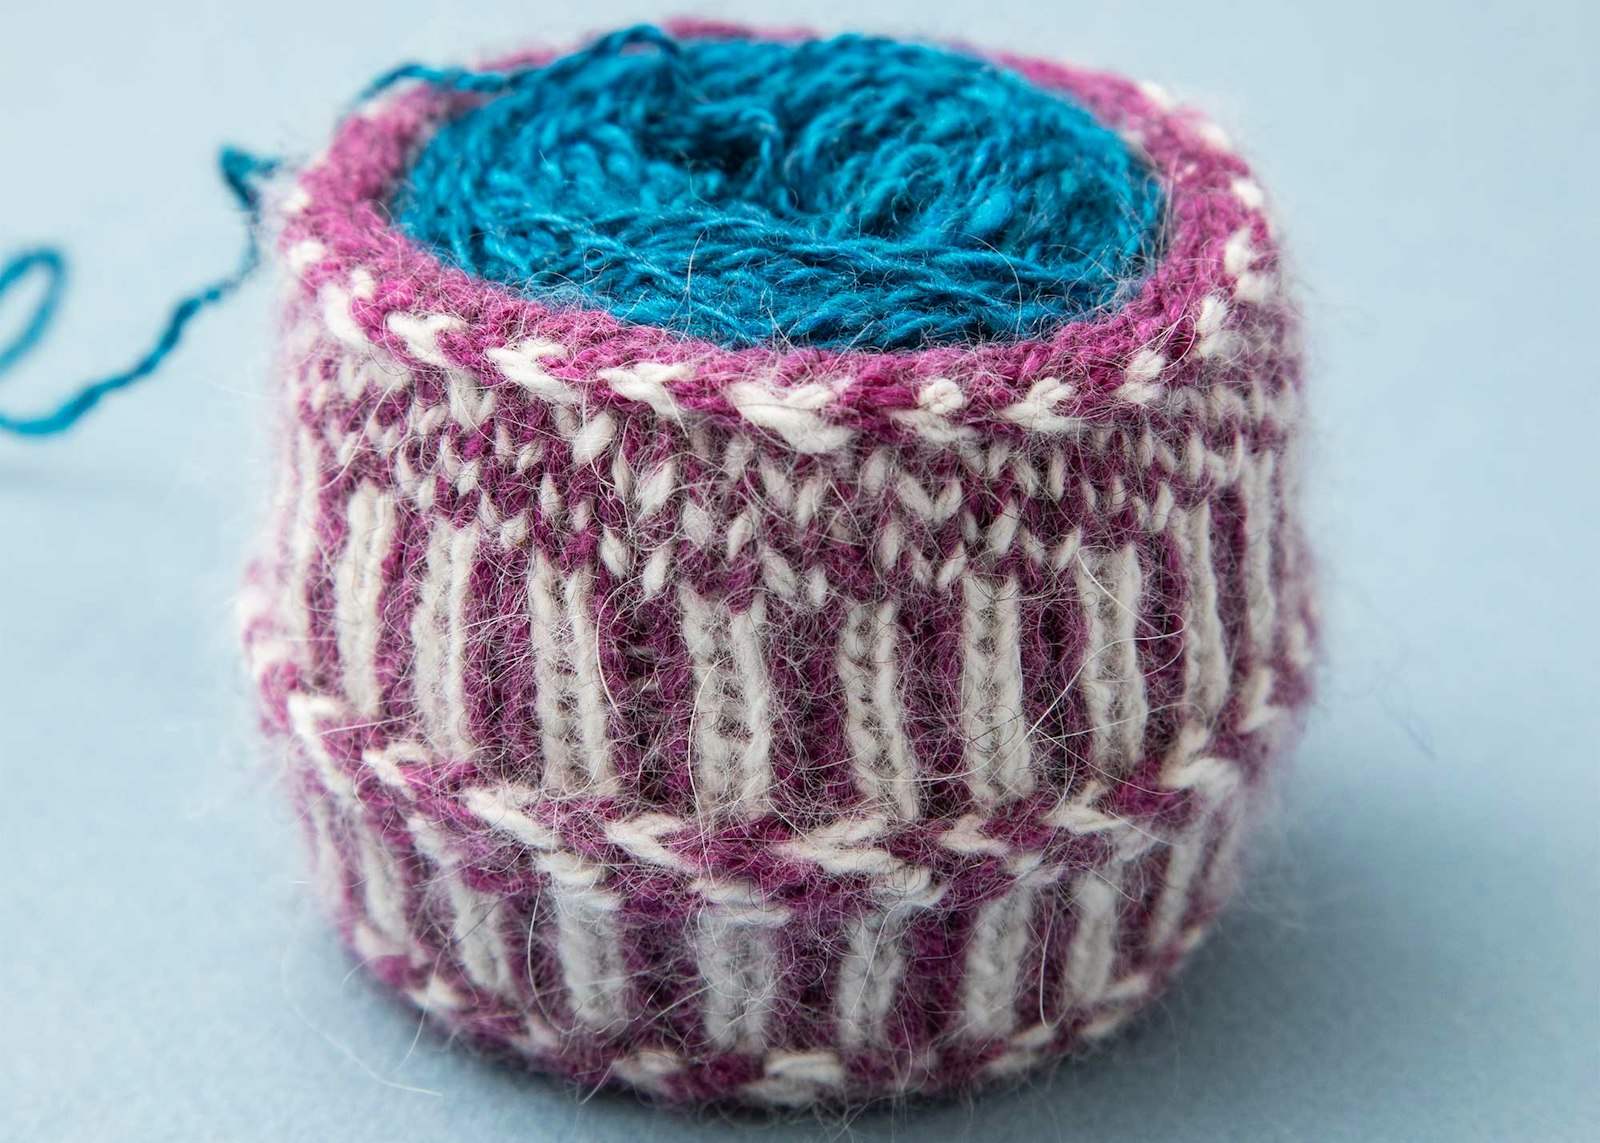
One of the most challenging aspects of twined knitting is that the working yarns build up excess twist as you work. One great way to manage this is to knit a snug cuff that sits around a ball wound using two colors, which allows you to dangle the ball to release excess twist. Use this practice swatch to test your gauge, learn the technique, and put around a ball of yarn to keep the outer end from raveling.
The instructions below assume that you will hold the yarns English-style, holding both in your right hand. For dedicated Continental knitters, who hold both yarns in your left hand, you will need to reverse the stated direction of twist every time it is given below.
You will need:
- 2 S-plied yarns of similar thickness in contrasting colors or values. (If you choose Z-plied yarns instead, twine in the opposite directions below.)
- Double-pointed or circular used as for a sock needles appropriate for yarn.
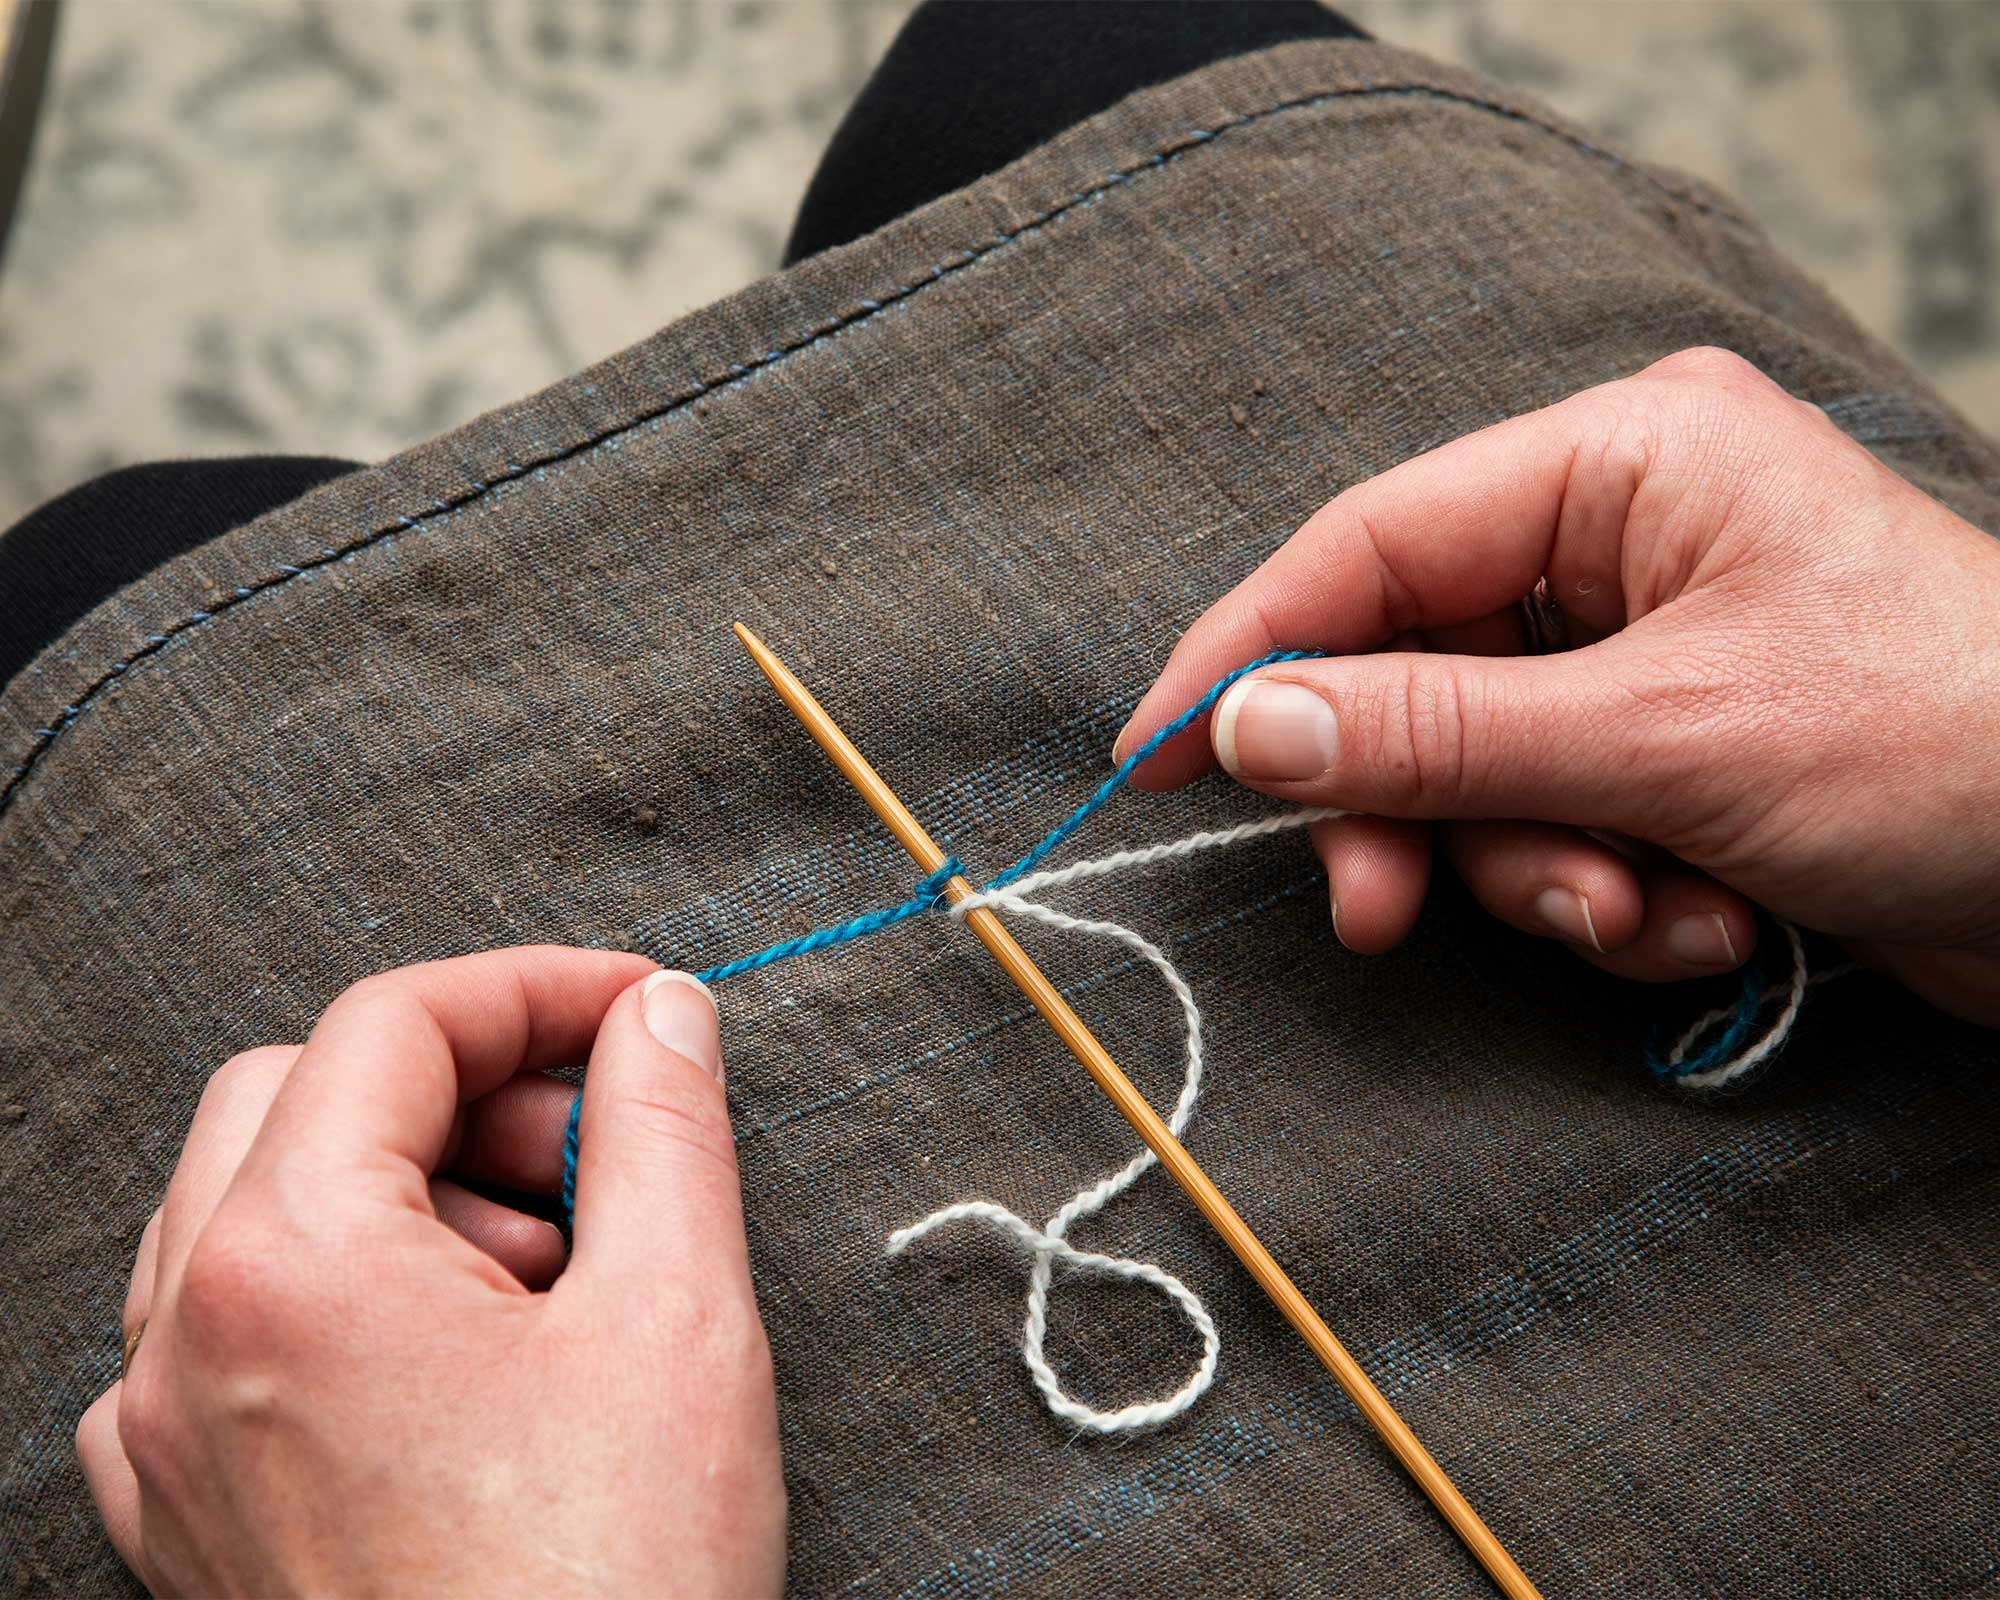
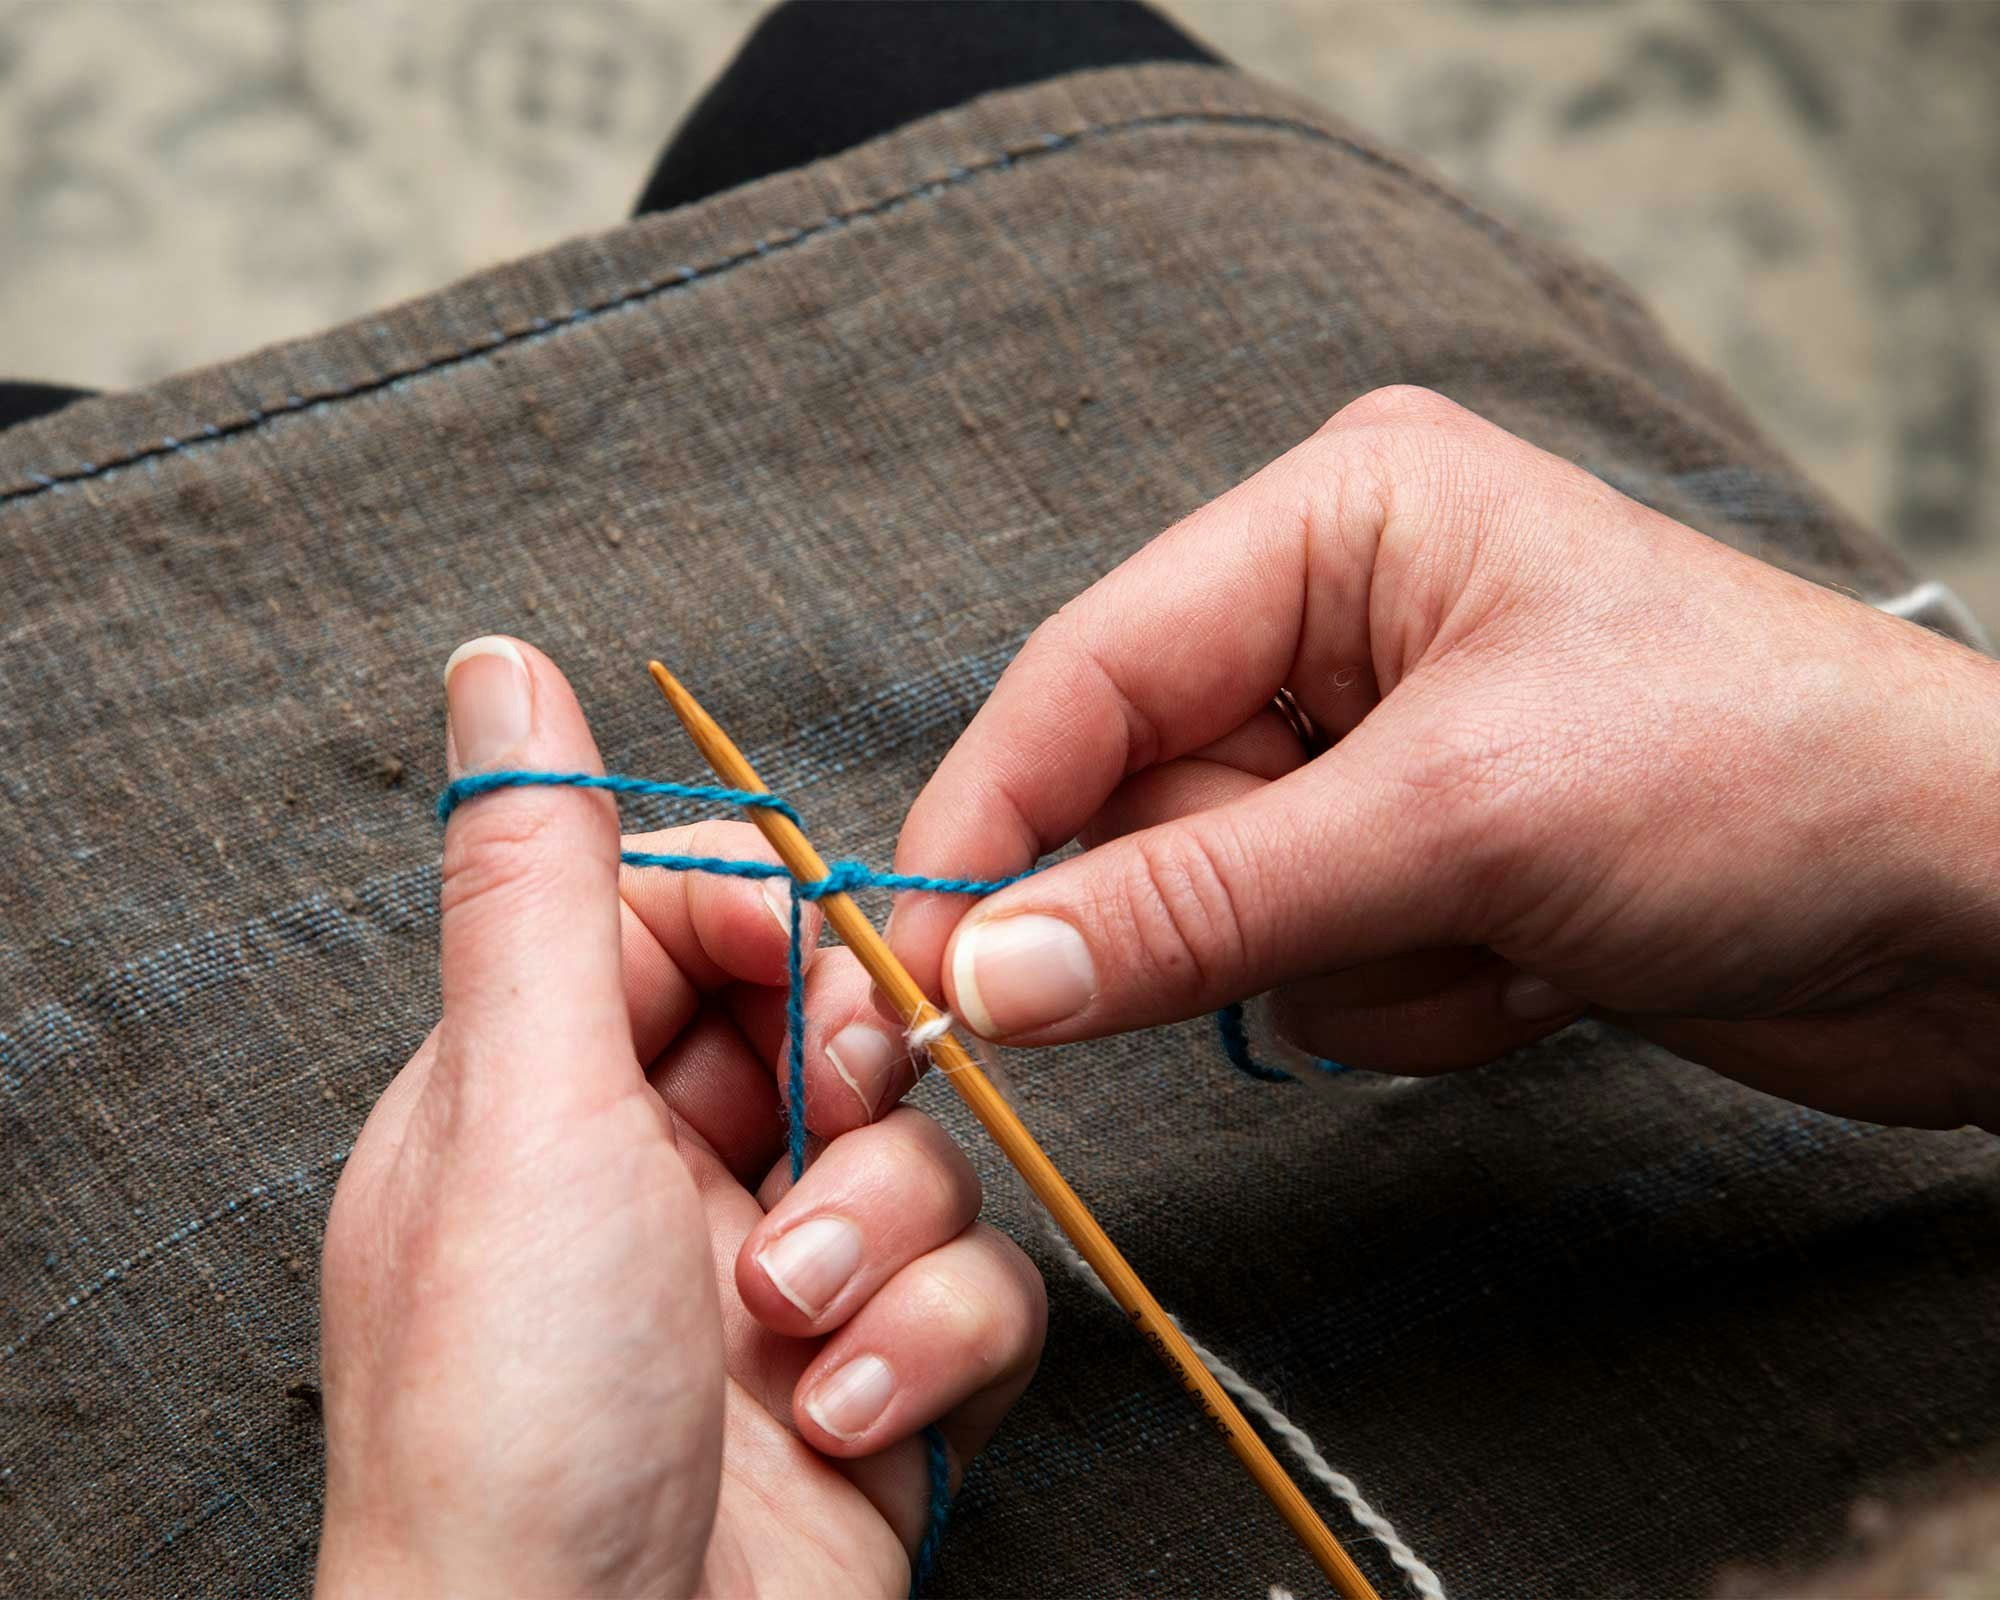
Use a ball winder, nøstepinne, or your thumb to wind a center-pull ball of yarn. Keeping center end of first ball available, wind second yarn onto same ball with outside end ready to use. Pull out 1½ yd of main color (MC) and 1 yd of contrasting color (CC). Secure together to the ball with the loop of a slipknot. As you work, allow the ball to hang suspended, where it will untwist as needed. When necessary, let out more yarn and re-secure the ball with a slipknot.
 Wind a center-pull ball, leaving the center end available, and then wind the second ball of yarn on the outside.
Three-Strand Alternating Cast-On
Make a slipknot 4" from end of CC and place on the needle (does not count as cast-on stitch.)
Make a slipknot 2 yd from the end of MC and slip it onto the needle (1 st cast on).
- With MC tail in left hand and other 2 strands in right hand, pick up the tail to make a loop with the left thumb as for the long-tail cast-on.
- With the right hand, take CC under MC and knit through the loop on the thumb (2 sts cast on).
- Pick up another loop on the thumb. Take MC under CC and knit into the loop.
Repeat from 2 & 3 for the desired number of stitches, continuing to alternate MC and CC. The result looks like a long-tail cast-on with alternating colors. (See Kate Larson using this method in a short video.)
To let built-up twist spin out, suspend either the ball or the knitting and run a finger between the yarns.

Sample Cuff
Check out the image at the top of the page as a reference for the following instructions, and release extra twist from the ball as needed.
Use the three-strand alternating method, cast on 42 or 48 sts. Divide sts between needles (3 dpns or any circular method you’d use for a sock). Join to work in round. Break MC and CC, leaving a 3" tail. Hold both yarns in your right hand, being careful not to knit with the tails. (For dedicated continental knitters, hold both yarns in left hand, but you will always need to reverse the stated direction of twist.)
Z-Twine Braid Work twined purling to keep the edge from rolling as follows: Bring both yarns forward and purl and work sts with opposite color, holding strand of last st down and bringing new yarn over (twining counterclockwise.) Repeat, alternating colors. Let twist spin out of the ball as needed. At end of rnd, bring yarns to back ready to knit.
S-Twine Section Use the twined-knitting method, always bringing the new yarn over the previous (counterclockwise) and knit the colors as they appear for 5 rounds, making vertical stripes.
S-Twine Braid Bring both yarns forward and purl into opposite colors,twining clockwise.
Z Twine Braid Use the twined-knitting method in the clockwise direction to knit 1 round into same colors. Repeat Z-Twine Braid as above.
Z Twine Section Knit 5 Z-twined rounds (clockwise) into same colors, creating vertical stripes. Knit 5 Z-twined rounds into opposite colors to make checkerboard.
Z Twine Braid Make another Z-twine braid.
Bind off as desired. Use ends to join braids and weave in remainder. Hand wash and when dry, measure sts per inch.
Want to see how it’s done? Check out the video below, where editor Pamela K. Schultz walks you through the twining sections on Joan’s swatch!