Subscriber Exclusive
Spin and Weave a Sunset
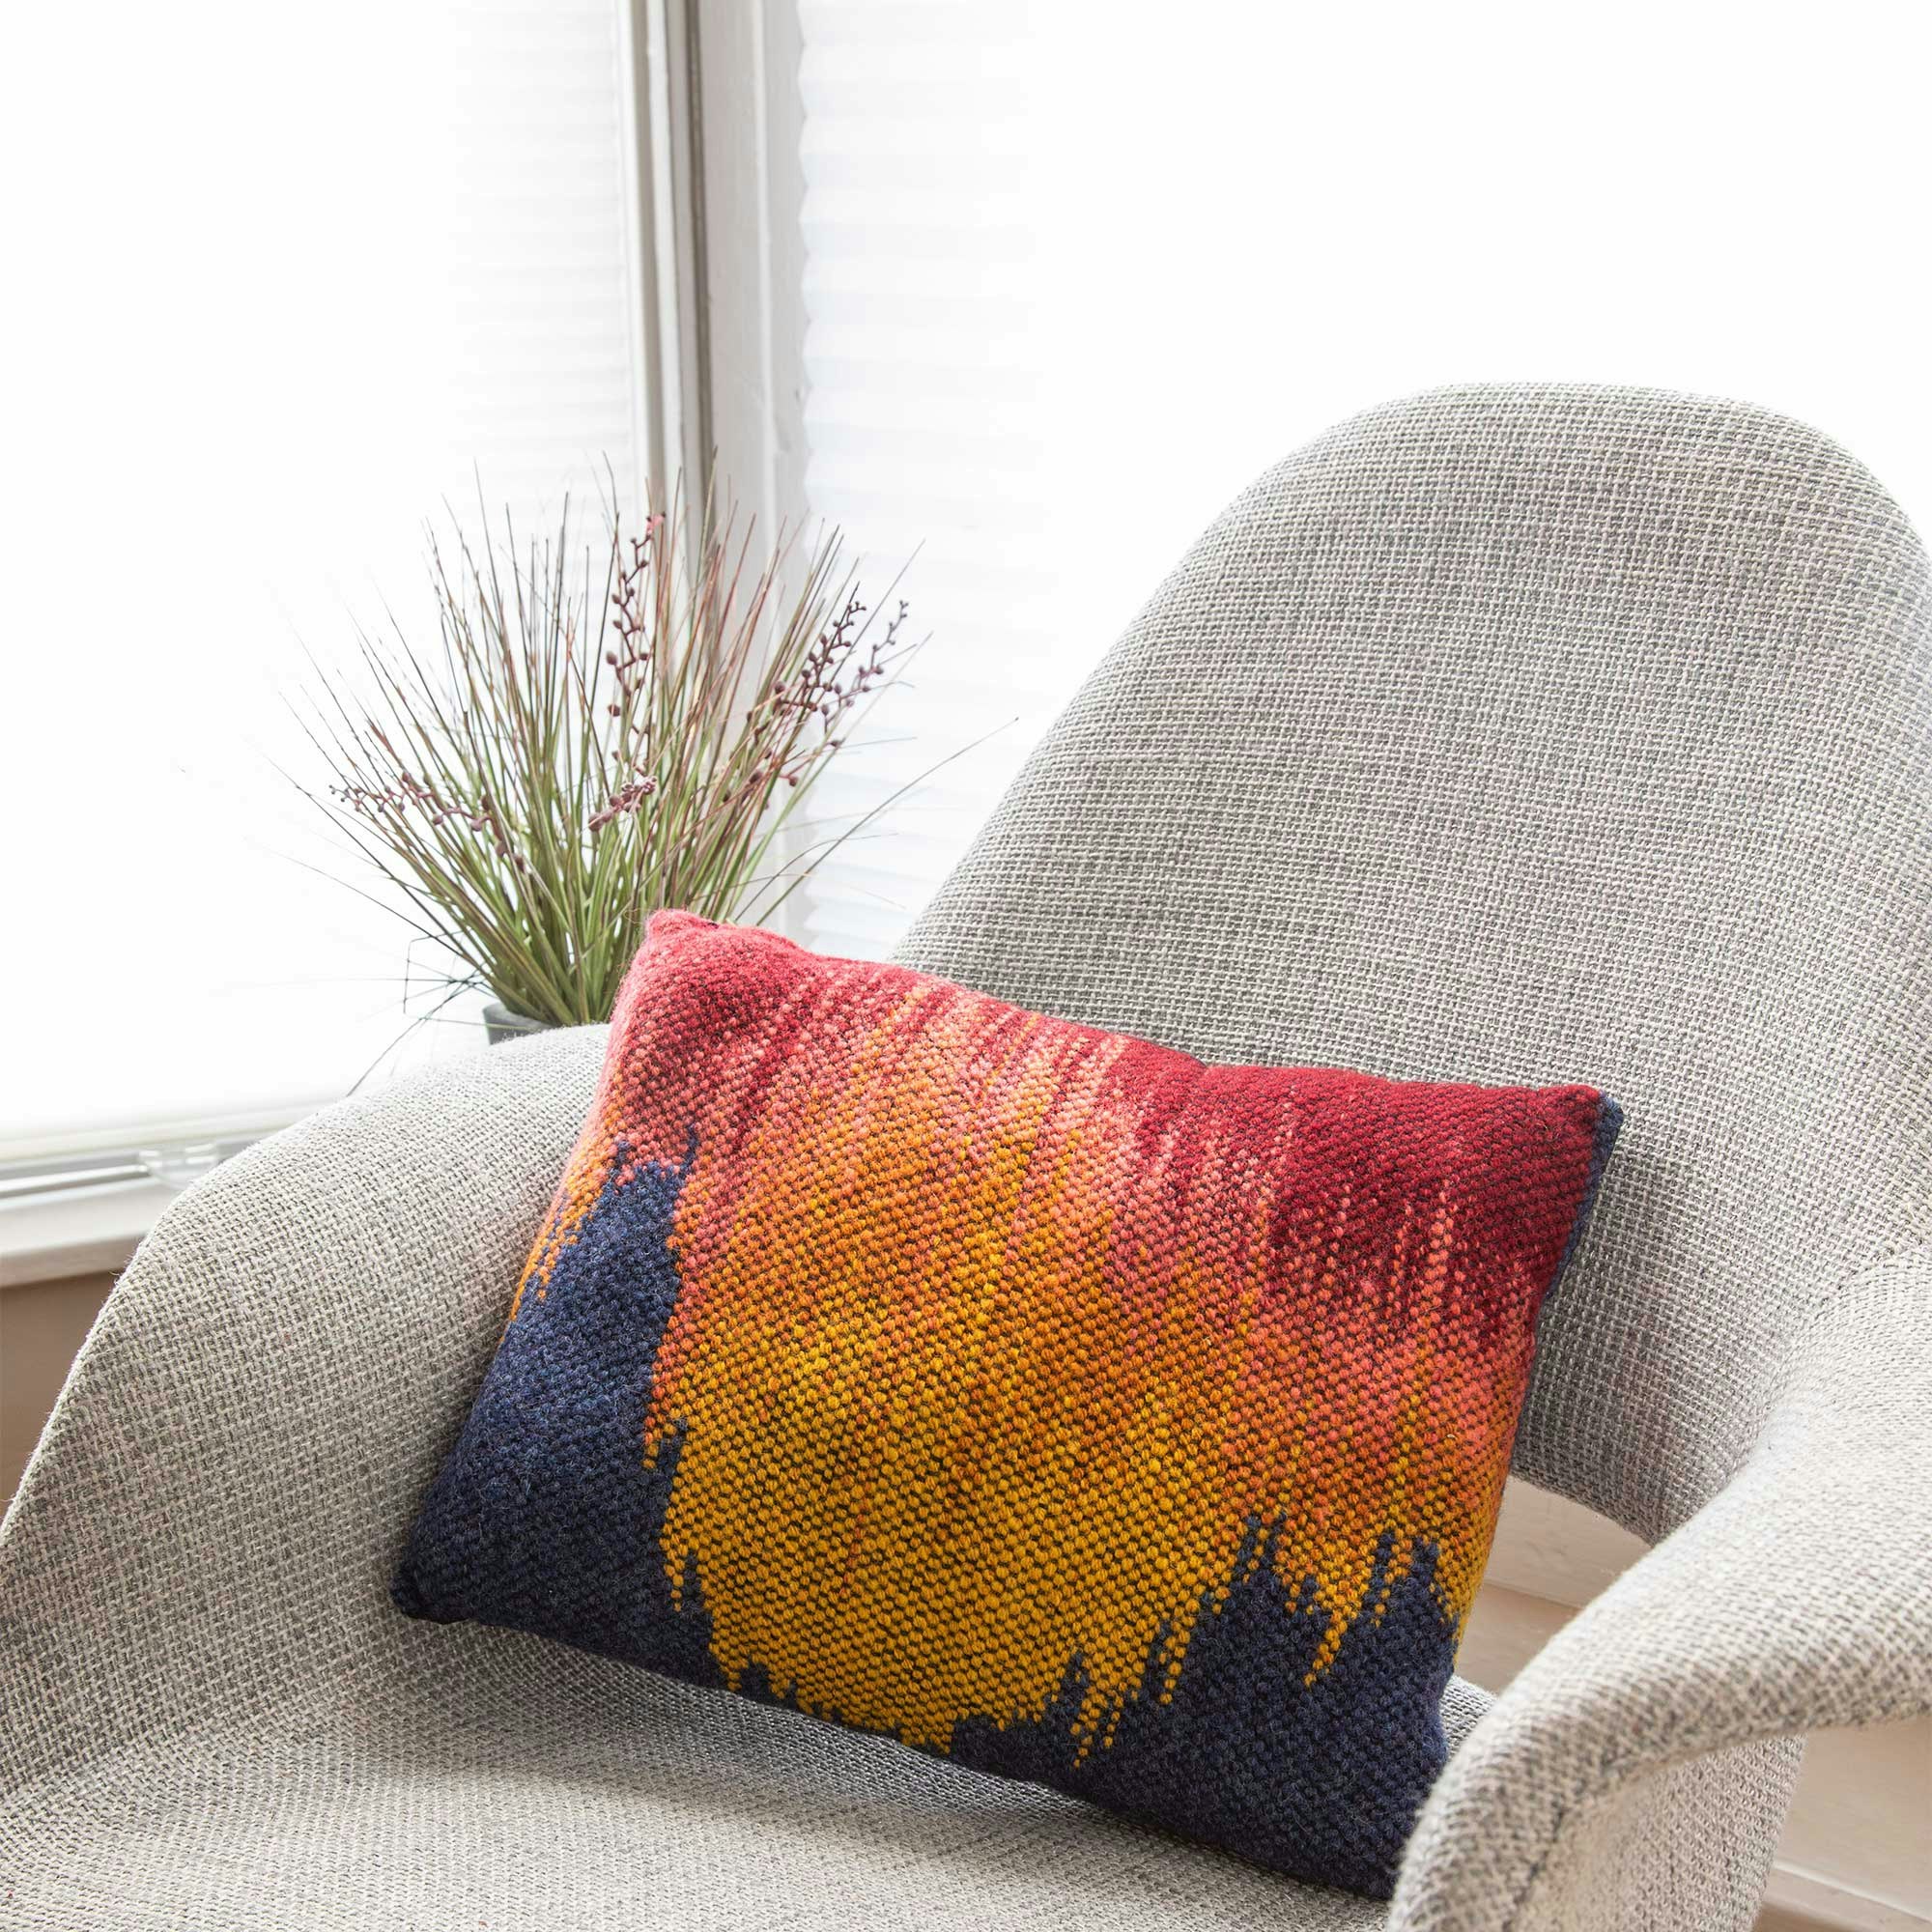
Combine planned pooling and clasped weft to create your own stunning design!
Combine planned pooling and clasped weft to create your own stunning design! <a href="https://spinoffmagazine.com/spin-and-weave-a-sunset/">Continue reading.</a>
https://spinoffmagazine.com/cdn-cgi/image/format=auto/https://www.datocms-assets.com/75073/1768407767-planned-pooling-header.jpg?auto=format&w=900
Contents
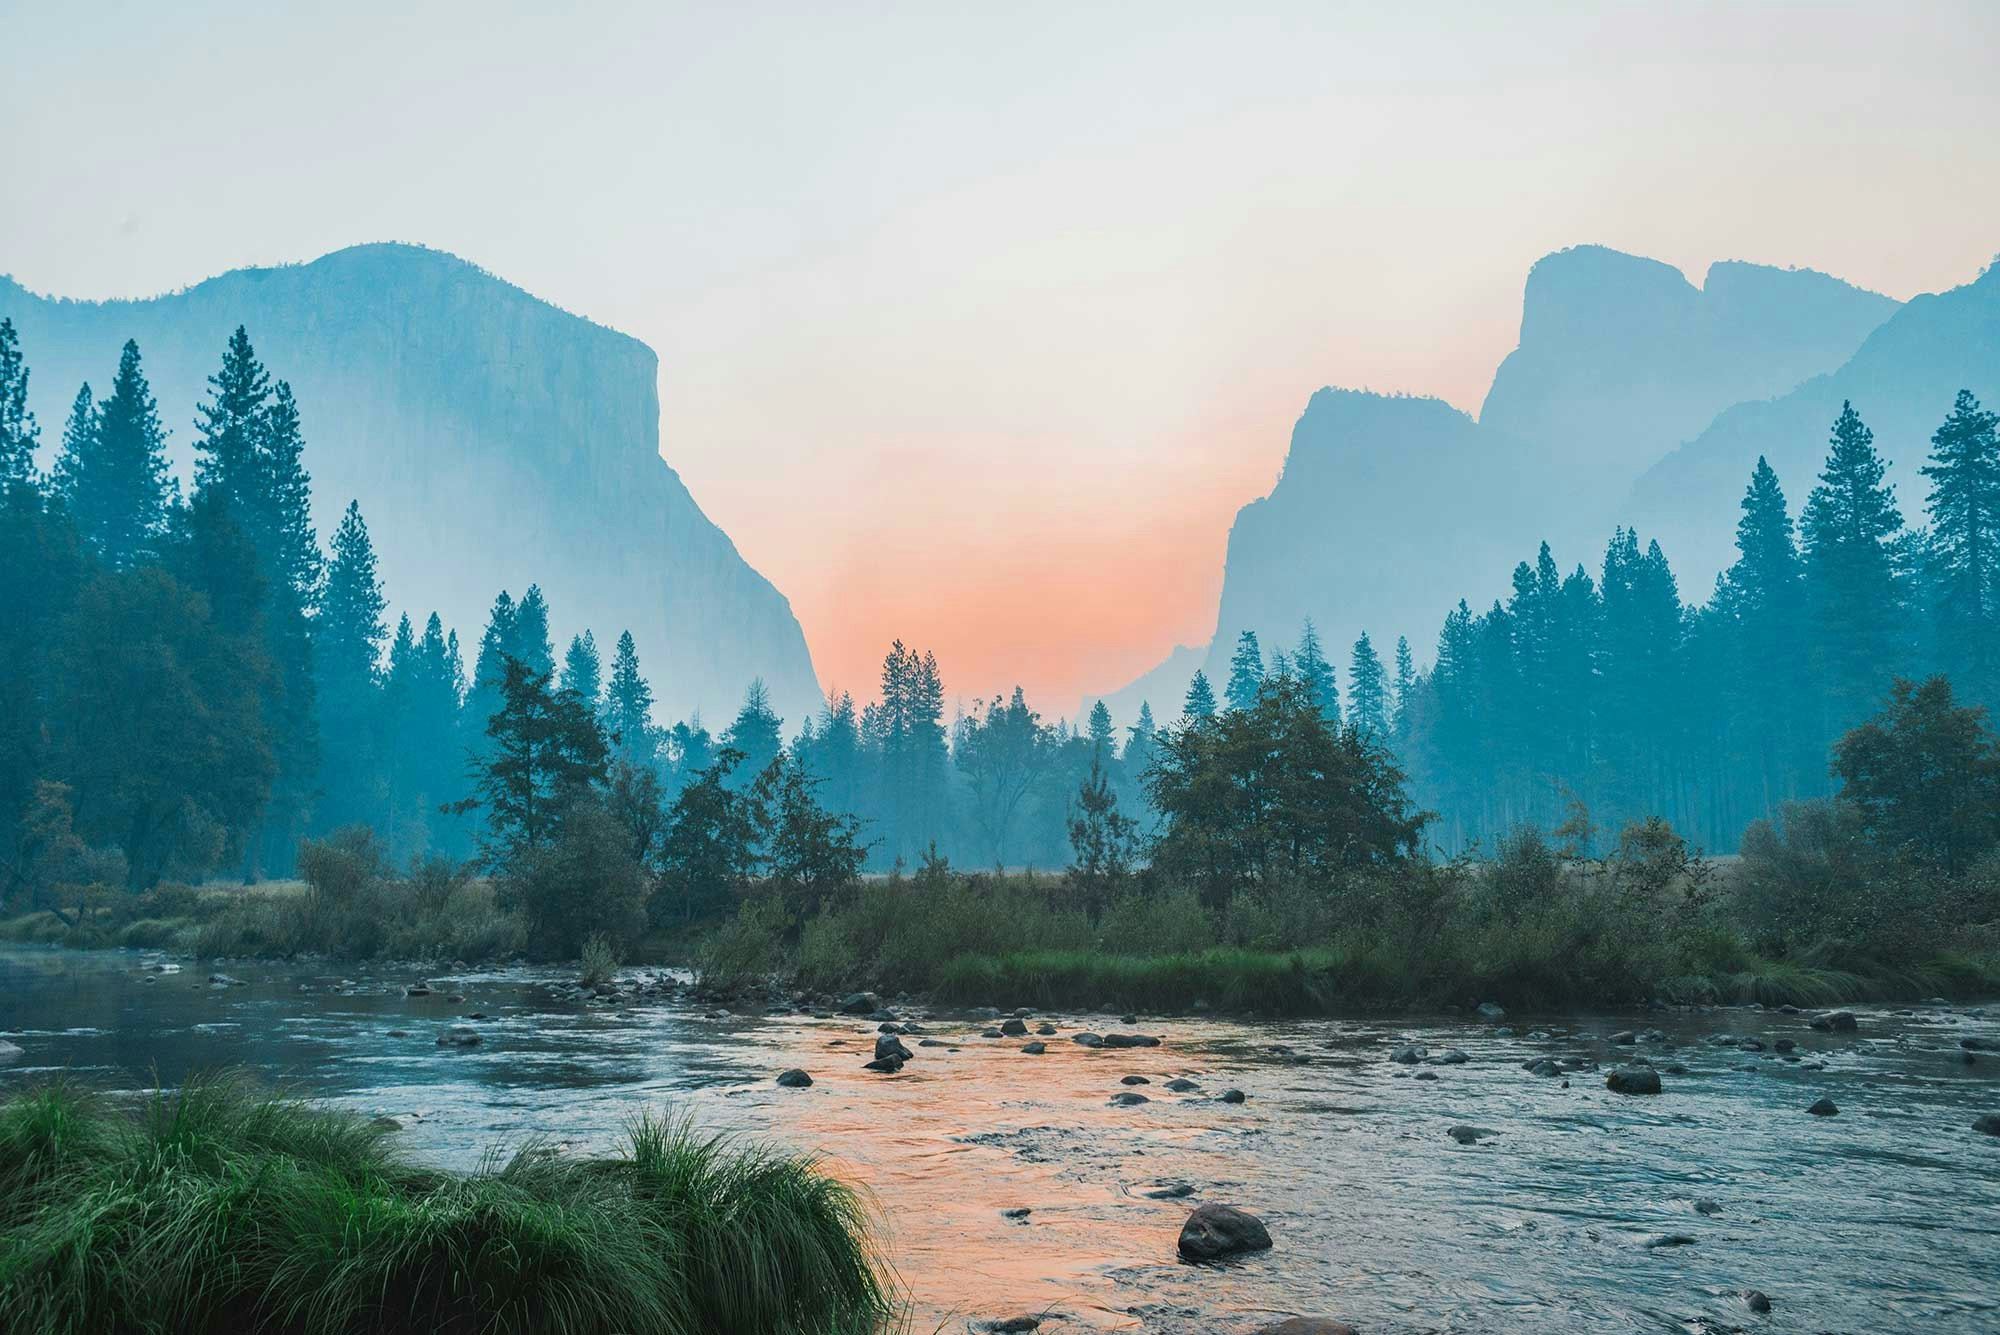
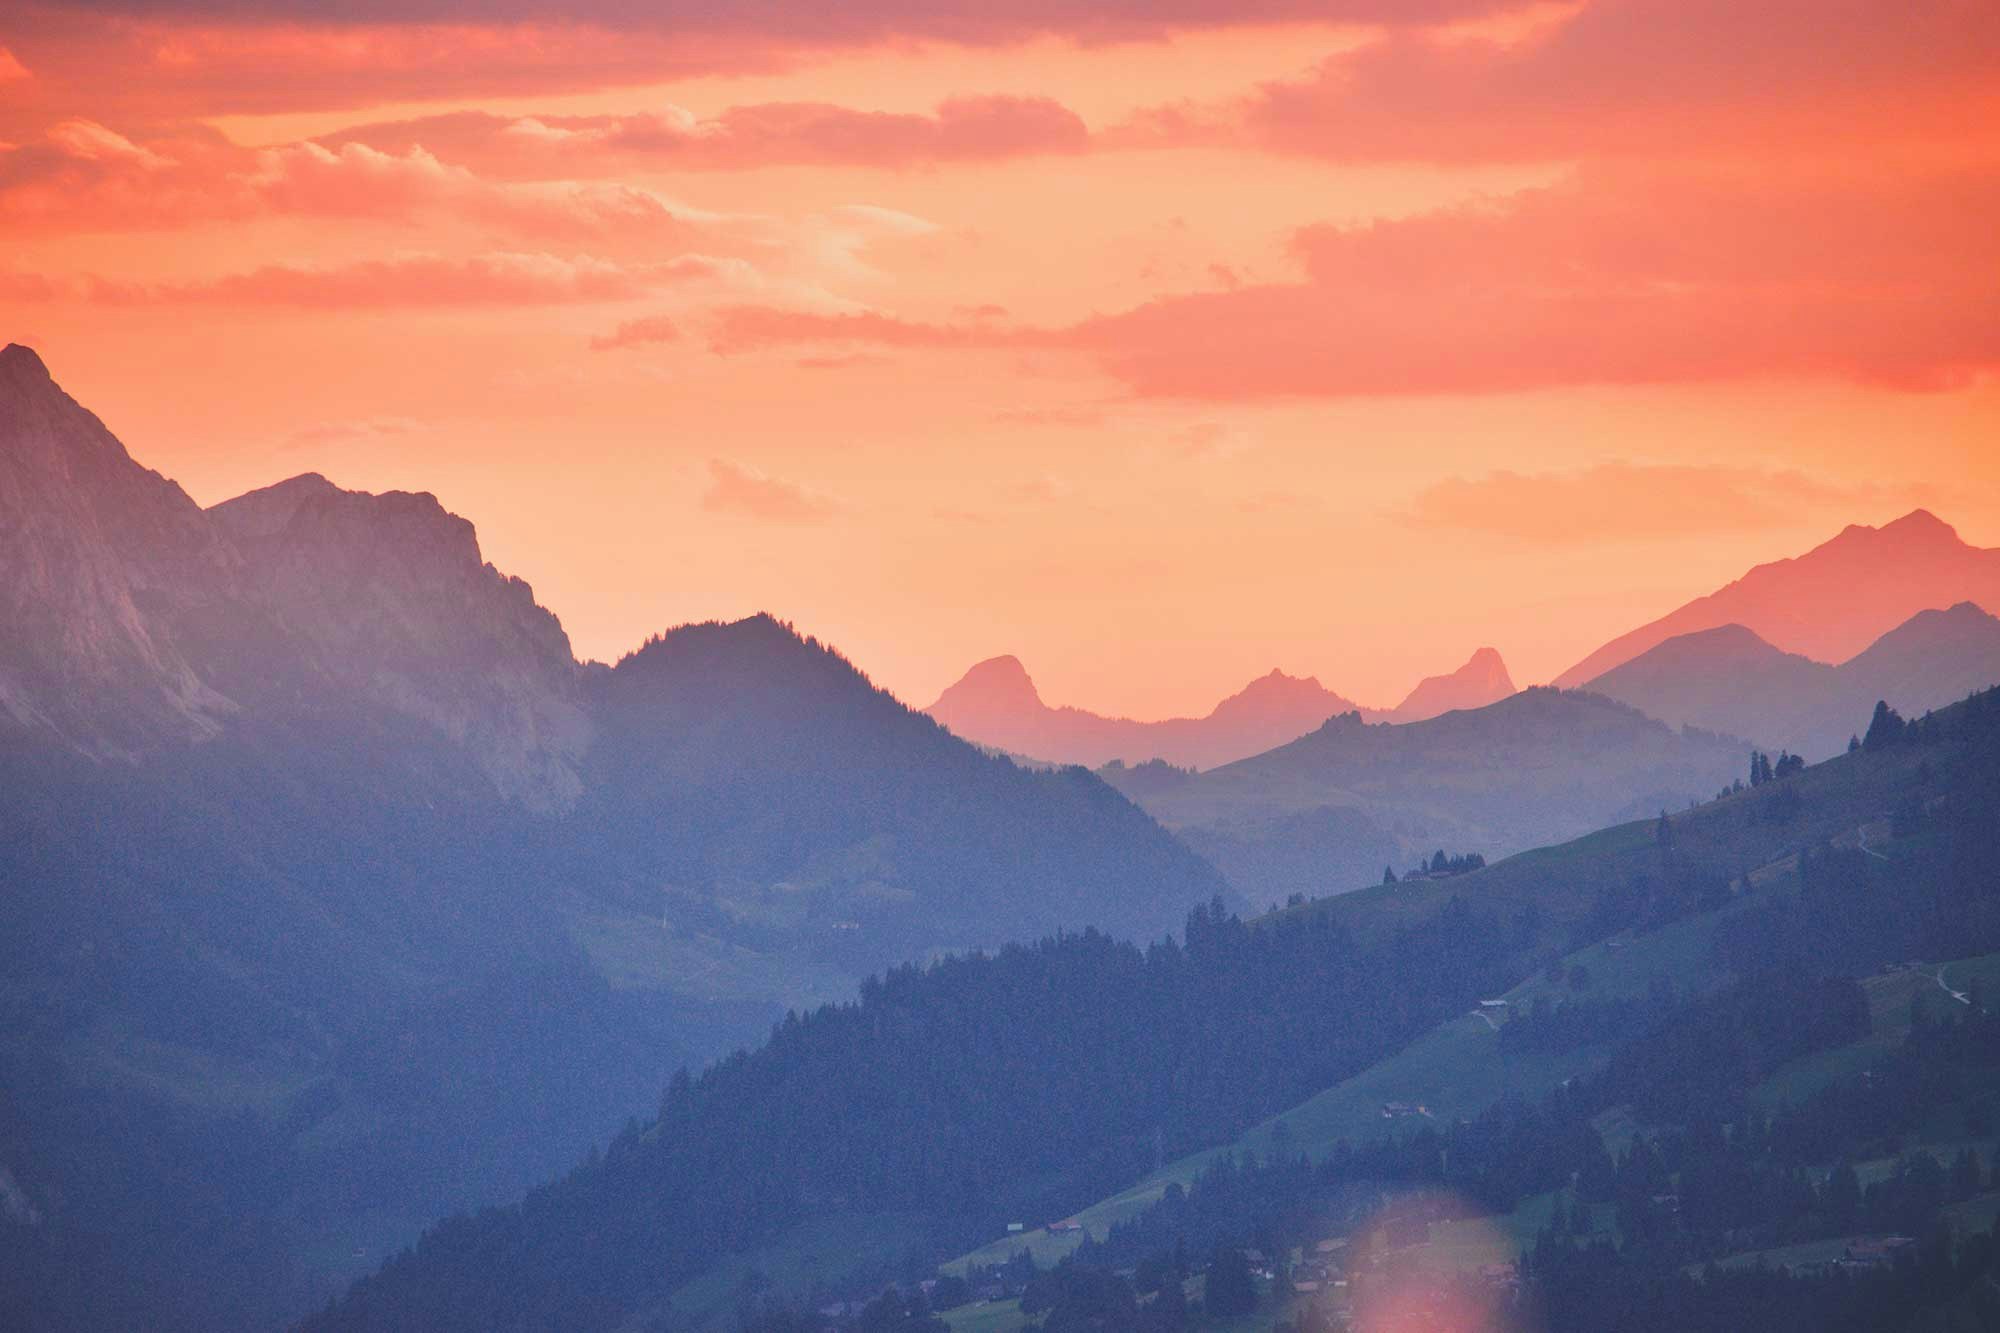
Have you ever looked at something beautiful and thought, “I could do that”? The hubris of the fiber artist strikes again as I scroll through the beautiful sunset pictures on social media, wondering how hard it would be to capture the incredible display of color. As a handspinner and beginner rigid-heddle weaver, I set out to see if I could apply the principles I’ve seen used in planned pooling for knit and crochet to build
a clasped-weft weaving, mimicking all the colors of the wind.
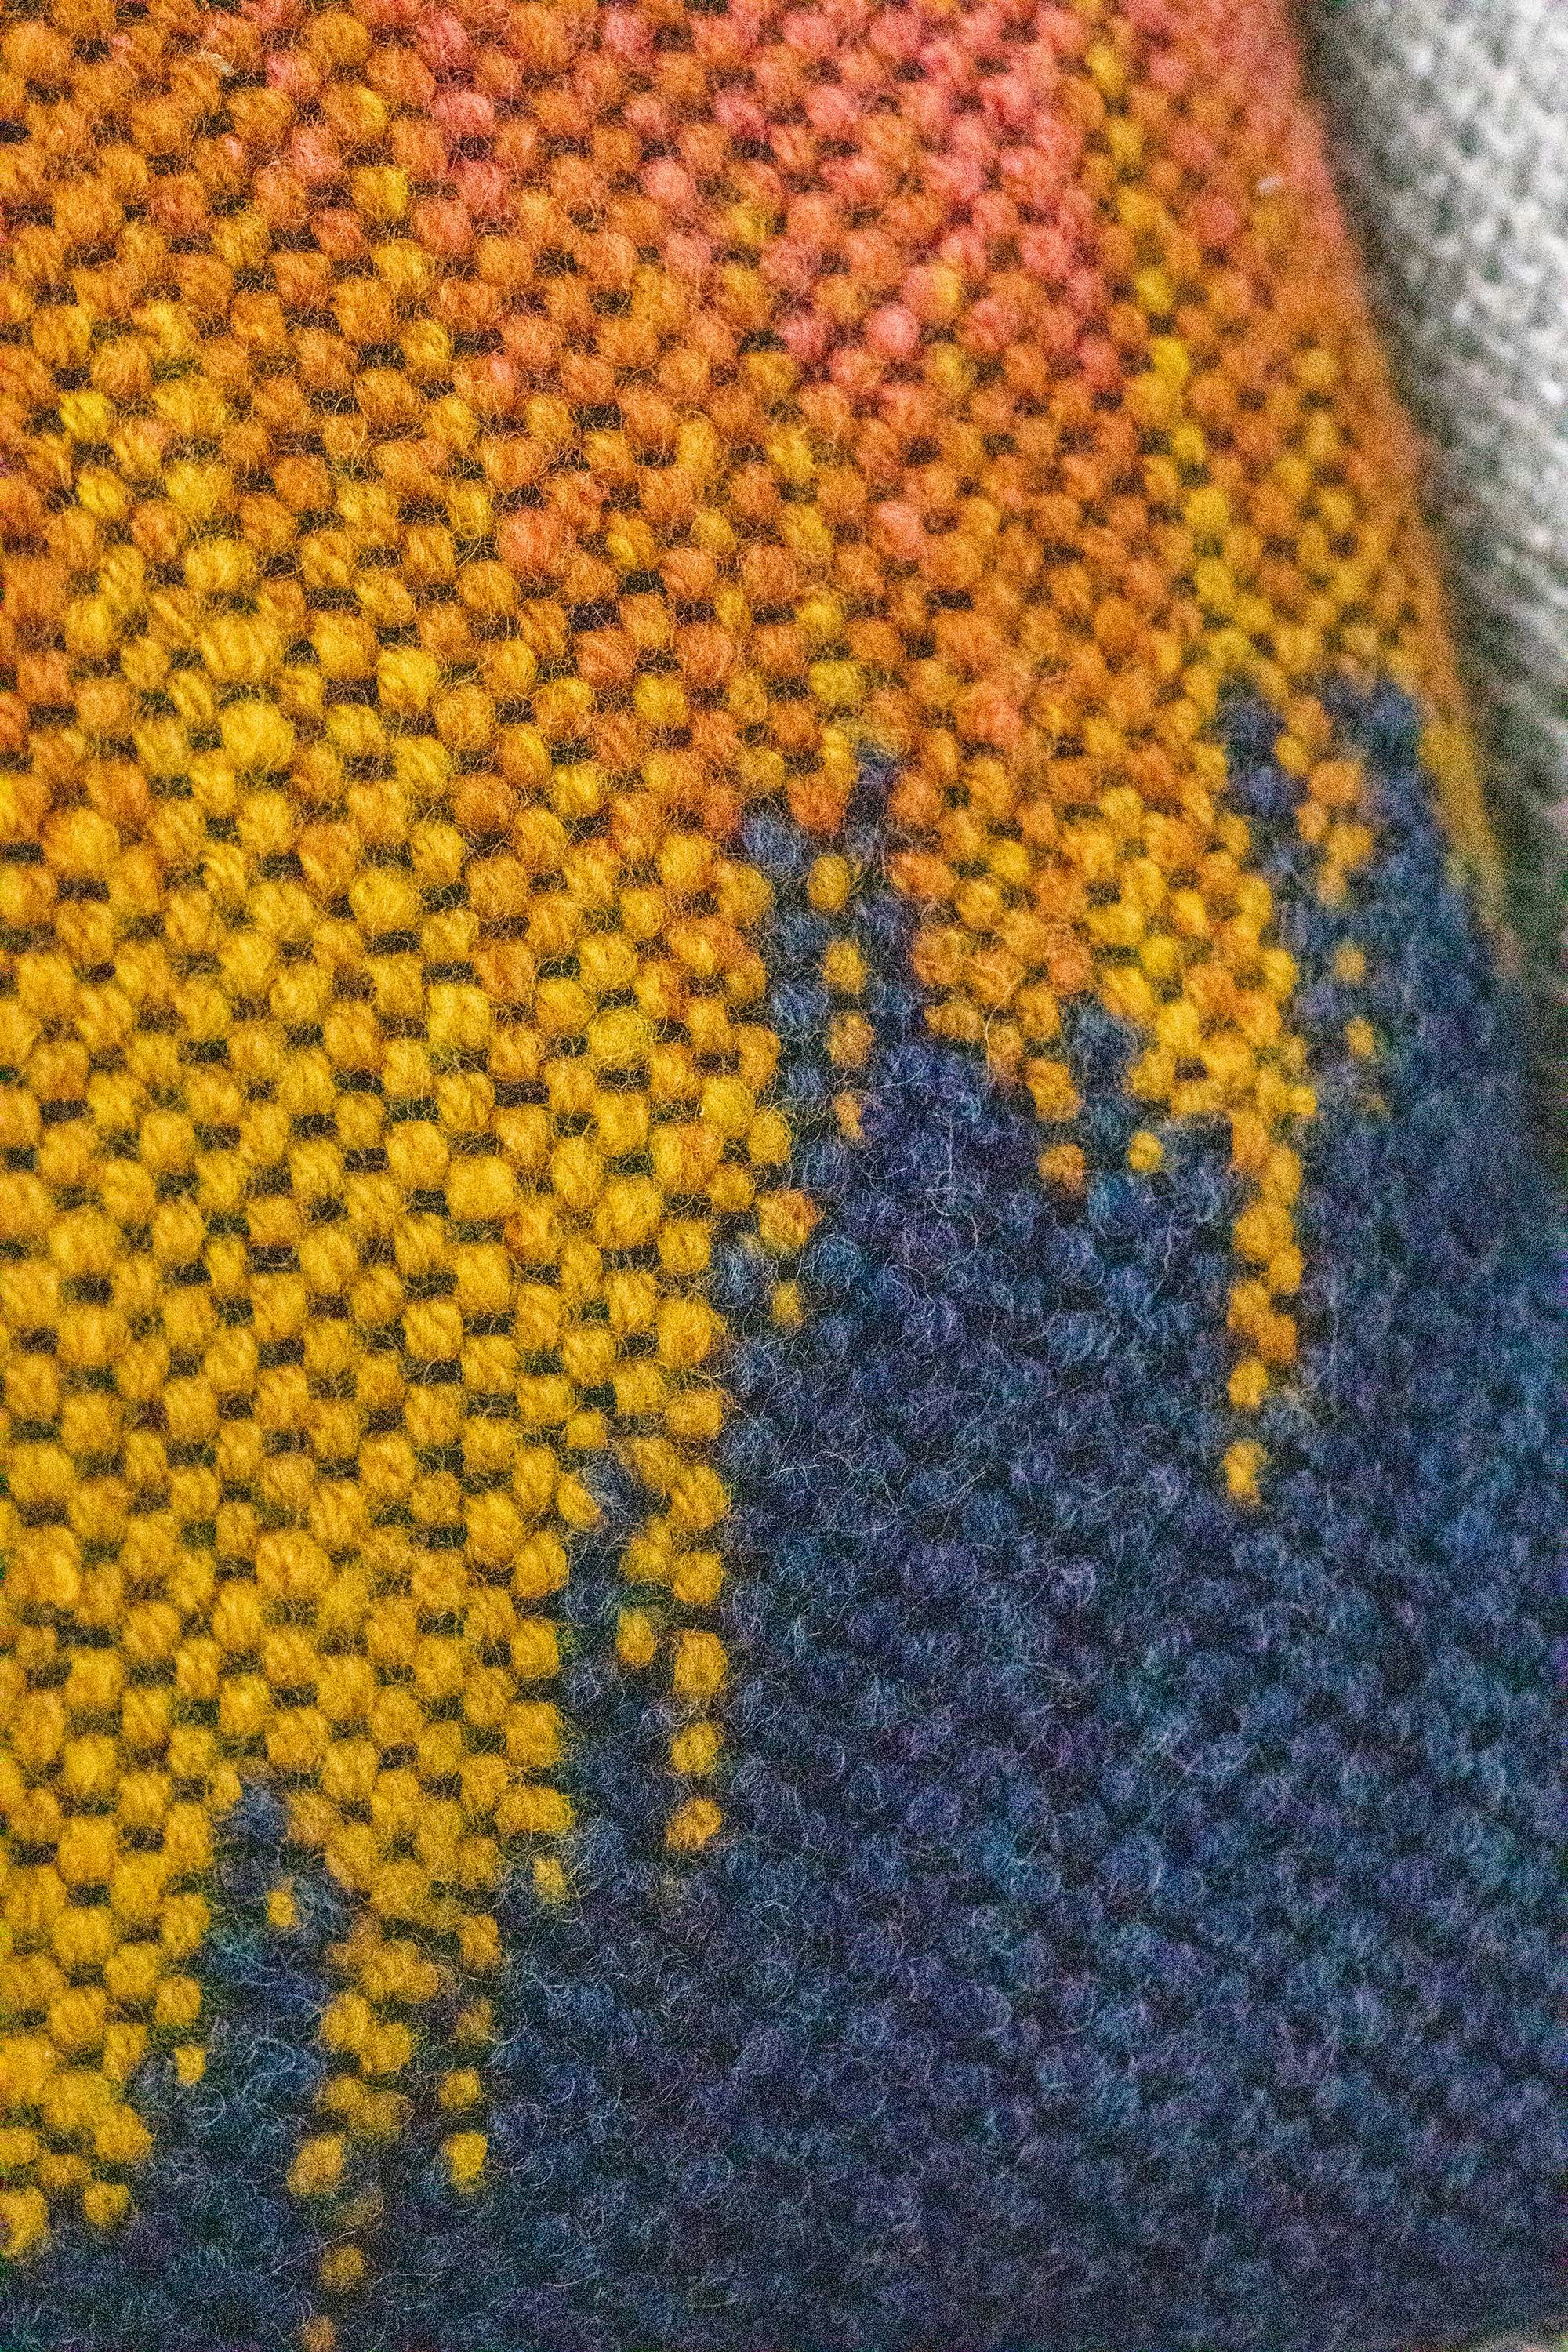
In knitting and crochet, planned pooling is where a skein of yarn is space-dyed in a specific pattern so that when you work a particular number of stitches, the colors “pool” together and create a pattern—magical! Using this method, my plan was to start with a beautiful sunset photo, design a weaving draft, and spin a yarn for the weft that would magically change colors as I wove to pool into my desired sunset. As I set out to do some weaving math, I quickly dialed back my ambition and decided the mountain part of this sunset scene needed to be its own yarn; this meant I could spin the sunset of my dreams. Clasped weft offered the perfect weaving solution, allowing me to create an undulating transition between mountain and sky as I wove.
SUBSCRIBER EXCLUSIVE
Have you ever looked at something beautiful and thought, “I could do that”? The hubris of the fiber artist strikes again as I scroll through the beautiful sunset pictures on social media, wondering how hard it would be to capture the incredible display of color. As a handspinner and beginner rigid-heddle weaver, I set out to see if I could apply the principles I’ve seen used in planned pooling for knit and crochet to build
a clasped-weft weaving, mimicking all the colors of the wind.
In knitting and crochet, planned pooling is where a skein of yarn is space-dyed in a specific pattern so that when you work a particular number of stitches, the colors “pool” together and create a pattern—magical! Using this method, my plan was to start with a beautiful sunset photo, design a weaving draft, and spin a yarn for the weft that would magically change colors as I wove to pool into my desired sunset. As I set out to do some weaving math, I quickly dialed back my ambition and decided the mountain part of this sunset scene needed to be its own yarn; this meant I could spin the sunset of my dreams. Clasped weft offered the perfect weaving solution, allowing me to create an undulating transition between mountain and sky as I wove.
[PAYWALL]
Creating a Design
I started where any overly ambitious fiber project starts: the internet. When determining what I was looking for, I decided I needed a mountain line that had some visual interest with higher peaks and low valleys and a set of no more than four sunset colors. Using images I found online was easy, but I hope you experiment with your own photos and imagination, too!
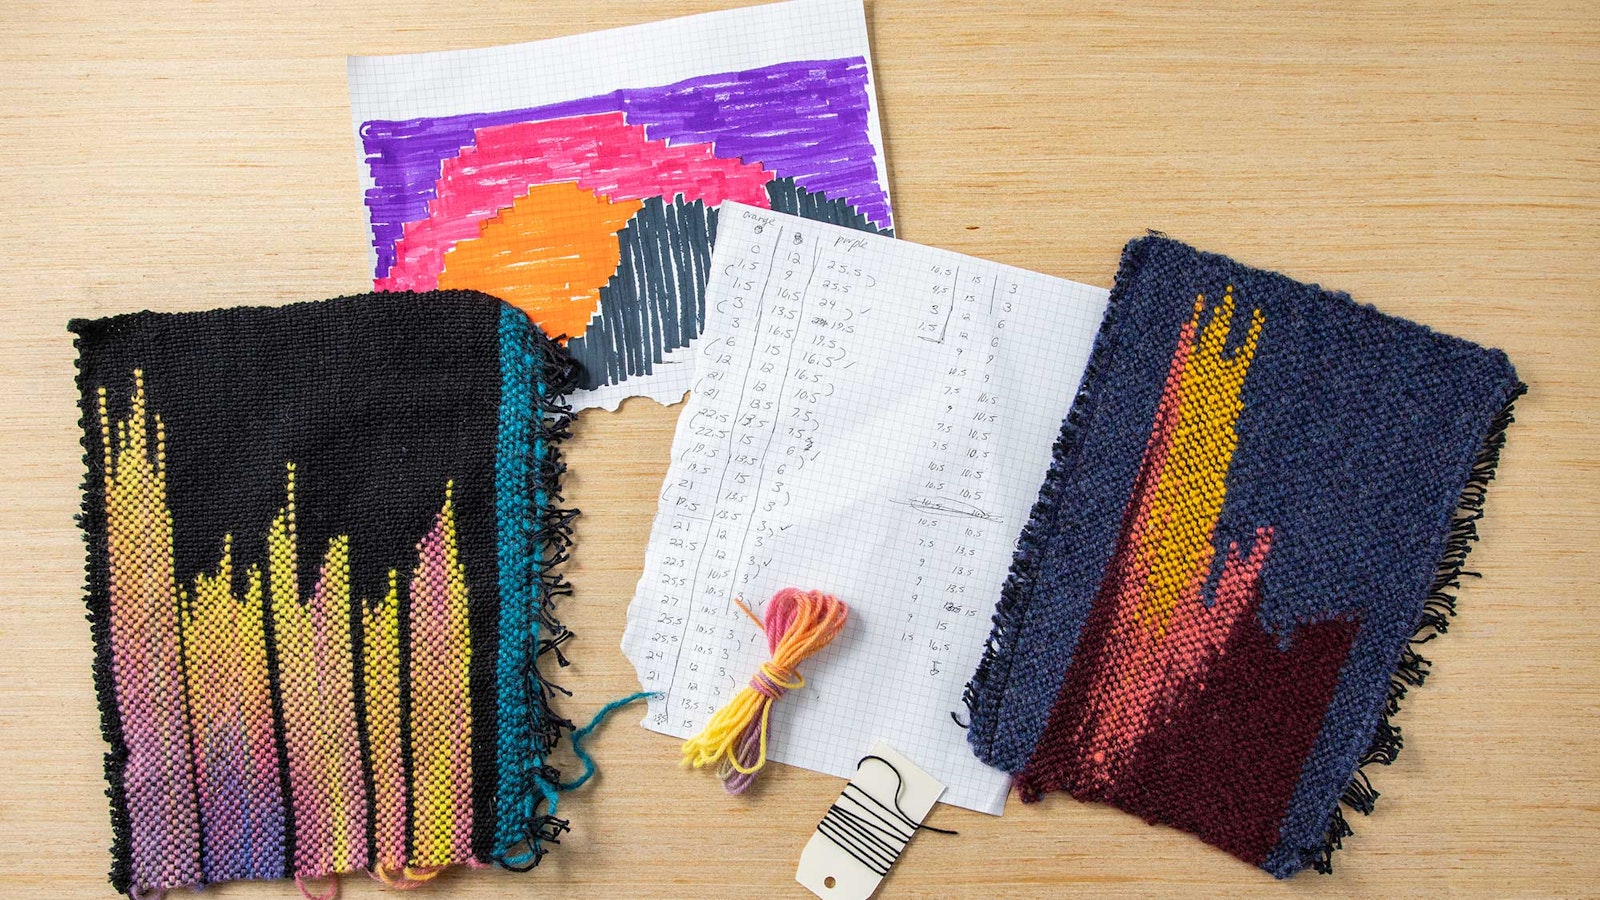
Using my chosen photo, I overlaid a grid image and changed the colors a bit to match what I had in my stash and the colors in my living room. I created a 30-block grid, where each block represented ½ inch in my final weaving. Because I planned to create the mountain line using clasped weft, I would need to weave the piece sideways, so the grid would be woven from left to right. The top of the pillow (sky) would be my left selvedge edge while it was on the loom.
Using the grid, I next needed to determine how long each sunset color needed to be per row if I were to weave from the left selvedge to the mountain line and back for each row. As someone who struggles with arithmetic while spinning, I then wrote out a list of lengths (yellow: 1", orange: 1", pink: 2", maroon: 4") to keep myself on track.
I planned to use millspun for warp and calculated 16" for loom waste and 2" for header on both sides, and I assumed I would be creating a slightly weft-faced fabric at about 10 picks per inch. To spin enough weft yarn for the front of the pillow, I needed about 150 yards total. I then assumed the ratio of sunset to mountain colors would be about 70/30 based on my graph, but with headers in the blue mountain color, I expected it to be closer to 50/50. When choosing a warp for this project, I wanted to make sure that my handspun shone, so I chose a smaller-gauge, sturdy wool thread in black that I expected to fade into the background.
For a project like this, I sample, sample, sample! Even though it’s not my favorite thing to do, I added warp so I could do several samples. I first used space-dyed yarn to figure out the general plan, and I then spun up extra yarn in two different colorways to sample as well.
Andrea used elements of several scenes to create her design.
Spinning
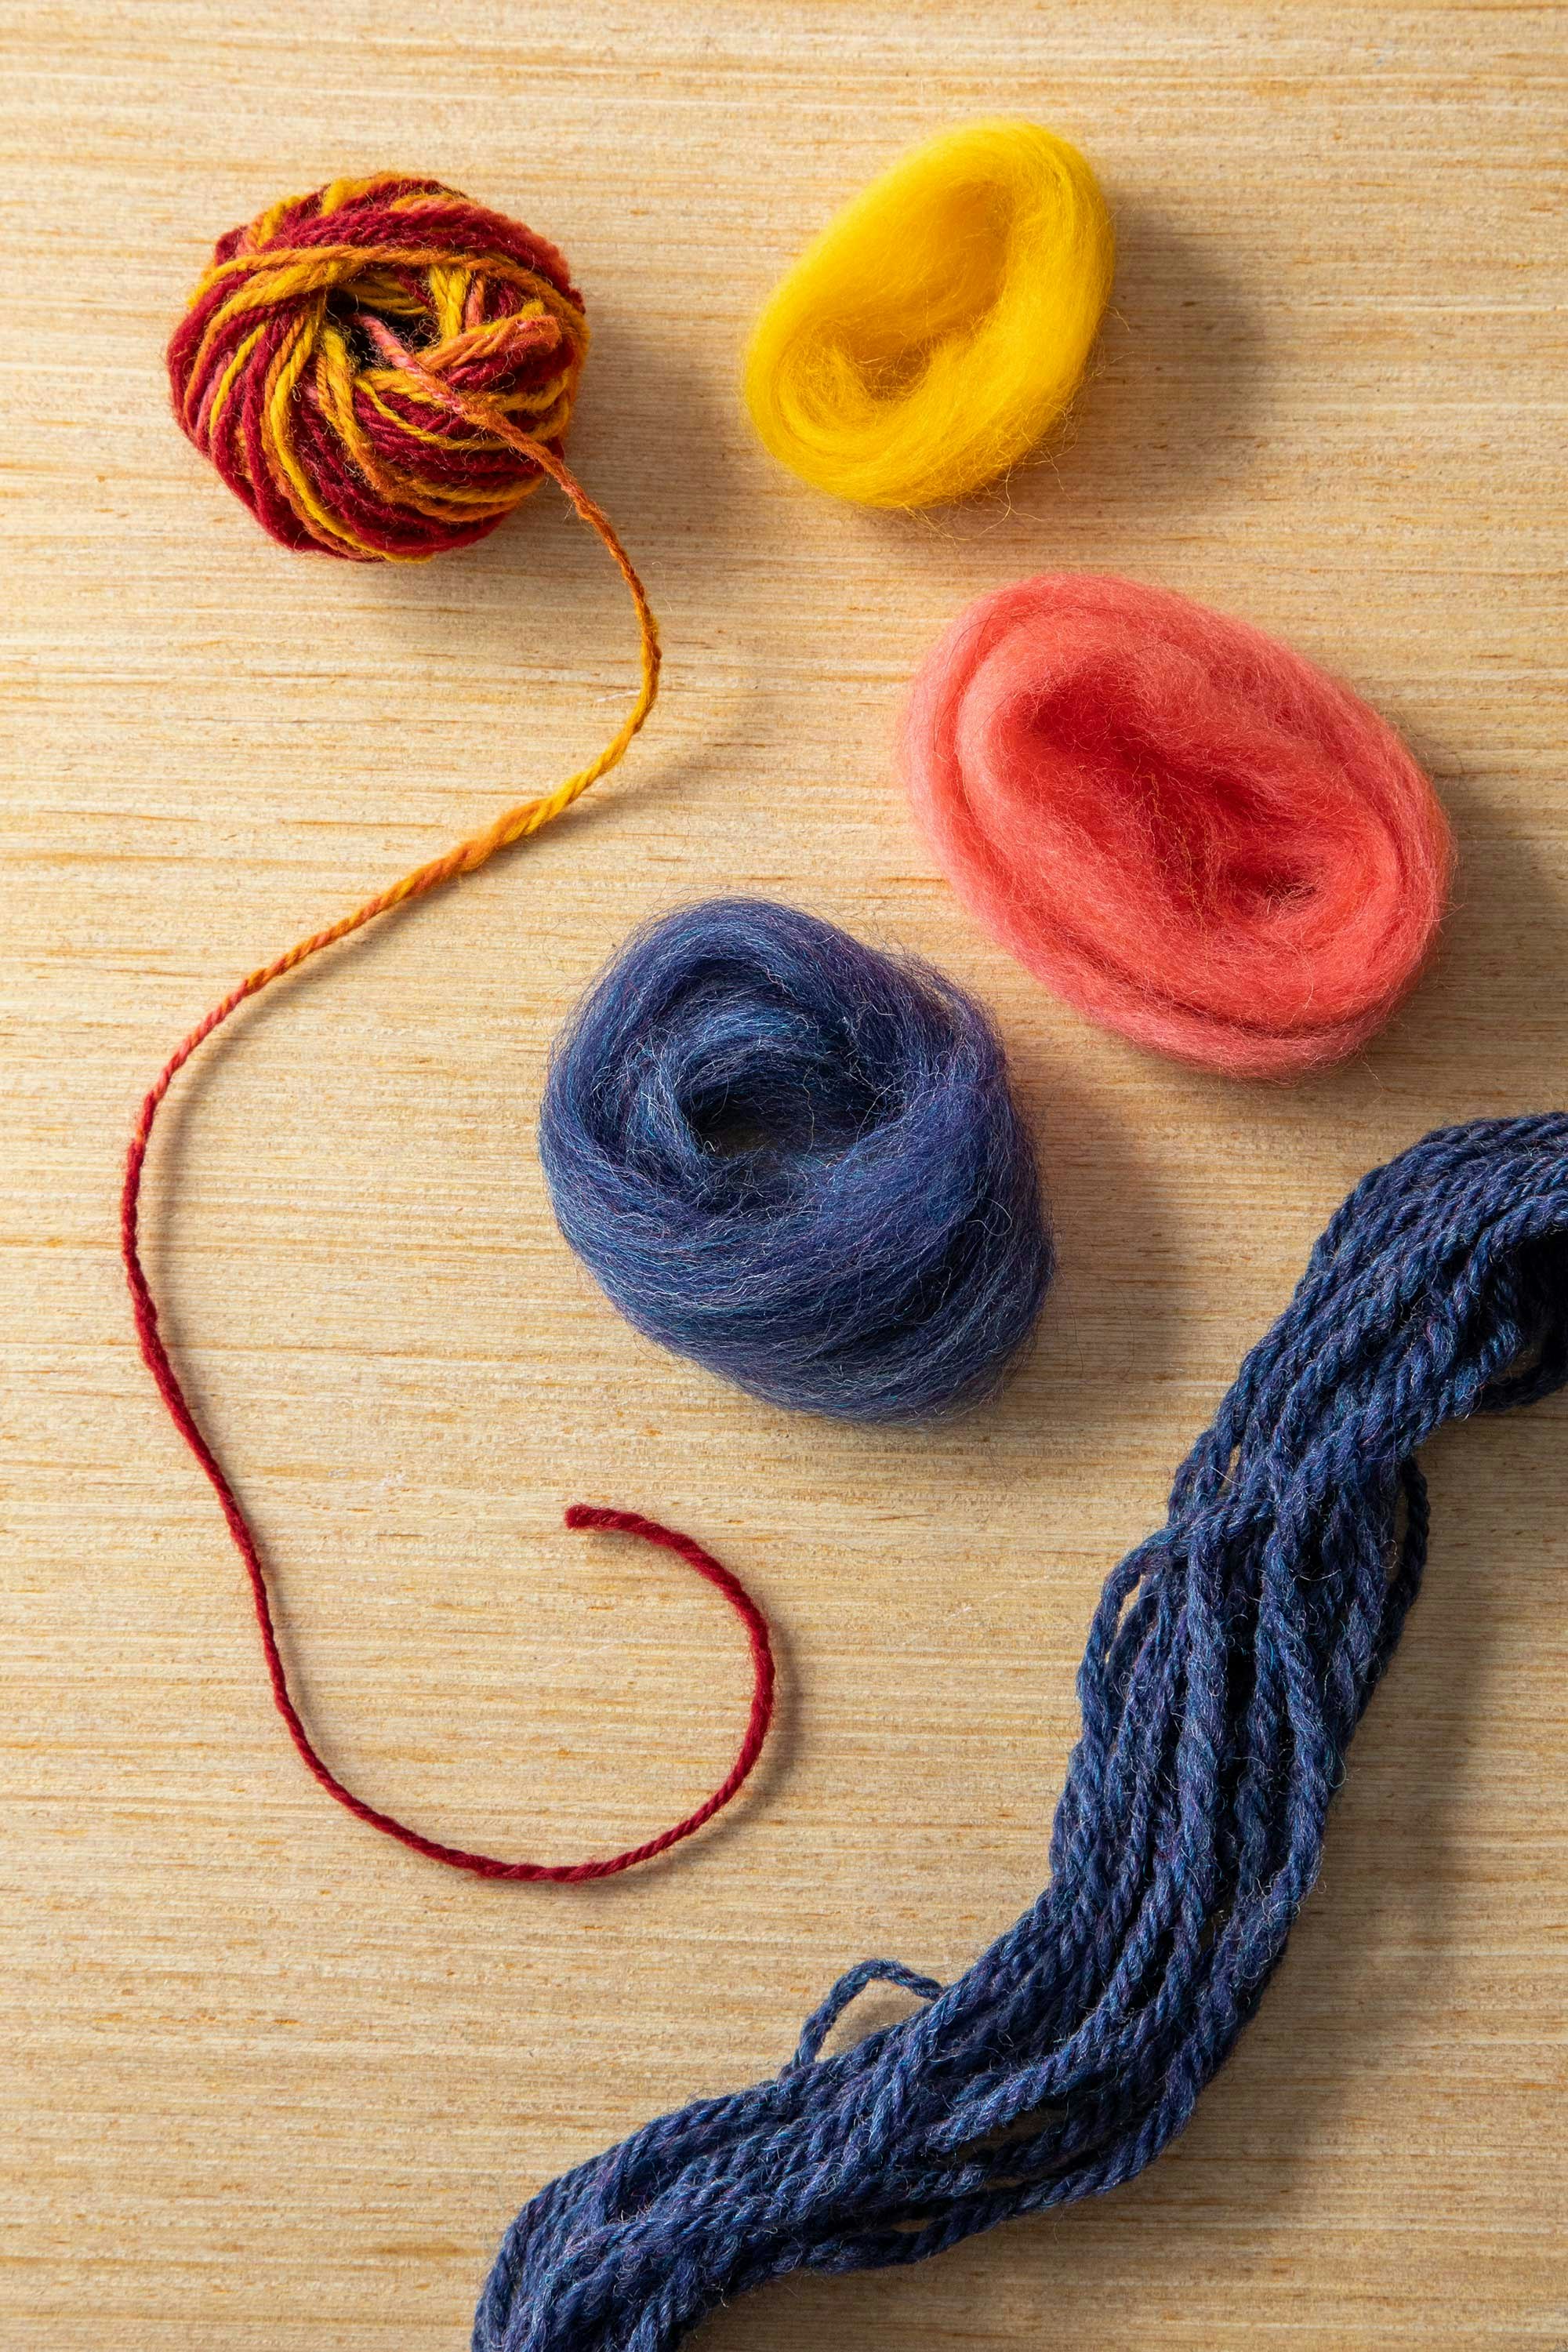
To keep the clear, crisp delineations between colors that I was looking for, I determined a chain-ply (three-ply) was necessary, as I didn’t trust my ability to plan two identical color-changing singles and then ply them. So, I multiplied each measurement per color by three for the length of the singles. I strongly recommend predrafting your fiber at this point. I used a pin-drafted roving for the pillow and was pleased with how easy it was to spin while I was simultaneously measuring every section. Then, I prepared to spin, measure, splice, repeat!
I spun an active, slightly overspun singles starting with the color closest to the left selvedge (top of the sky), measured how long it needed to be in a singles, and then changed colors approaching the mountain line. Thinking through the weaving, I then needed to spin the colors back from the mountain to the edge of the weaving. On the bobbin, the color sequence was something like maroon-pink-orange-yellow, yellow-orange-pink-maroon.
Am I great at joins and splicing? No. But a cup of water near my wheel to help with “spit” splicing, using a well-prepared fiber, and working slowly with a lot of measuring helped me through this. I was also using a fine Merino, which was a very easy spin. This was helpful, as I believe the math works out that I spun 618 color-change splices in the 1½ ounces of singles for the project. I have a lot more experience with joining fiber now!
I then chain-plied the singles, looping at every color change to maintain the pooling effect. After finishing, it was a fairly balanced worsted-weight, three-ply yarn with clear color changes. I set it to soak and quickly spun up my mountain color—a breeze of a spin—and chain-plied to match the size of the color-changing yarn but with only one color throughout!
Weaving
Weaving a weft like this was, unlike the spinning, very easy! Let your previously completed math do the work. How do you know how long the mountain should be as you work a pick? Once you hit the color change (the middle of the yellow section), that should be closest to the mountain, and it lines up going into and back out of the warp. In a weft like this, you can determine where the clasp sits on every single pick. It was a breeze to weave and looked like magic as the sunset suddenly appeared!
Resources
- Subscribers can find the full text of this article, plus project instructions, in the Spin Off Library.
- If you're an LTM All-Access Subscriber, you also have access to Sara Bixler’s video course, Creative Weaving: Clasped Weft, where you'll learn tips for working with the clasped weft technique Andrea used for her pillow.
The article was originally published in the Spring 2024 issue of Spin Off.